![[Super Easy] Guide to building the best automatic deployment environment starting with Coolify x Xserver VPS x Cloudflare](https://hack-lab-256.com/wp-content/uploads/2025/06/hack-lab-256-samnail-18.jpg)
In this article, to install
Coolify integrate with GitHub, auto-deploy, and build your own domain + HTTPS using Cloudflare.
The following audiences are expected:
- I want to manage multiple apps on a Docker-based basis
- Looking for a PaaS-style management tool that can also be used with GUI
- I want to automate my deployment by simply pushing from GitHub
- I want to use Cloudflare for DNS and SSL
We do not provide detailed explanations or comparisons of tools, and only the actual construction steps are listed step by step .
Along the way, we have included solutions including problems such as opening ports and SSL errors, so you can copy and paste them as they are.
- The crisp typing feel that is unique to the capacitive non-contact system!
- REALFORCE's first wireless compatible device! Wired connection also available!
- Unlike the HHKB, the Japanese keyboard layout has no quirks and is easy for anyone to use!
- Equipped with a thumb wheel, horizontal scrolling is very easy!
- It also has excellent noise reduction performance, making it quiet and comfortable!
- Scrolling can be switched between high speed mode and ratchet mode!
Preparing a VPS environment
This time, we will prepare a VPS and install Coolify there.
A VPS is available: Xserver VPS is the cheapest!
I do a lot of research on VPS every time, but I think the XServer VPS is the cheapest! !
*Although other VPSs offer a lot of discounts in the first month, the amount you pay monthly is actually quite high. I think it's better to cancel it when you sign it.
This time, I'm 4,400 yen for 6 cores and 12GB. If you only need to touch it a little, I think it's fine to use another plan with a lowered price!
\ VPS should be chosen based on cost performance /
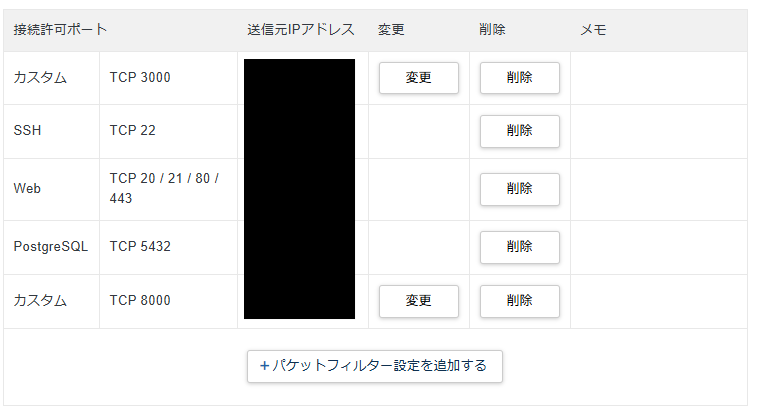
Configuring a Packet Filter
Once you sign up for an XServer VPS, you will be able to use the VPS.
However, if this continues, the packet filter will be restricted, so at least open the ports listed below.
- SSH
- Web
- Custom: 8000
Checking Coolify to install and start up
Next, we'll actually go into a VPS and start working on it.
SSH is fine for a VPS, and I think the XServer console alone can help.
Install docker
First, we'll install docker.
sudo apt update sudo apt install -y docker.io sudo systemctl enable --now dockerDocker compose could not be used if it continues like this, so I have responded to the following. ()
mkdir -p ~/.docker/cli-plugins curl -SL https://github.com/docker/compose/releases/download/v2.24.5/docker-compose-linux-x86_64 -o ~/.docker/cli-plugins/docker-compose chmod +x ~/.docker/cli-plugins/docker-compose docker compose version # Verify versionInstalling Coolify
To install Coolify, simply run the following command:
Since it's an installer, the rest will do it on its own!
curl -fsSL https://cdn.coollabs.io/coolify/install.sh | bashOnce the installation is complete, you will see something like this:
root@xxx-xxx-xx-xx:/data/coolify/source# ll total 108 drwx----- 2 9999 root 4096 June 5 21:53 ./ drwx----- 12 9999 root 4096 June 5 21:53 ../ -rw-r--- 1 root root 634 June 5 21:51 .env -rw-r--- 1 root root 634 June 5 21:53 .env.backup -rwx------ 1 9999 root 211 June 5 21:51 .env.production* -rwx----- 1 9999 root 2941 June 5 21:51 docker-compose.prod.yml* -rwx----- 1 9999 root 875 June 5 21:51 docker-compose.yml* -rwx------ 1 9999 root 2614 June 5 21:53 installation-20250605-215102.log* -rw-r--- 1 root root 70202 June 5 21:52 upgrade-2025-06-05-21-51-17.log -rwx----- 1 9999 root 3175 June 5th 21:51 upgrade.sh*Once this is the time, check the operation
Check the screen at http://[XServer VPS IP]:8000.
I have already registered an account, but I think there is an account registration screen on the screen. (The screen below will appear.)
As long as you register an account according to the contents of the screen, there is no problem.

(Optional) Configuring your own domain
Once you have downloaded Coolify, set up your own domain.
This time, the domain is available at Cloudflare. I think it's fine to have it all fitted with an XServer domain.
Cloudflare side settings
Cloudflare simply adds an A record to an existing domain.
If the name is a subdomain, it would look something like coolify.example.com.
For IPv4, set the IP address of the XServer VPS.

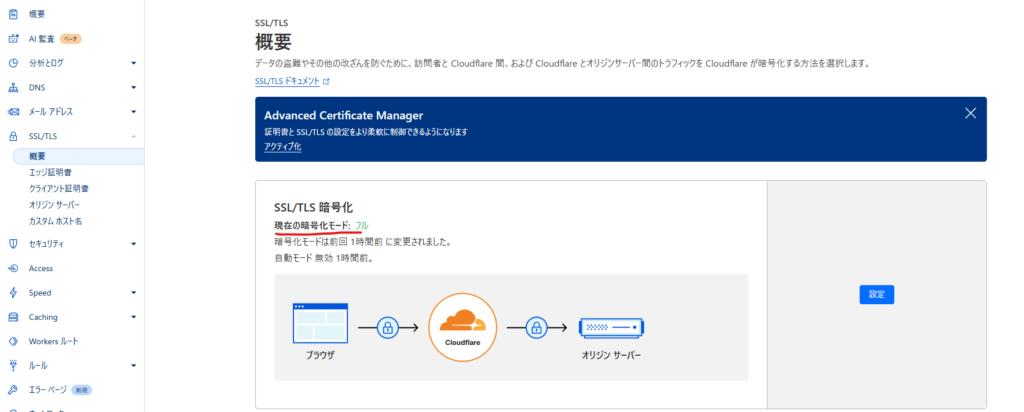
This completes the settings, but if you have the proxy status turned on, please set the encryption mode to a non-flexible.
| situation | Recommended SSL mode |
|---|---|
| Under development / Only self-signed certificates | Full |
| Production / Let's Encrypt in use | Full (strict) |
| Cloudflare Tunnel in use | Full or Full (strict) |
| You should avoid it anyway | ❌ Flexible |
Configuring your own domain in Coolify
Finally, set the domain you set to A record in Coolify's Settings > Instance's Domain.
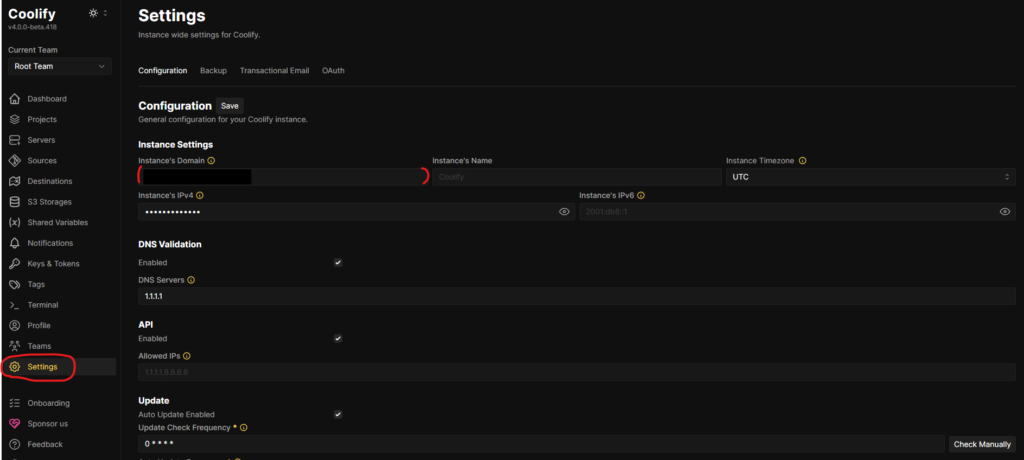
Now you can view the login screen with your own domain!
Try deploying the Next app
Finally, try deploying the Next app.
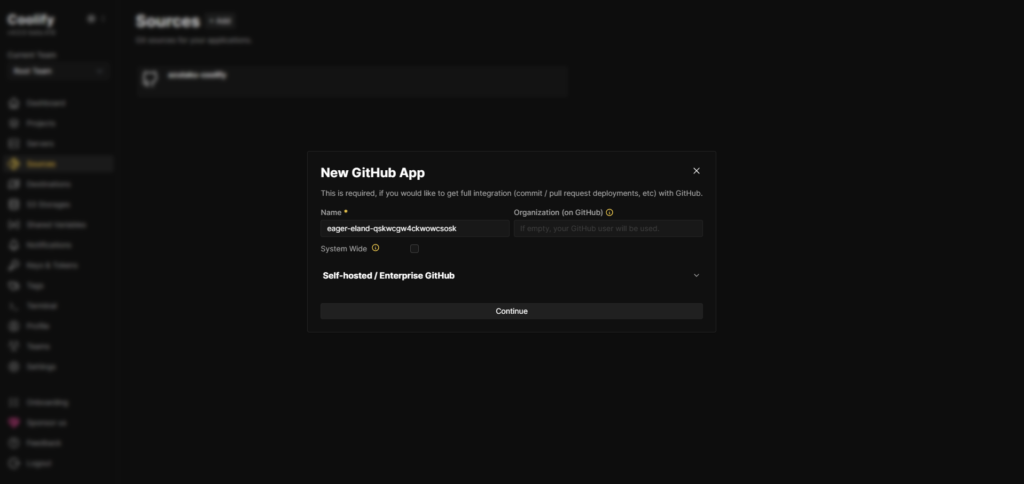
First, create a New GitHub app from Sources > add. The name is optional and is fine.
Once you've connected to GitHub, select Projects > My first project. (You can also create a new Projects.)
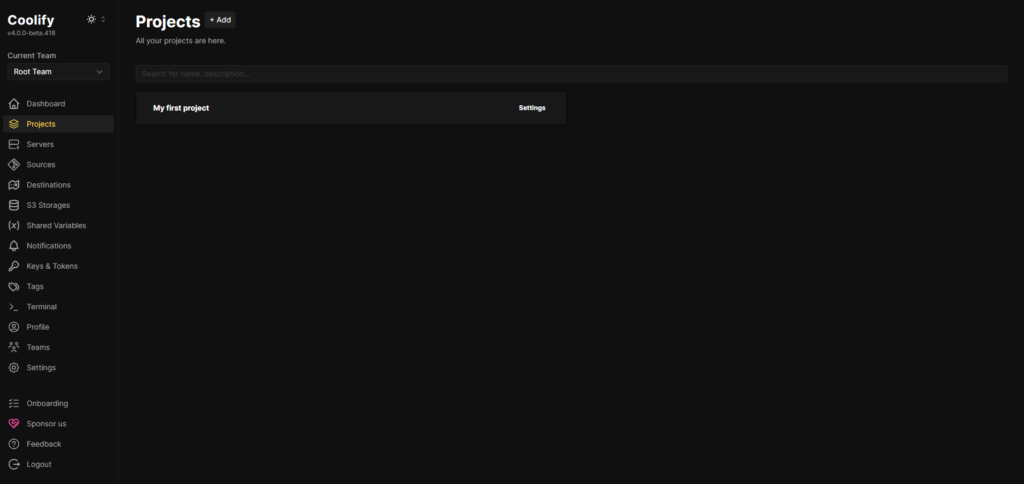
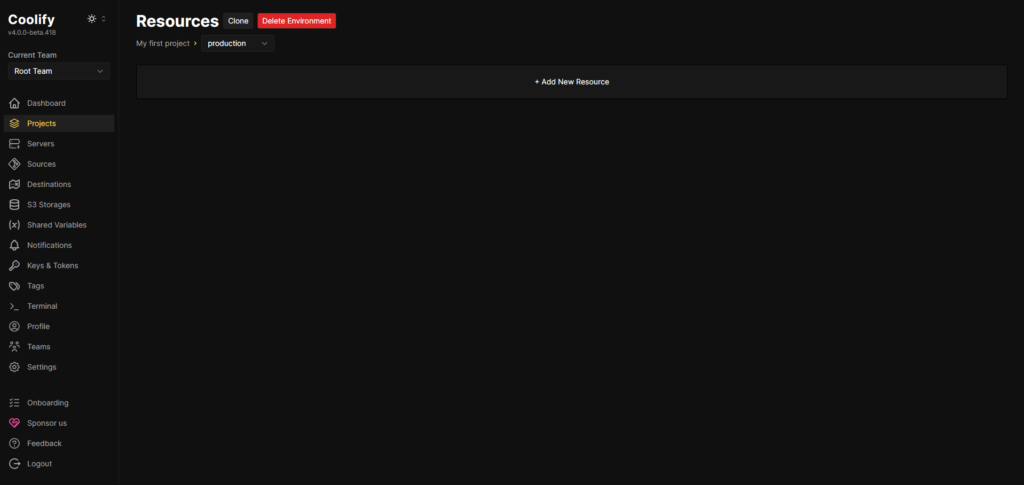
Select Resources > Add New Resource.
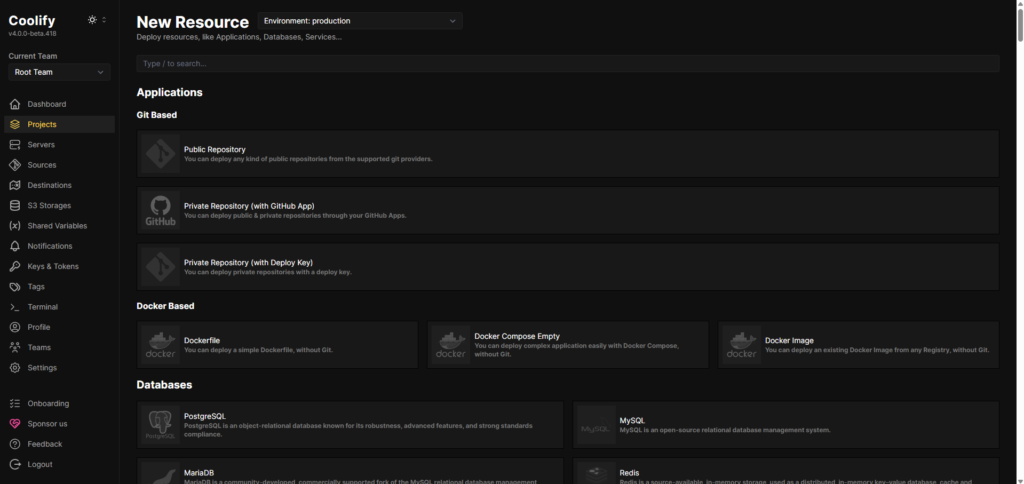
Select Private Repository (with GitHub App).
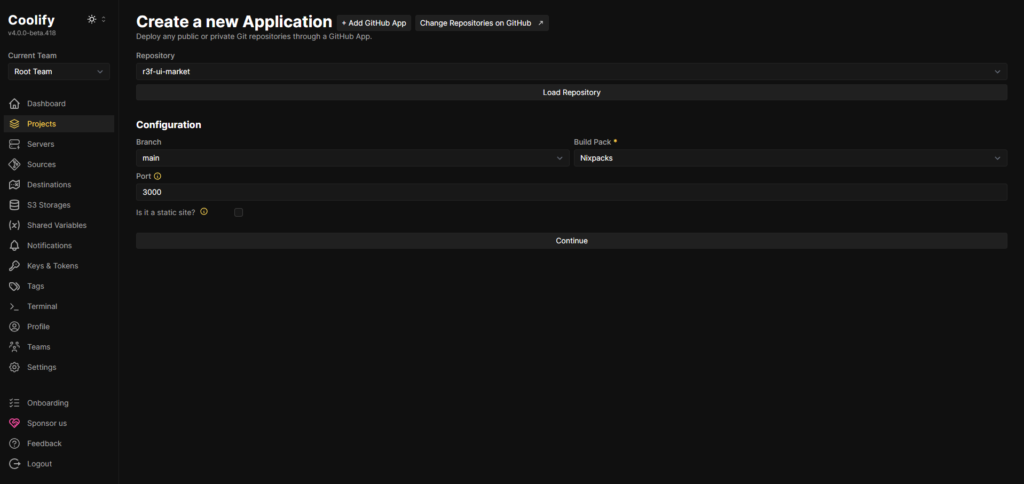
Select the repository you want to deploy to the Repository.
If you haven't changed the ports or other things in Next, you can just leave it like this.
If you want to release your app with your own domain, set your own domain below.
You can set your own domain in the same way as when using the console with A Record.
If you are running the console at coolify.example.com, set an A record like app.example.com.
Both the IPs of A records are the IP addresses of the XServer VPS. (The rest is Coolify (lol))
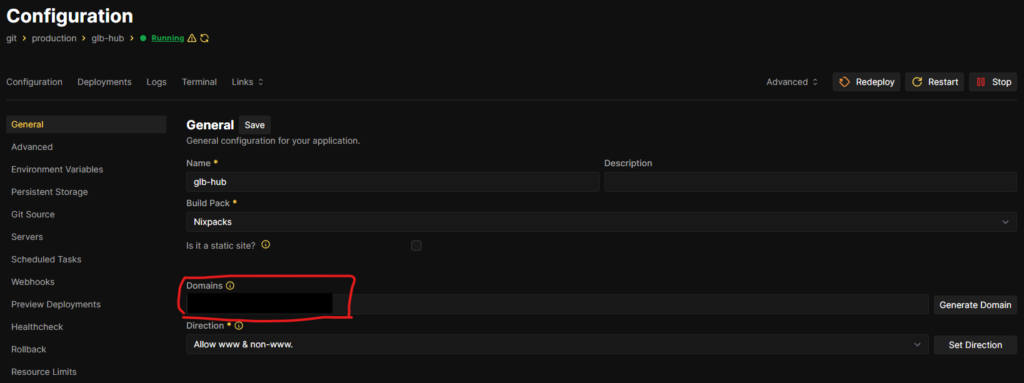
Now, once you run Start, you should be able to release your app in your own domain! !
lastly
Now you've created a
convenient and powerful PaaS-style deployment environment that combines VPS + Coolify + Cloudflare
One option is to ride the free slots, but
it's very comfortable to have a VPS environment where you can control yourself without being bound by restrictions.
If you want to build your own cloud, please give it a try.
![Is Coolify automatically exited? The true nature of the problem that stops every day [v4.0.0-beta.420.1]](https://hack-lab-256.com/wp-content/uploads/2025/07/hack-lab-256-samnail-24-300x169.jpg)
![[2025 Edition] Next.js Hosting: Vercel Free Plan vs Paid Plan Thorough Comparison | Summary of Features, Limitations and Fees](https://hack-lab-256.com/wp-content/uploads/2025/05/hack-lab-256-samnail-17-300x169.png)