![[Hacking] Install KALI LINUX into VirtualBox! Start an OS specializing in penetration testing!](https://hack-lab-256.com/wp-content/uploads/2022/03/hack-lab-256-samnail-2.jpg)
KALI LINUX is an open source, Debian-based Linux distribution that is compatible with a variety of information security tasks, including penetration testing, security investigation, computer forensics, and reverse engineering.
Penetration testing is a test in which you actually hack the system to check for vulnerabilities.
KALI LINUX is often used when conducting penetration testing, and KALI LINUX is more specialized for attacks than defense.
It's not just using it for bad things,Used to improve securityPlease.
We will provide you with a detailed explanation of how to install KALI LINUX in VirtualBox.
If you have not yet installed VirtualBox, please refer to Detailed Explanation on how to install Virtual Box

- The crisp typing feel that is unique to the capacitive non-contact system!
- REALFORCE's first wireless compatible device! Wired connection also available!
- Unlike the HHKB, the Japanese keyboard layout has no quirks and is easy for anyone to use!
- Equipped with a thumb wheel, horizontal scrolling is very easy!
- It also has excellent noise reduction performance, making it quiet and comfortable!
- Scrolling can be switched between high speed mode and ratchet mode!
Download the KALI LINUX installer.
First, we will explain the steps to download the KALI LINUX installer.
You can enlarge the image by selecting it, so please use it if it is difficult to understand.
Download the KALI LINUX installer
First, open KALI LINUX
Once KALI LINUX is open, select "DOWNLOAD".
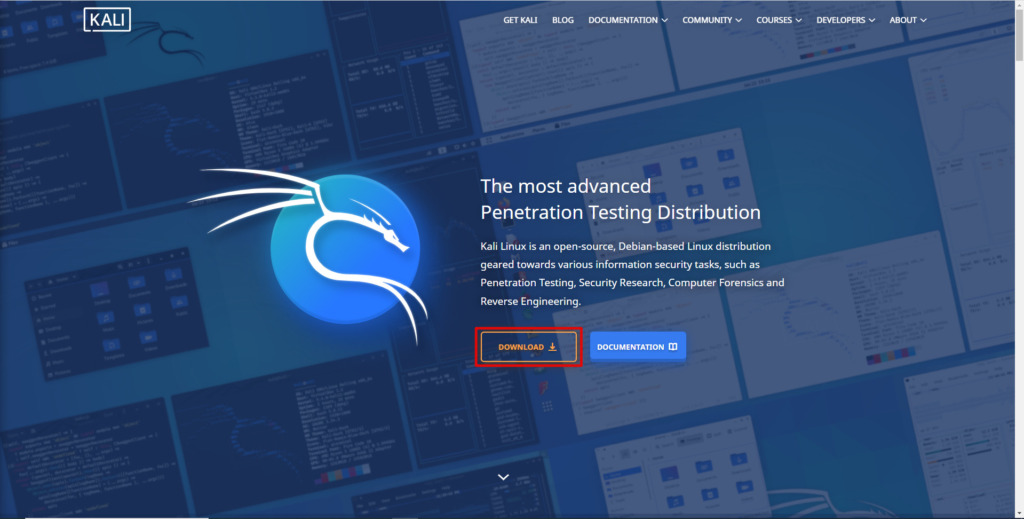
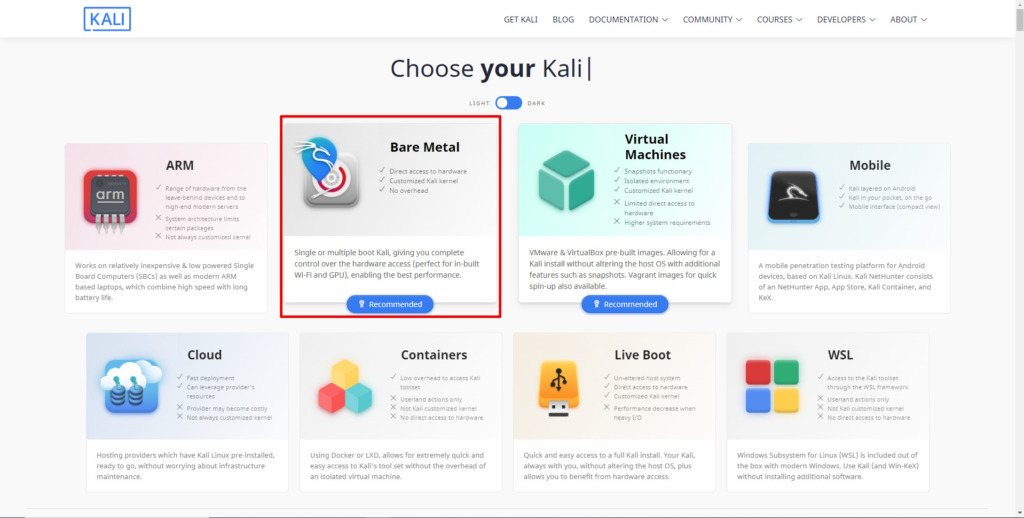
You will be asked which format to download KALI LINUX, but this time you will select "Bare Metal."
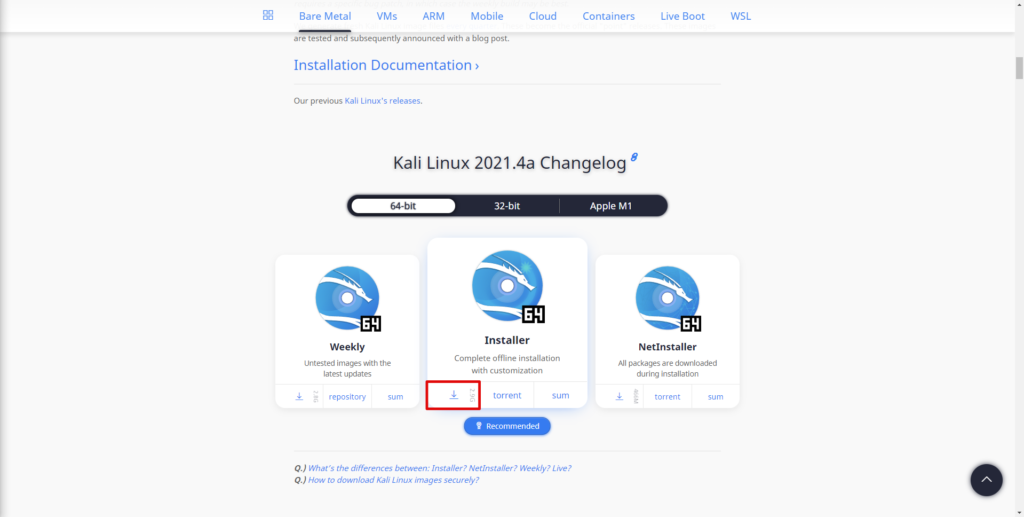
The download screen will open, so please select Installer ↓ to download.
Compare CheckSum
I think you were able to download the KALI LINUX installer in the previous steps, but let's do a CheckSum to check if there were any tampering.
Select "sum" on the screen you just downloaded.
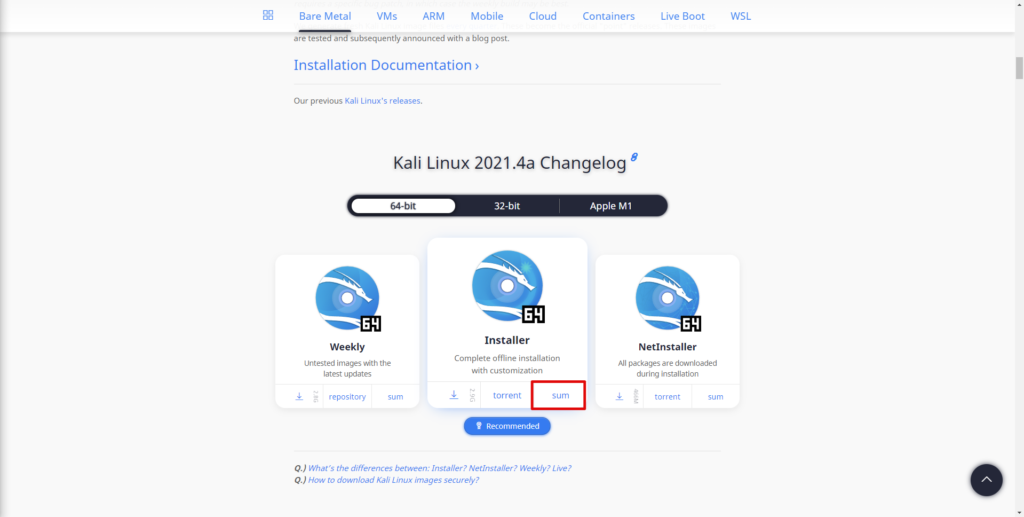
SHA256sum will be displayed, so remember this string.
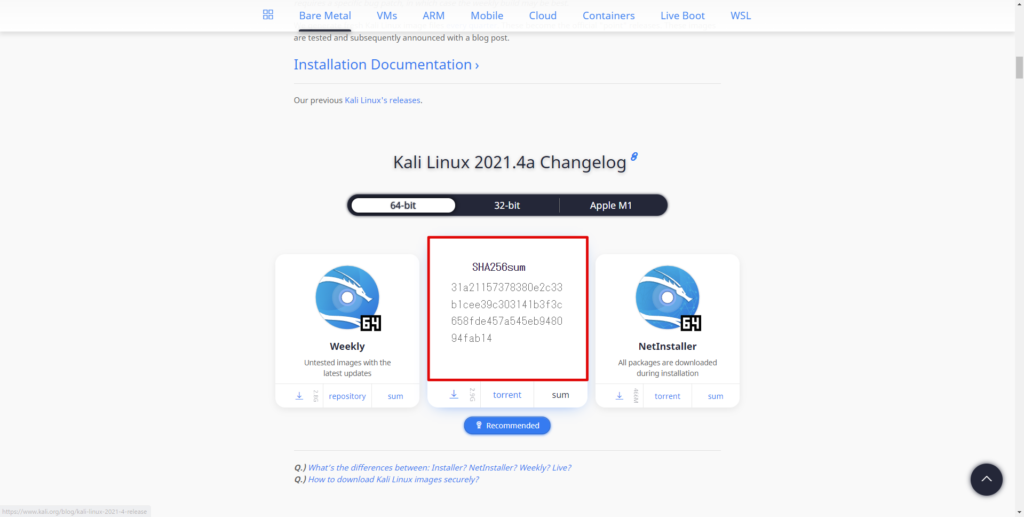
Next, open a command prompt and run the following command:
certutil -hashfile [Download file path] sha256It's OK as long as the string from the execution result is the same as the string above.
C:\Users\hackl>certutil -hashfile C:\Users\hackl\Desktop\shizai\kali-linux-2021.4a-installer-amd64.iso sha256 SHA256 hash (Applicable to C:\Users\hackl\Desktop\shizai\kali-linux-2021.4a-installer-amd64.iso): 31a21157378380e2c33b1cee39c303141b3f3c658fde457a545eb948094fab14 CertUtil: -hashfile command completed successfully.Install KALI LINUX on your virtual machine.
We will use the KALI LINUX installer that we downloaded earlier to create a virtual machine in VirtualBox.
If you have not yet installed VirtualBox, please refer to Detailed Explanation on how to install Virtual Box
Create a virtual machine
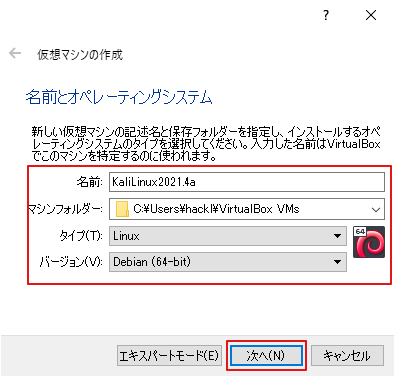
First, open the VM VirtualBox Manager and select New.

The screen will change to enter your name and OS, so enter it.
The thing to note is that KALI LINUX is Debian-based, so you should choose Debian as the version.
- Name: Optional
- Machine Folder: Optional
- Type: Linux
- Version: Debian (64-bit)
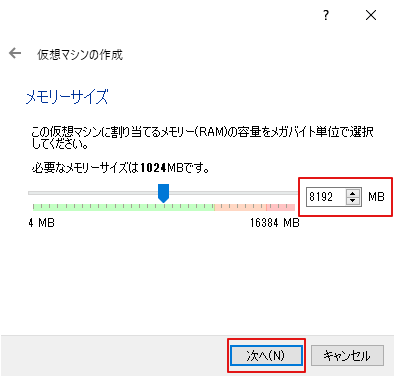
Next, select the size of the memory.
This place is optional, but I've taken a little more.
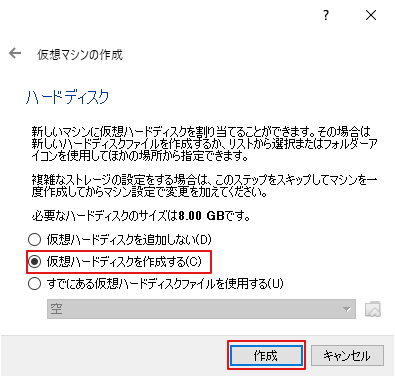
Hard disk allocation.
If there are no special needs, select "Create a virtual hard disk" and then select "Create".
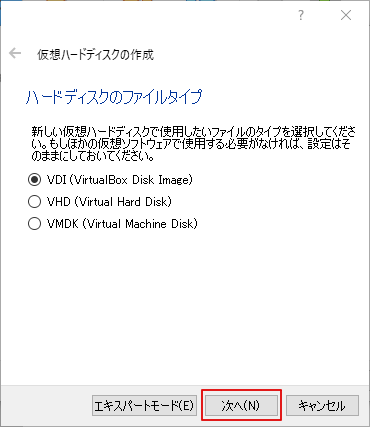
Select the file type for your hard disk.
If you do not need to use this software with other virtual software, simply select "Next".
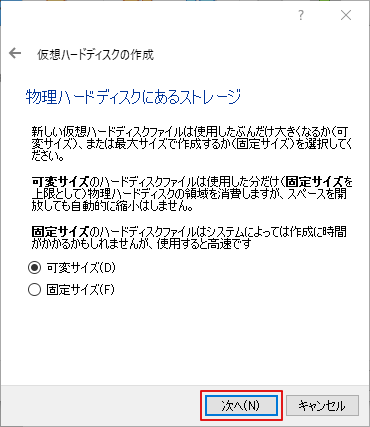
You will be asked if you want to have a variable size or a fixed size for your virtual hard disk.
Either one is fine, but this time I'll set the default "variable size."
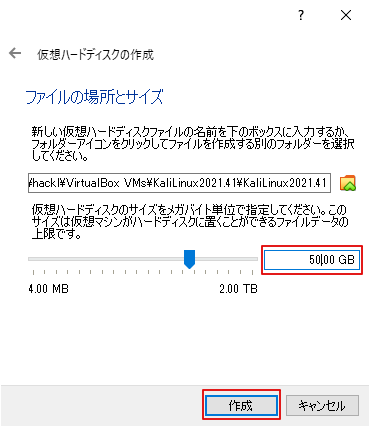
Finally, decide the size of the virtual hard disk and select Create.
I'm a bit more large in advance because it's a hassle to change it later.
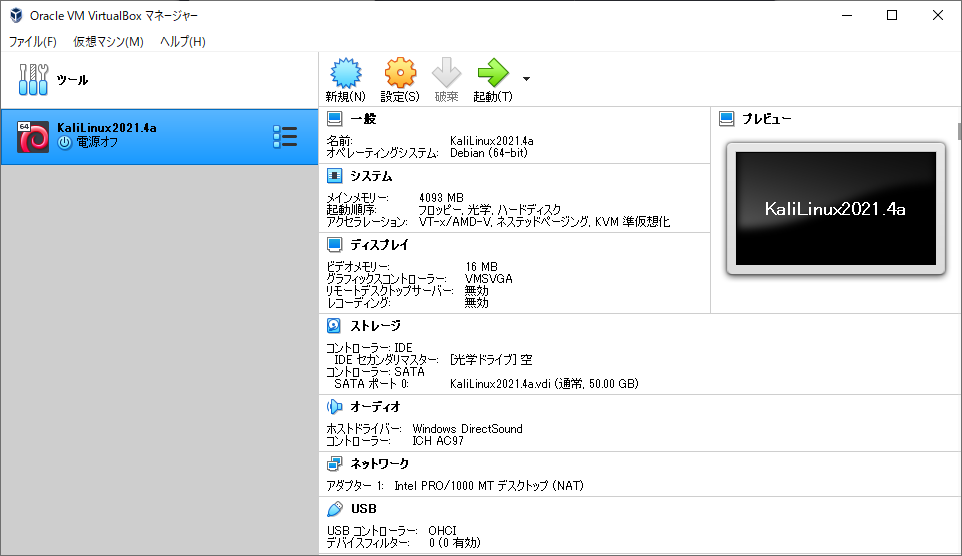
It's OK as long as the VM has been created.
Install KALI LINUX on a virtual machine
Install KALI LINUX on the virtual machine you just created.
First, select the virtual machine you just created and select "Start".
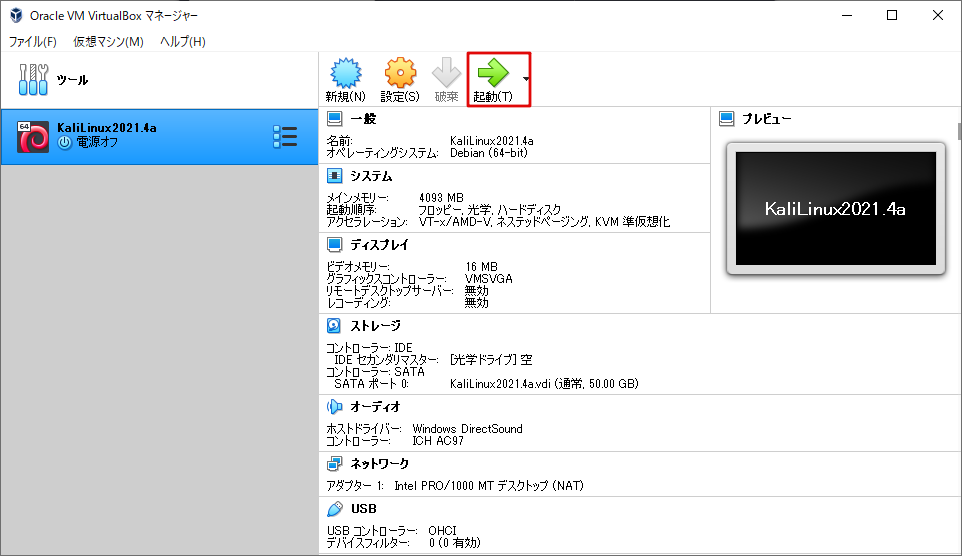
When it's the first time you start, you will be told to select the bootable hard disk, so select the folder icon in the red box.

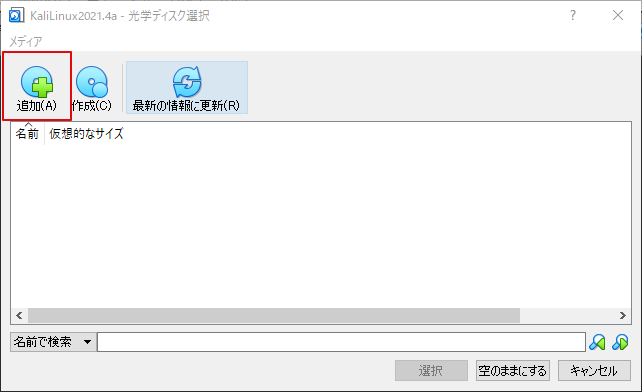
The optical disc selection screen will open, so select "Add".
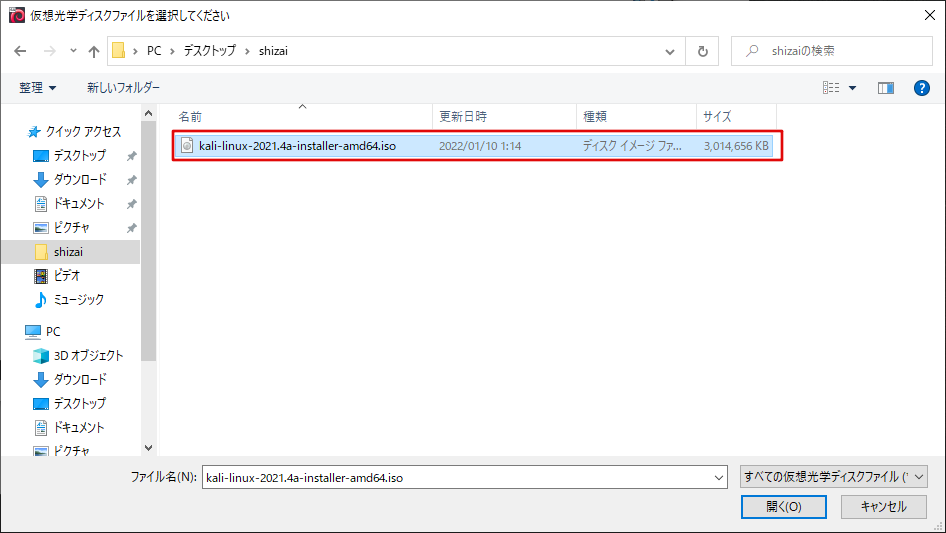
Select the KALI LINUX iso file you downloaded.
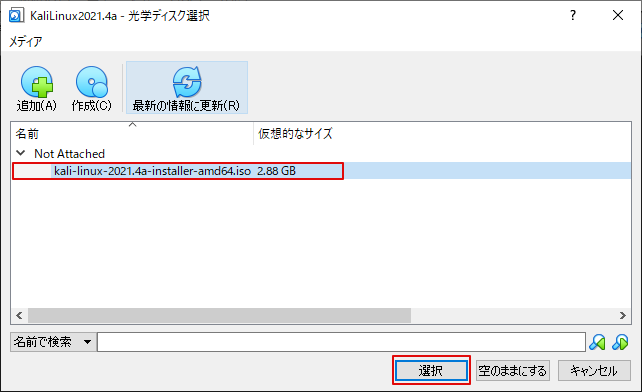
Make sure KALI LINUX is selected and select Select.
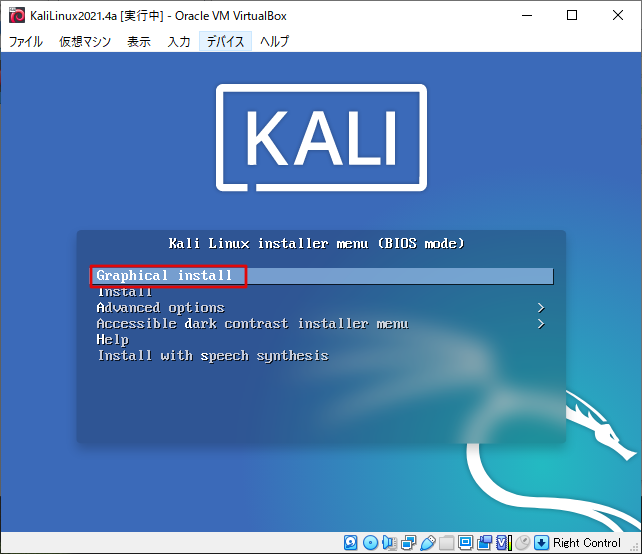
The KALI LINUX Installer screen will appear, so select "Graphical install".
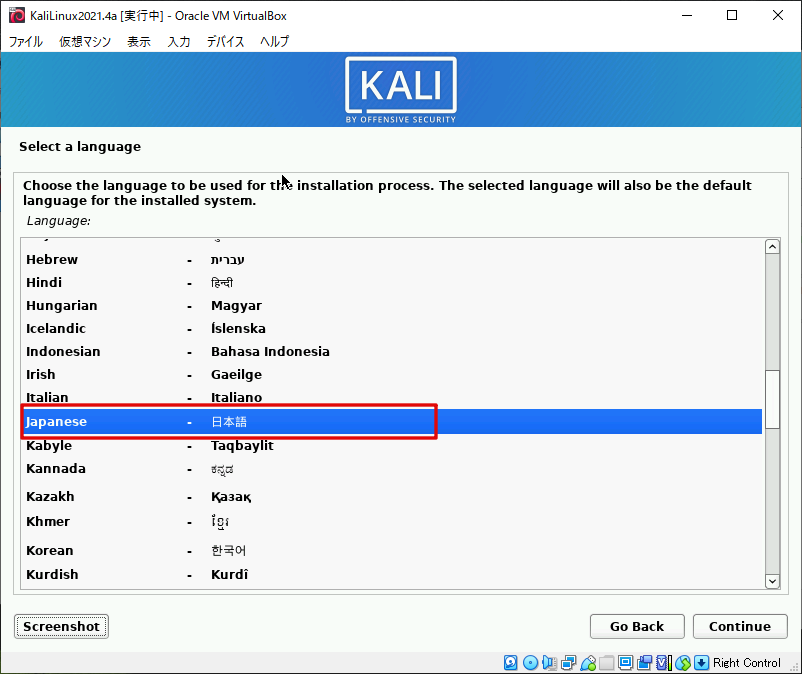
First, a language selection screen will appear, so please select your preferred language.
I select "Japanese".
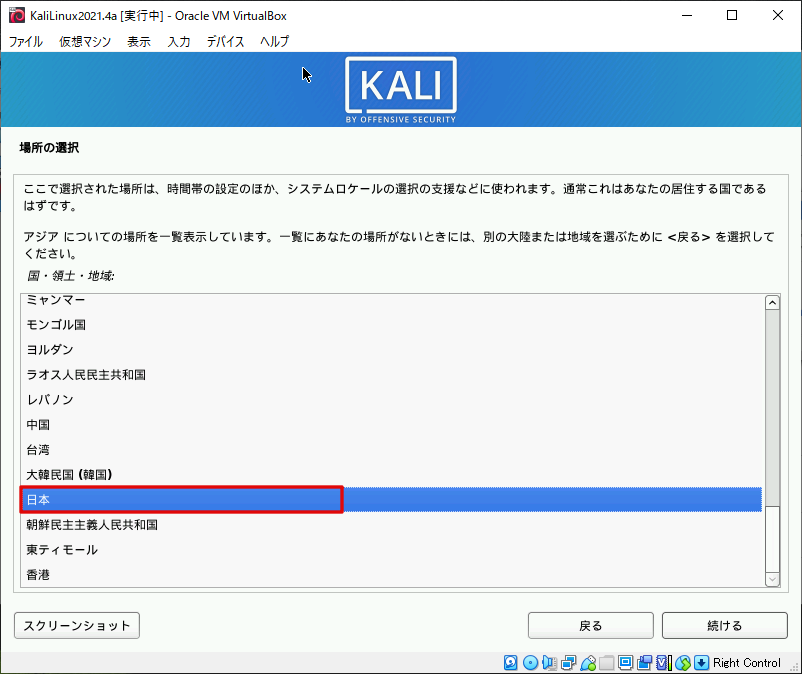
Next is to choose a location.
Basically, I think it would be fine if there is a country where PCs exist.
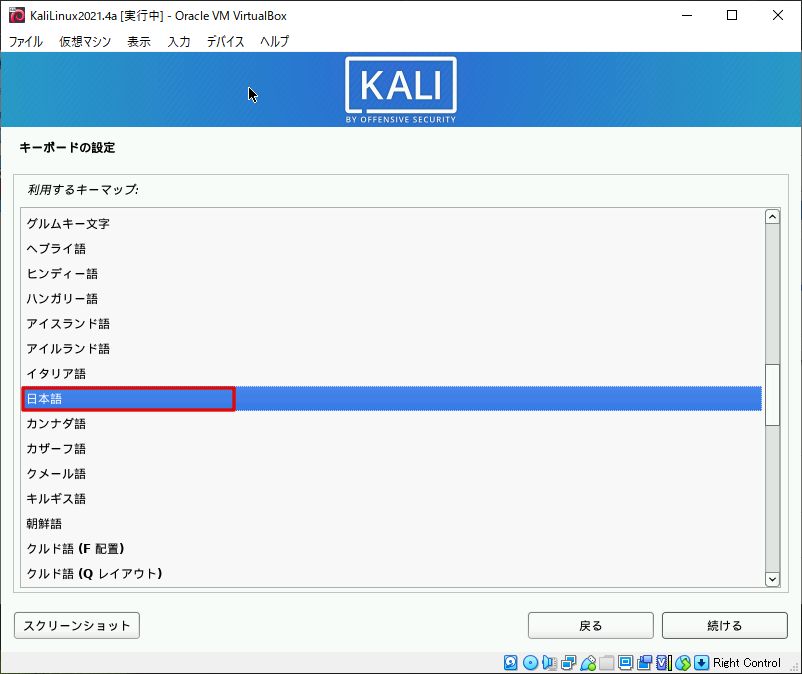
I think the keyboard settings should be tailored to the keyboard you normally use.
I use a Japanese keyboard so I set it to Japanese.
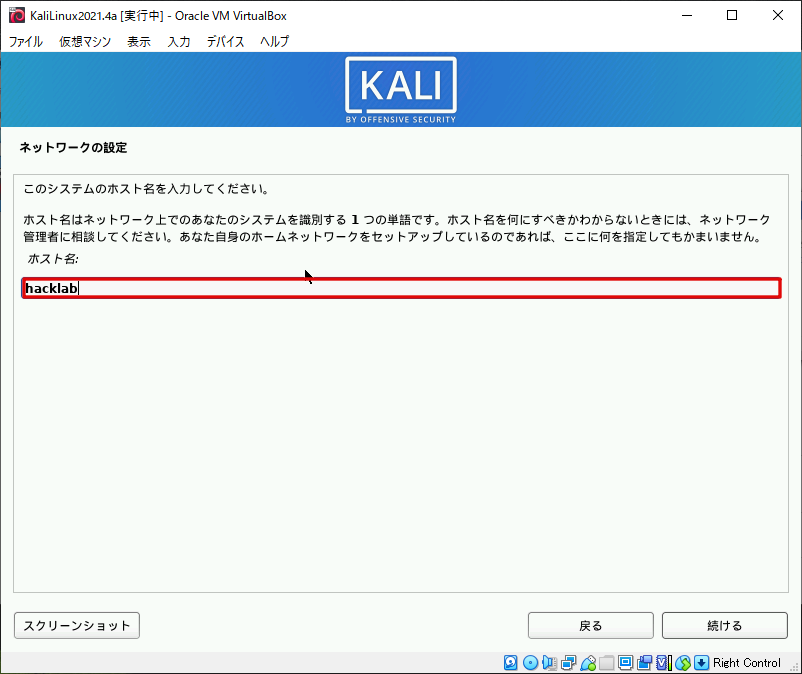
To configure the network, enter the host name.
Anything is fine for personal use.
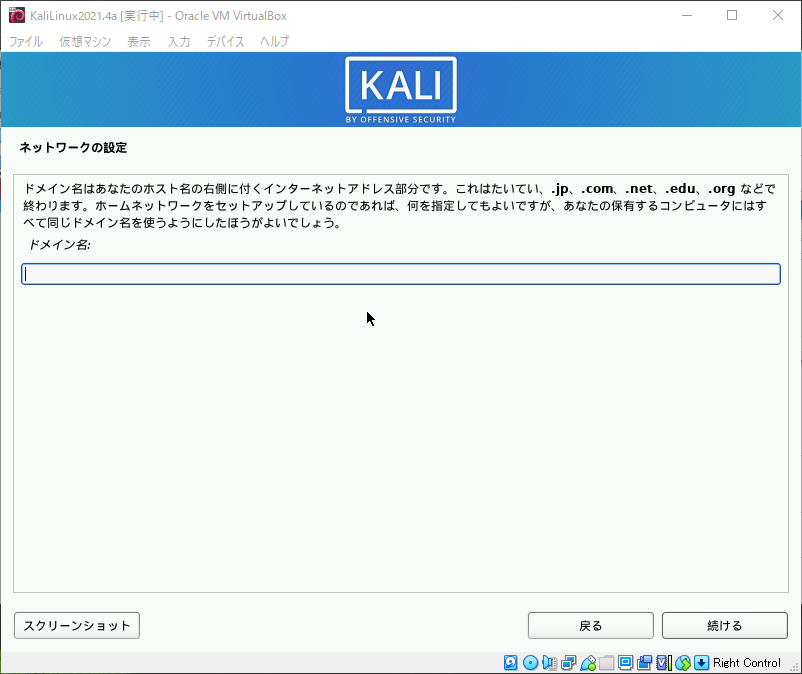
Next is the domain configuration.
Do not set this here and proceed to the next page.
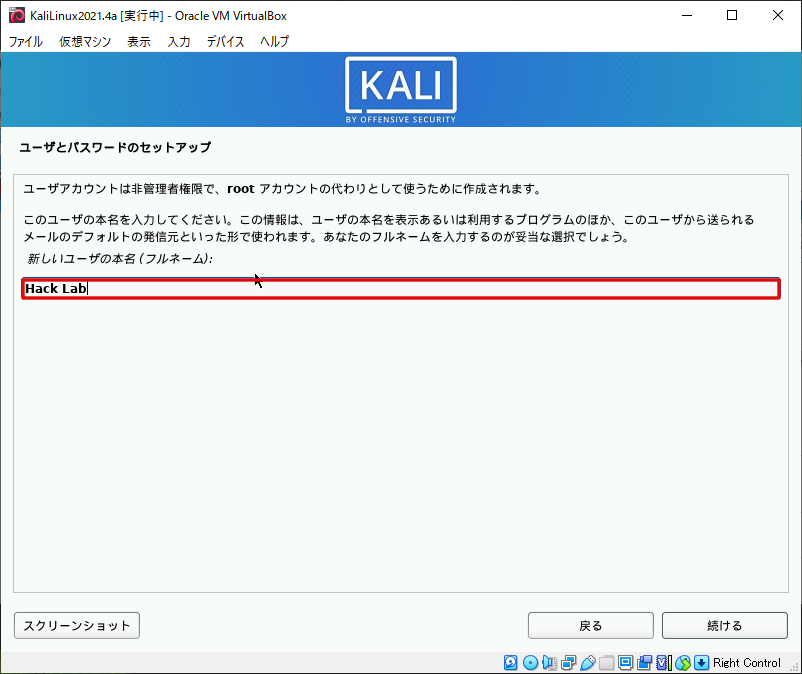
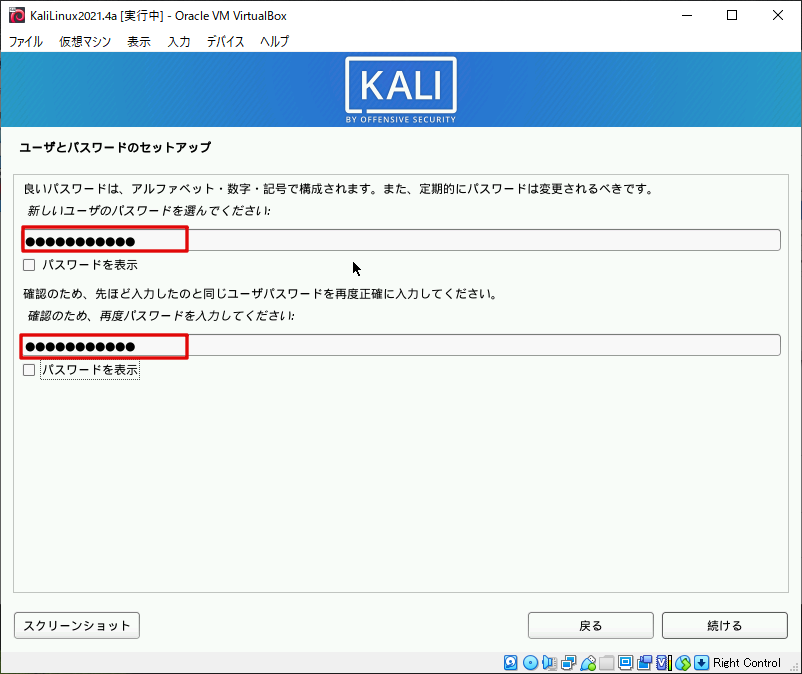
This will be a setup for users and passwords.
First, enter your full name.
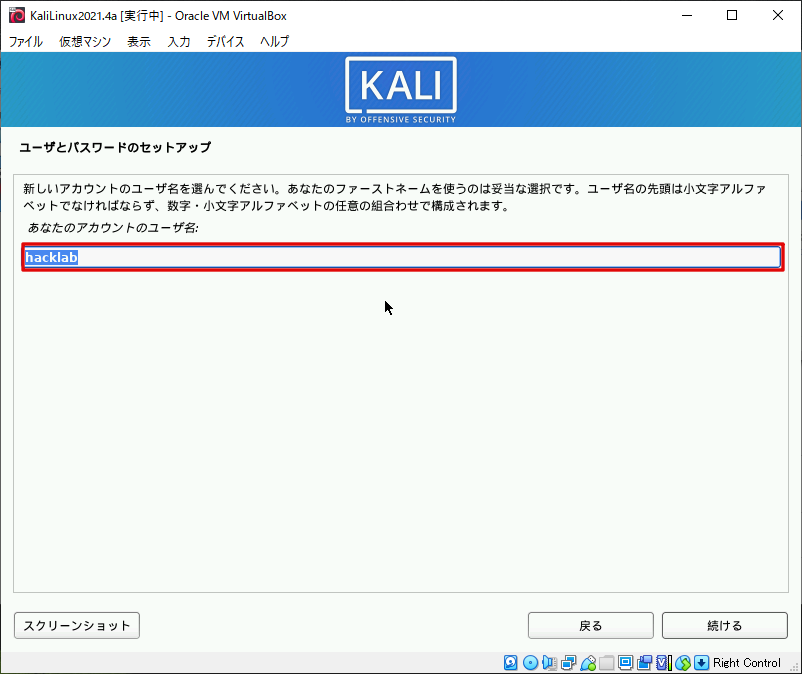
Next, enter your username. You can also enter this one at will.
Enter your password.
Please enter the same password at the top and bottom.
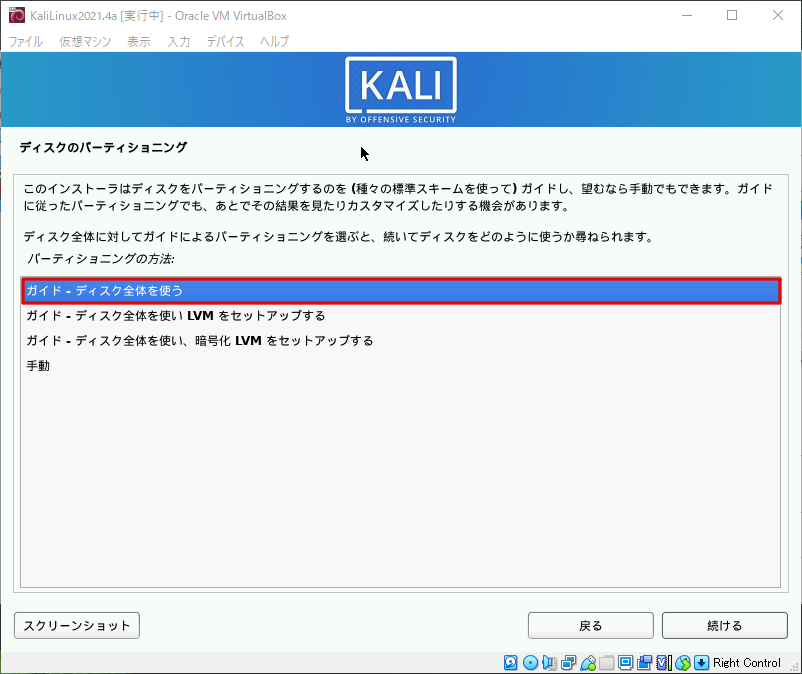
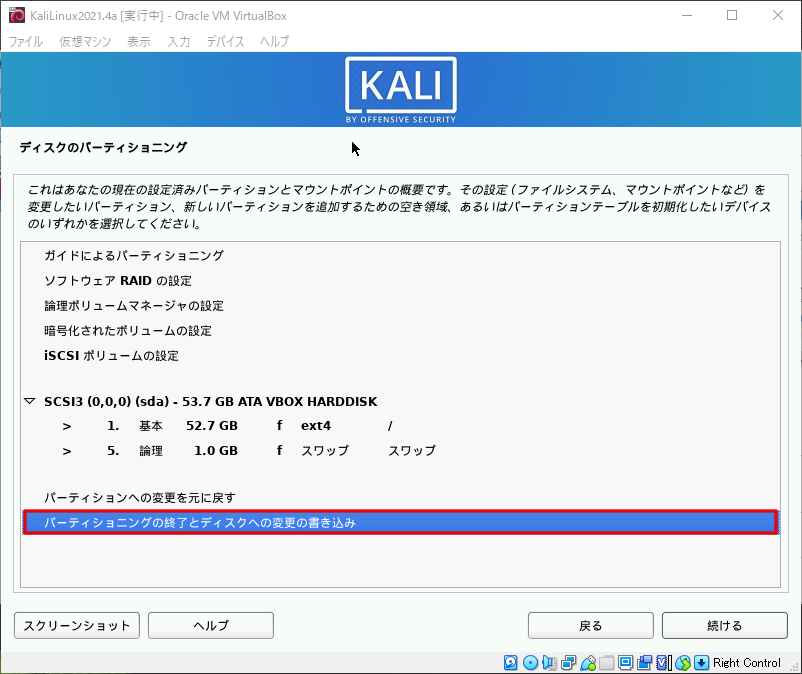
You will then be asked how to partition the disk.
If there is no particular need, I think it's fine to use the whole thing.
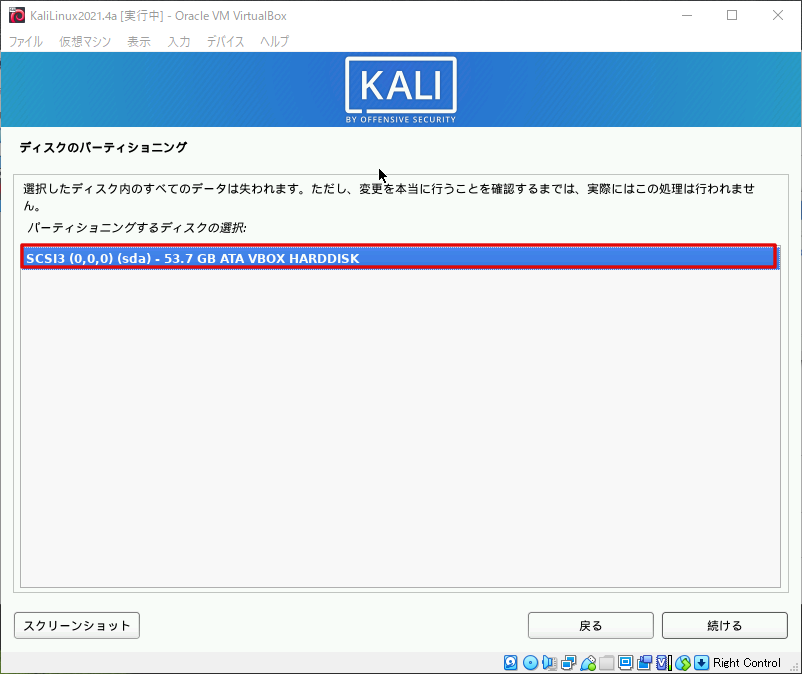
Select the disk to partition.
It's OK as long as you have selected the virtual machine's hard disk.
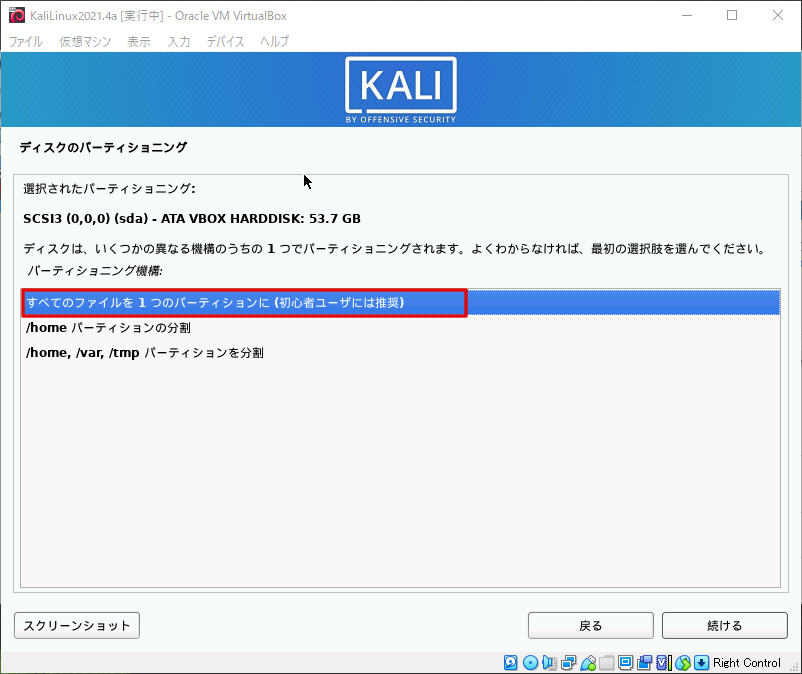
This is the choice of partitioning mechanism.
If you're not sure, select "All files are in one partition."
If you have trouble setting partitioning, select "End Partitioning and Write Changes to Disk" to proceed.
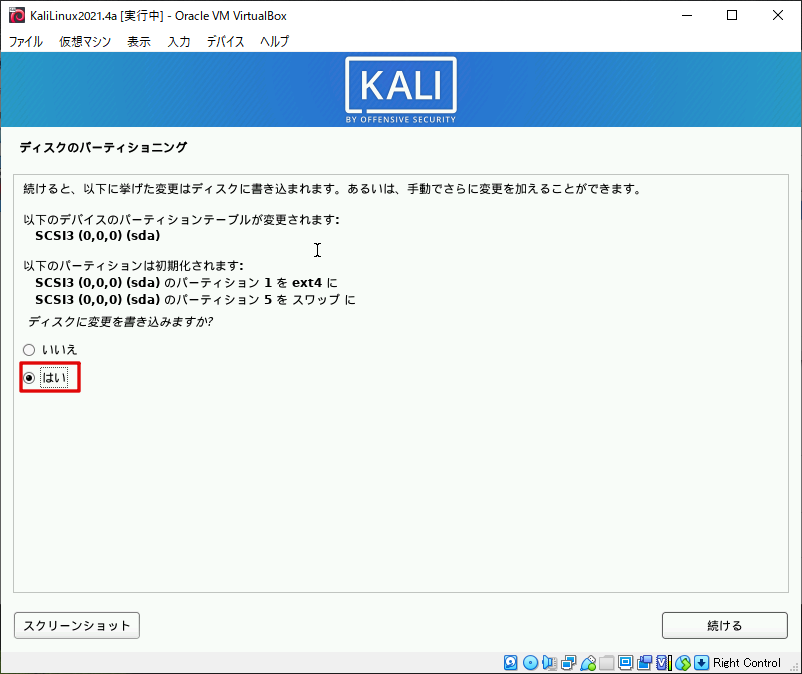
You will be asked if you want to burn it to the disc, so if you don't have a problem, select "Yes."
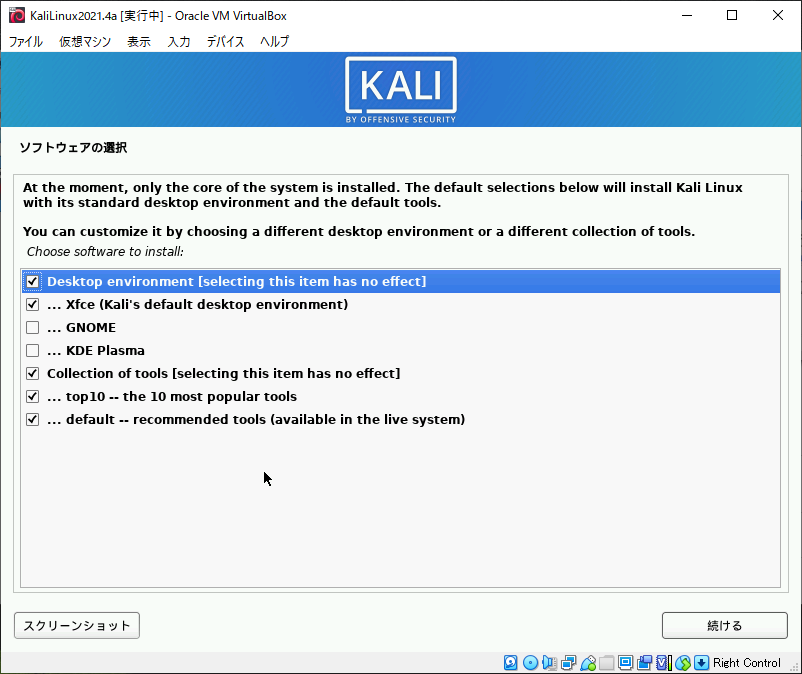
Next, you will need to choose the software.
This one wasn't in Japanese, so I'll post the translation.
Currently, only the core part of the system is installed.
The default selection below will install Kali Linux with the standard desktop environment and default tools.
You can customize by selecting a different desktop environment or collection of tools.
Basically, I think it's fine to leave the default, so I'll continue like this.
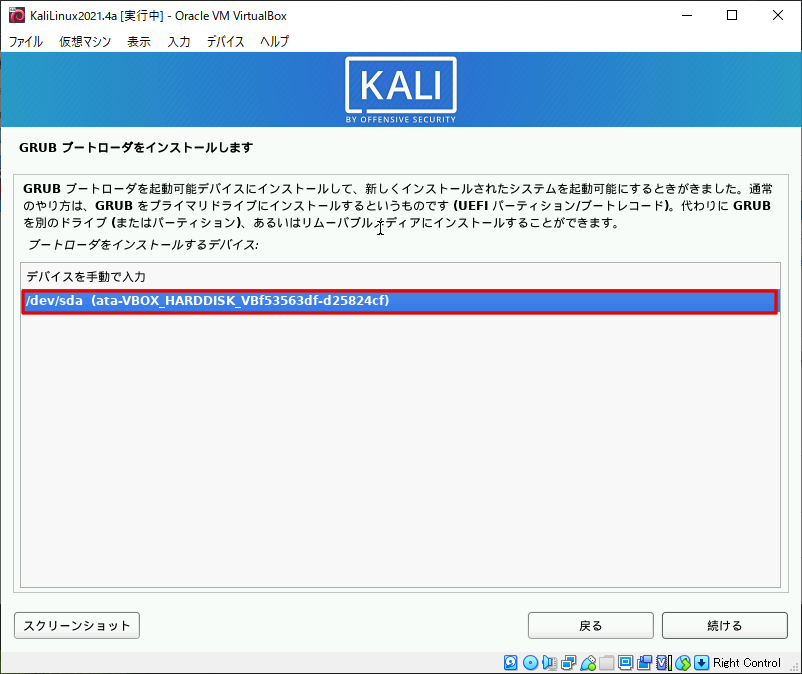
You will be asked if you want to install the bootloader, so select "Yes" to proceed.
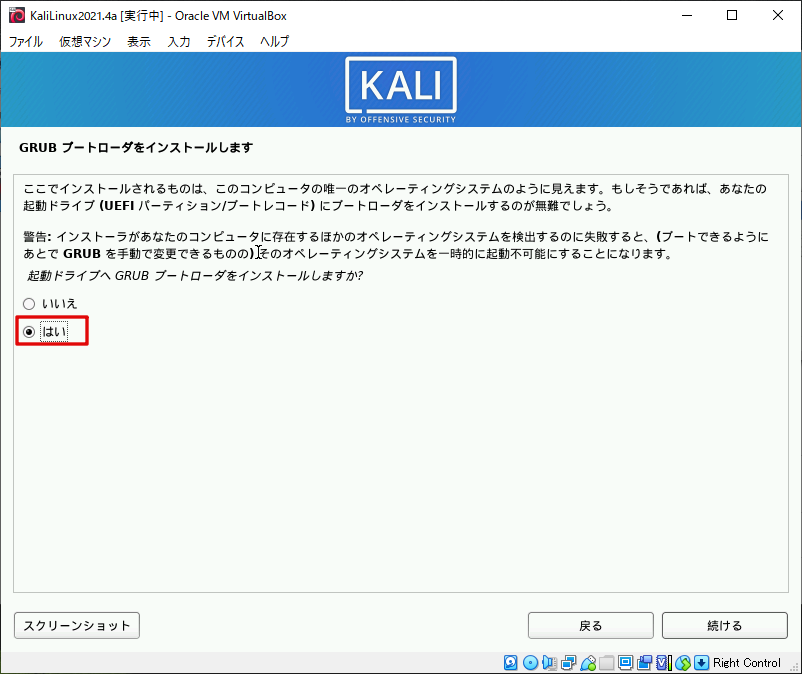
Finally, select the device to which you want to install the bootloader and the installation is complete!
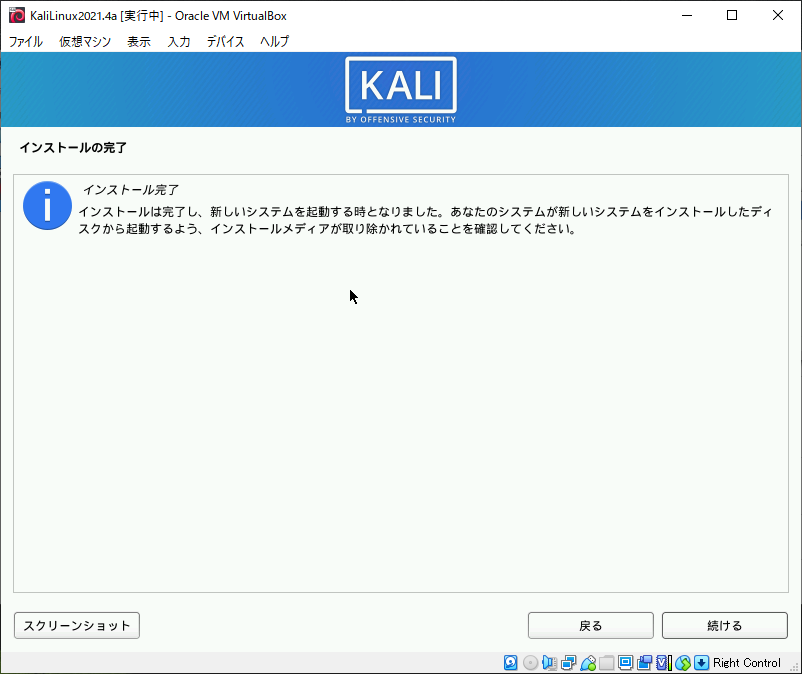
Once the installation is complete, select "Continue" to launch KALI LINUX.
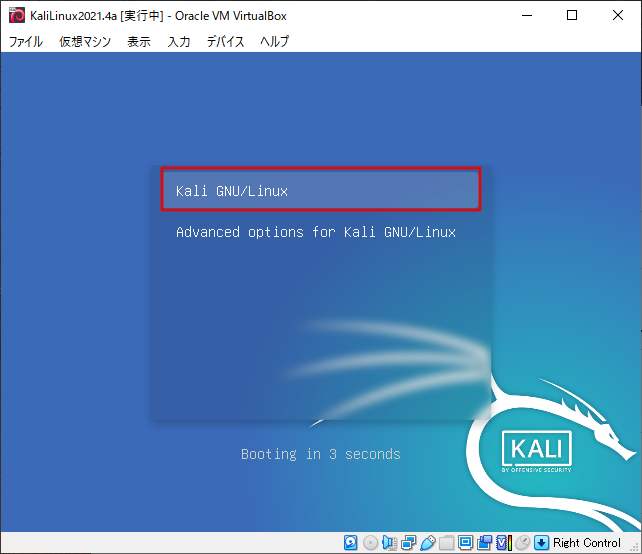
Once you have started KALI LINUX, select "Kali GNU/Linux".
Enter the user/password you just registered to log in.
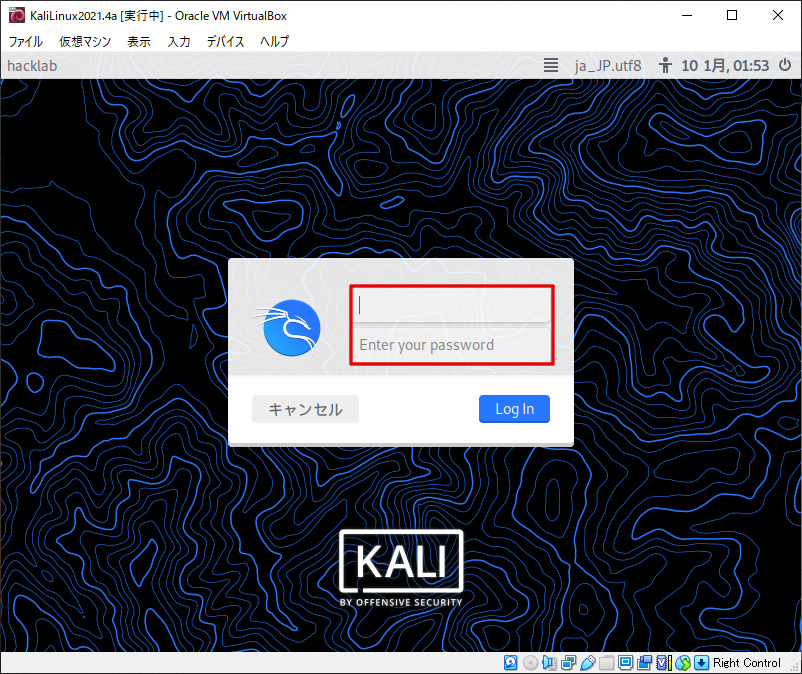
Once you're logged in, you're done!
Take a snapshot of a virtual machine
Finally, let's take a snapshot of the state where it has been confirmed to start up.
Select Virtual Machine > Create Snapshot, enter the snapshot name, and then select OK.
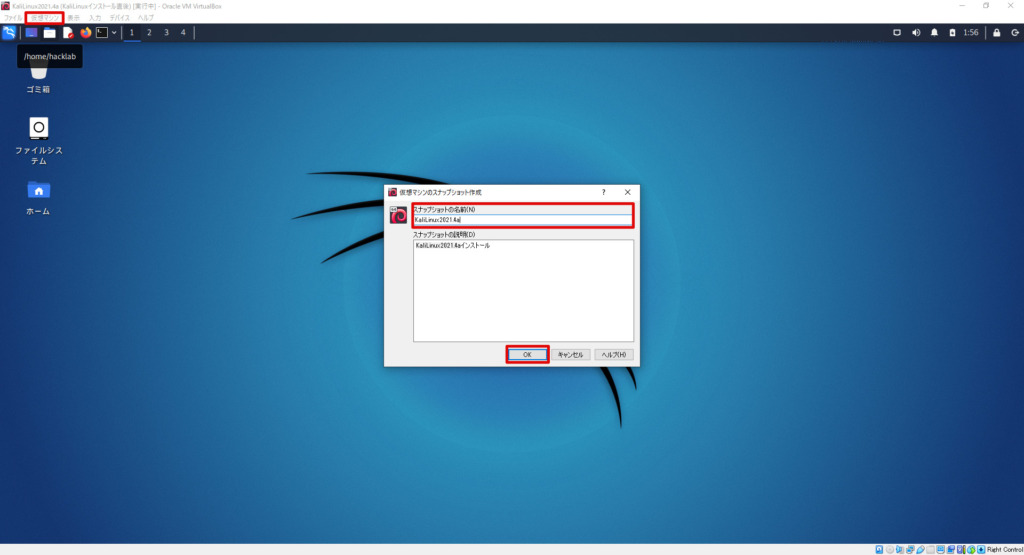
This completes the installation of KALI LINUX on your VirtualBox virtual machine!
Let's check the operation.
Check that the virtual machine is properly created and finish it.
Make sure KALI LINUX is installed
First, make sure KALI LINUX is installed.
Select the terminal icon to open the terminal.
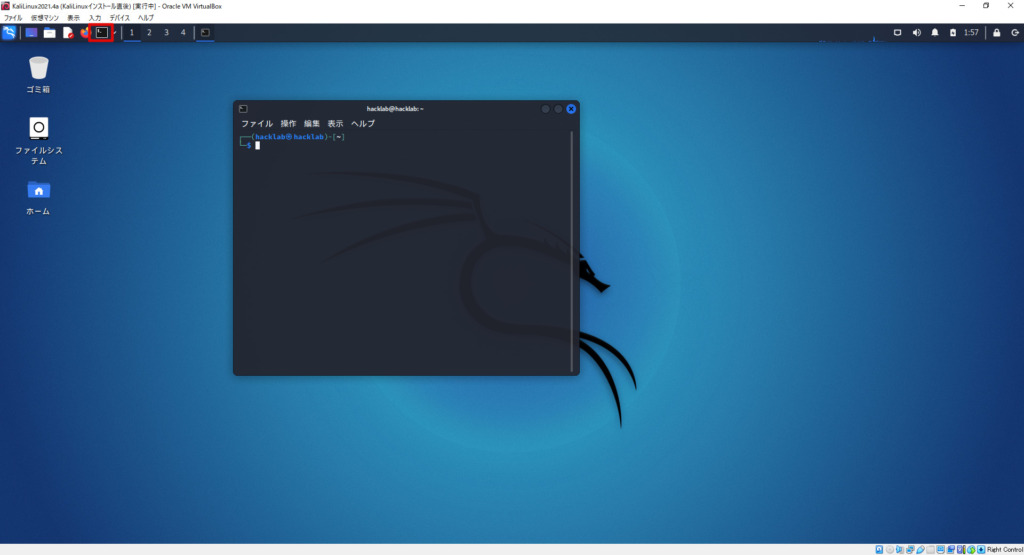
Enter the following command to confirm:
- uname -r
-
Displays kernel release information.
- uname -v
-
Displays the kernel version.
- cat /etc/os-release
-
Check the type and version of your Linux distribution
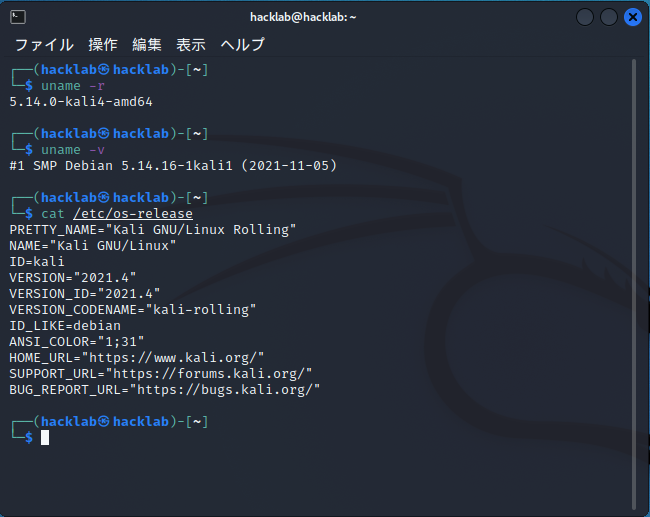
I've confirmed that Kali Linux 2021.4 is installed.
Check your IP address
Next, check the assigned IP address.
- ip address show
-
View the IP address of a network device
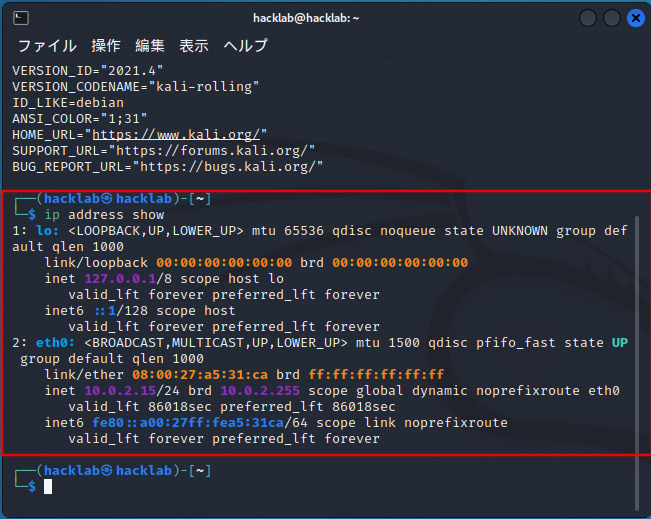
I was able to check the IP address too.
Check disk space
Check the disk space too.
- df
-
View disk capacity
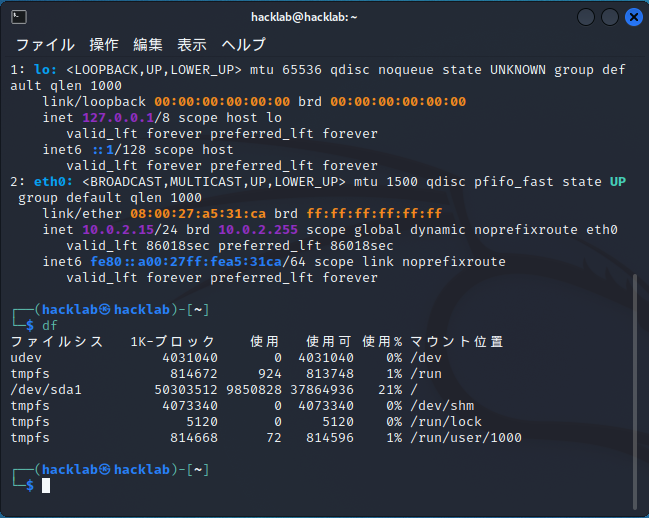
You can confirm that /dev/sda1 has 50GB allocated.
Check the memory capacity
Once you have checked the disk capacity, check the memory capacity as well.
- cat /proc/meminfo
-
Check the contents of the file where memory information is stored
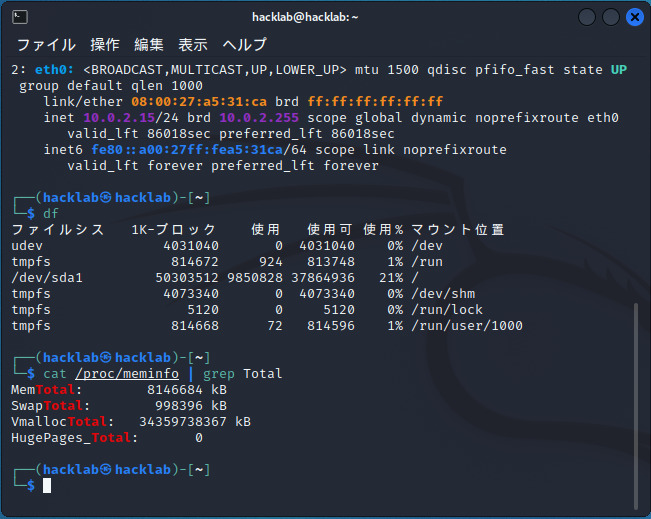
We have confirmed that the memory is 8GB and the swap is 1GB.
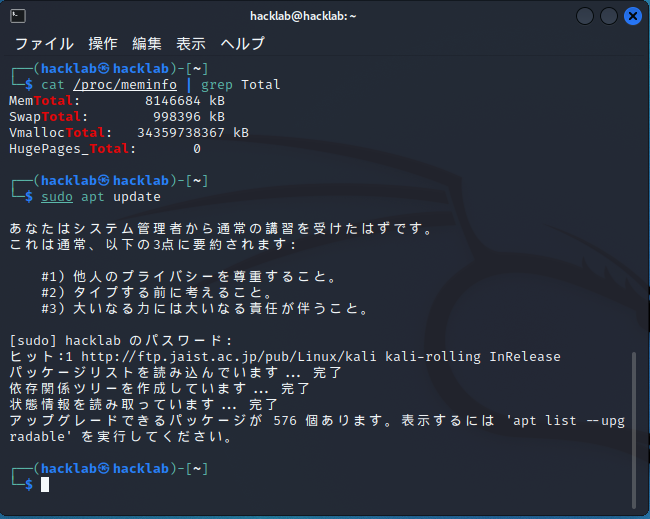
Let's update the package.
Finally, update the packages that you need to do after installation.
For Red Hat-based distribution shun (such as CentOS), clickyum' commands are used, but in Debian-based distributions,apt' is used.
Update package
The commands to be executed are as follows:
"apt update" seems to be updated by name, but please be careful as it will not be updated and you will only check.
- apt update
-
Check if there are any packages you can upgrade
- apt upgrade
-
Update the package
There are packages that can be upgraded, so run "apt upgrade".
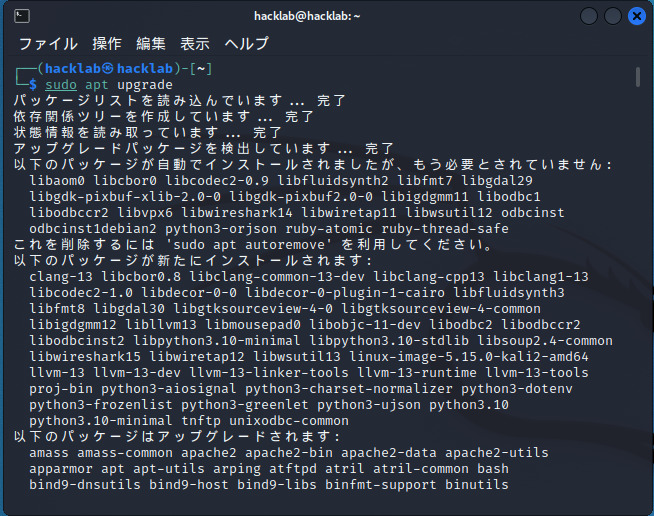
This completes the package upgrade.
summary
This time, I created a virtual machine in VirtualBox and installed KALI LINUX and watched it.
The procedure is simple, but it was a lot of work.
In the future, I'll be doing hacking and penetration tests using KALI LINUX!
![[XServer VPS] Build an LXDE GUI environment on Ubuntu and migrate to LXQt](https://hack-lab-256.com/wp-content/uploads/2026/01/hack-lab-256-samnail-2-300x169.jpg)
![[XServer VPS] The best solution for building a Kali Linux environment with Ubuntu Desktop x Distrobox](https://hack-lab-256.com/wp-content/uploads/2026/01/hack-lab-256-samnail-1-300x169.jpg)