
![[Super Easy] Introduction to React Three Fiber x Drei x TypeScript! Poke Poke style 3D background made with standard objects!](https://hack-lab-256.com/wp-content/uploads/2025/02/hack-lab-256-samnail-14.jpg)
In recent web application development, 3D graphics are increasingly being used. In particular, React Three Fiber (R3F) allows you to easily use Three.js as a React component.
we will implement a colorful "Pokepoke-style" 3D background using React and TypeScript , while also utilizing the Three.js wrapper library Drei
📌 And this time, we won't be using any special 3D models!
You'll see how much you can achieve using only the basic objects (Box, Plane, etc.) that come standard with Three.js
💡 Finished image👇The
3D background we will create looks like this👇
📺 Watch the demo on YouTube : You can watch it from this link
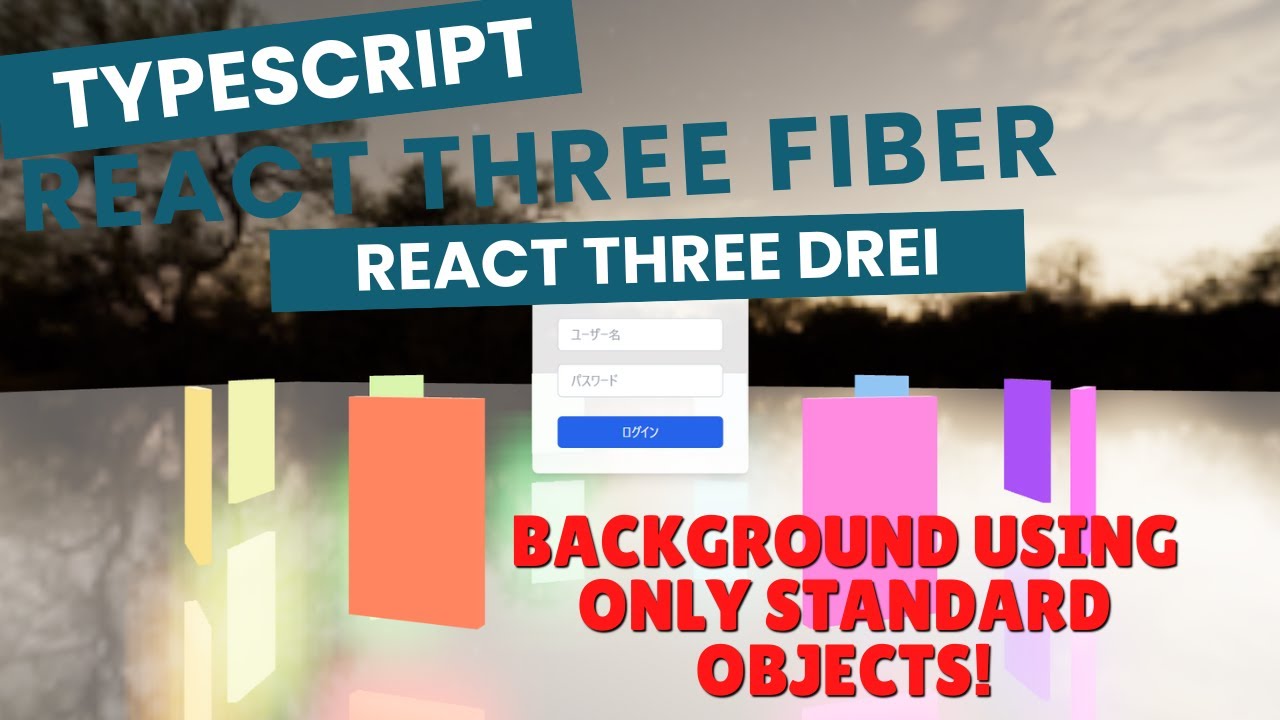
✅ A 3D world with colorful cards arranged in a circle
✅ A stylish background using specular reflections
✅ A UI that combines HTML/CSS
🚀 Let's move forward, keeping in mind that you don't need any special 3D models! You can do this much with just standard objects!
Now let's actually write some code!
We will continue to create lessons and works from TypeScript x React Three Fiber in the future!
We will be making an announcement on YouTube, so please subscribe to our YouTube channel and wait for notifications!
📺 Watch YouTube : You can watch it from this link

If you'd like to know what React Three Fiber can do, please refer to the following!
We have easy-to-use works available!
- I tried making bears walk with React x Three.js!
- I tried making an old man dance on React x Three.js!
- I tried to display a 3D model with React x Three.js!
- I made a 3D button that explodes in React x Three.js!
- React Three Fiber x Drei x Introduction to TypeScript! Poke Poke style 3D background made with standard objects!
- The crisp typing feel that is unique to the capacitive non-contact system!
- REALFORCE's first wireless compatible device! Wired connection also available!
- Unlike the HHKB, the Japanese keyboard layout has no quirks and is easy for anyone to use!
- Equipped with a thumb wheel, horizontal scrolling is very easy!
- It also has excellent noise reduction performance, making it quiet and comfortable!
- Scrolling can be switched between high speed mode and ratchet mode!
🚀Introduction to technical elements: Tools and libraries to use in this project
You can change the tools and libraries you use to one that is easy to use for yourself, but this project will explain this assumption.
- VSCode
-
- A free code editor provided by Microsoft.
- It doesn't need to be VSCode, but there are many extensions, so I recommend it.
- It is also recommended to include ESLint or Prettier.
- Node.js
-
- A JavaScript built on Chrome's V8 JavaScript engine .
- You can run JavaScript code outside of your browser.
- This is explained based on the assumption that it is already installed, so please download it from
https://nodejs.org/ja *We recommend downloading the long-term stable version of LTS.
- Vite
-
- A build tool for modern web projects. It is characterized by its fast and lightweight
- The previously used "CRA (create-react-app)" is not listed on the official website, and has become an old technology.
- From now on, Vite should be the best option when creating apps with React.
- React
-
- This is a JavaScript library for building a UI (user interface). It was developed by Facebook and is still used in many web apps today.
- Three.js
-
- A JavaScript library for easily creating 3D graphics. It abstracts the complex operations of WebGL and enables intuitive 3D development.
- It's easy to create 3D graphics and is easier to use than direct WebGL operations.
- React Three Fiber
-
- This is a library that allows Three.js to be used with React. It combines React's component structure with Three.js' 3D engine.
- Three.js can be used in the React development style, allowing for intuitive and efficient development.
- React Three Drei
-
- A collection of useful utility components for React Three Fiber. It's easy to add the commonly used Three.js features.
- Complex Three.js features can be achieved with short code, reducing learning costs.
🚀 Let's create a "Pokepoke-style 3D background" using React Three Fiber × Drei × TypeScript!
📌The environment construction is explained in this article
📌This time, we will not use any special 3D models, but only use standard objects that are available in React Three Fiber and React Three Drei.
If you would like to learn more about standard objects, please also refer to this article
Please check GitHub for the complete source code you created this time.
💾 GitHub Repository : Check the source code at this link

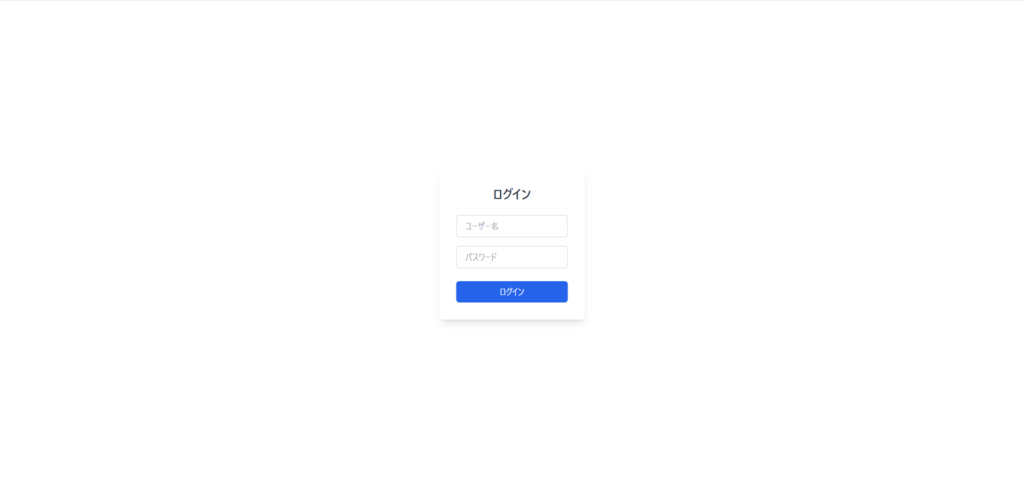
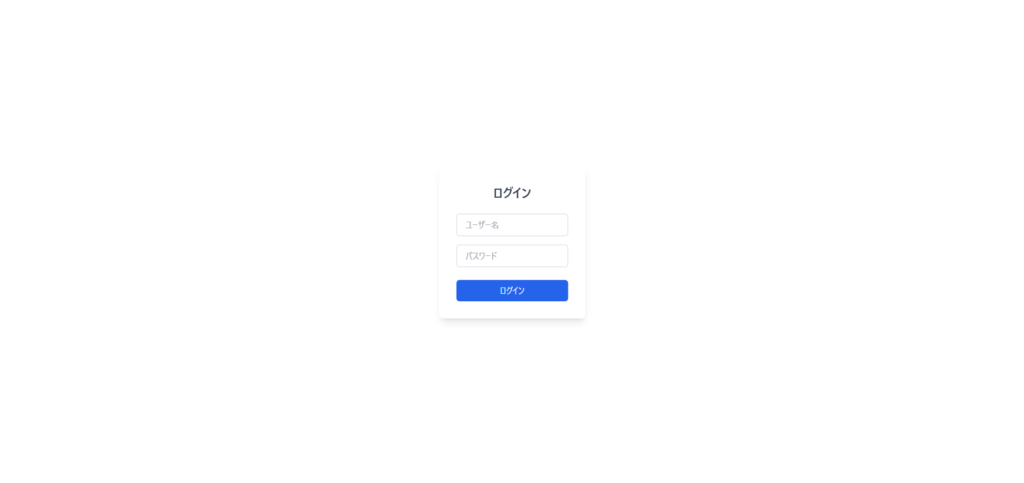
💡Create a login form!!
First, let's create a simple login form using React.
We use tailwind-css as the CSS library.
// === Main App Component === const LoginScreen = () => { return ( <> {/* Login form */} <div className="absolute top-1/2 left-1/2 transform -translate-x-1/2 -translate-y-1/2 bg-white/90 rounded-lg p-8 shadow-lg text-center"><h2 className="text-2xl font-semibold text-gray-700 mb-6"> Log in </h2><form><div className="mb-4"><input type="text" placeholder="ユーザー名" className="w-full px-4 py-2 border border-gray-300 rounded-md focus:outline-none focus:ring-2 focus:ring-blue-500" /></div><div className="mb-6"><input type="password" placeholder="パスワード" className="w-full px-4 py-2 border border-gray-300 rounded-md focus:outline-none focus:ring-2 focus:ring-blue-500" /></div> <button type="submit" className="w-full bg-blue-600 text-white py-2 px-4 rounded-md hover:bg-blue-700 transition" >Log in</button></form></div></> ); }; export default LoginScreen;
💡Display Canvas as background!!
First, place the Canvas and prepare the camera and lighting
import { Canvas } from "@react-three/fiber"; import { OrbitControls, } from "@react-three/drei"; // === Main app component === const LoginScreen = () => { return ( <> {/* Three.js Canvas */}<Canvas camera={{ position: [0, 0, 10], fov: 50 }}><color attach="background" args={["white"]} /> {/* Lighting */}<ambientLight intensity={10} /><directionalLight position={[0, 5, 0]} intensity={15} /> {/* Camera operation */} <OrbitControls enablePan={false} enableZoom={false} minPolarAngle={Math.PI / 2} maxPolarAngle={Math.PI / 2} /></Canvas> {/* Login form created with HTML/CSS */} <div className="absolute top-1/2 left-1/2 transform -translate-x-1/2 -translate-y-1/2 bg-white/90 rounded-lg p-8 shadow-lg text-center"><h2 className="text-2xl font-semibold text-gray-700 mb-6"> Log in </h2><form><div className="mb-4"><input type="text" placeholder="ユーザー名" className="w-full px-4 py-2 border border-gray-300 rounded-md focus:outline-none focus:ring-2 focus:ring-blue-500" /></div><div className="mb-6"><input type="password" placeholder="パスワード" className="w-full px-4 py-2 border border-gray-300 rounded-md focus:outline-none focus:ring-2 focus:ring-blue-500" /></div> <button type="submit" className="w-full bg-blue-600 text-white py-2 px-4 rounded-md hover:bg-blue-700 transition" >Log in</button></form></div></> ); }; export default LoginScreen;
💡Card pack object placement!!
Next, place a PokePoke card pack-like object in the background.
Doesn't this just somehow look like a PokePoke pack selection screen? (lol)
import { Canvas } from "@react-three/fiber"; import { MeshReflectorMaterial, OrbitControls, } from "@react-three/drei"; // === Place boxes resembling a pack of cards in a circle centered at [0,0,0] === const CircularCardPack = ({ radius = 5, count = 10, cardSize = [1, 1.5, 0.1], // width, height, depth }: { radius?: number; // radius of the circle count?: number; // number of cards to place cardSize?: [number, number, number]; // size of the cards }) => { const cards = Array.from({ length: count }); // Generate an array return (<group> {cards.map((_, i) => { const angle = (i / count) * Math.PI * 2; // Angle on the circumference const x = radius * Math.cos(angle); // X coordinate const z = radius * Math.sin(angle); // Z coordinate const rotationY = -angle + Math.PI / 2; // Rotate the card so that it faces the center return ( <mesh key={i} position={[x, -1, z]} // カードの位置 rotation={[0, rotationY, 0]} // カードの向き ><boxGeometry args={cardSize} /><meshStandardMaterial color={`hsl(${(i / count) * 360}, 70%, 50%)`} /></mesh> ); })}</group> ); }; // === Main app component === const LoginScreen = () => { return ( <> {/* Three.js Canvas */}<Canvas camera={{ position: [0, 0, 10], fov: 50 }}><color attach="background" args={["white"]} /> {/* Lighting */}<ambientLight intensity={10} /><directionalLight position={[0, 5, 0]} intensity={15} /> {/* Camera operation */} <OrbitControls enablePan={false} enableZoom={false} minPolarAngle={Math.PI / 2} maxPolarAngle={Math.PI / 2} /> {/* Card object */}<CircularCardPack /></Canvas> {/* Login form created with HTML/CSS */} <div className="absolute top-1/2 left-1/2 transform -translate-x-1/2 -translate-y-1/2 bg-white/90 rounded-lg p-8 shadow-lg text-center"><h2 className="text-2xl font-semibold text-gray-700 mb-6"> Log in </h2><form><div className="mb-4"><input type="text" placeholder="ユーザー名" className="w-full px-4 py-2 border border-gray-300 rounded-md focus:outline-none focus:ring-2 focus:ring-blue-500" /></div><div className="mb-6"><input type="password" placeholder="パスワード" className="w-full px-4 py-2 border border-gray-300 rounded-md focus:outline-none focus:ring-2 focus:ring-blue-500" /></div> <button type="submit" className="w-full bg-blue-600 text-white py-2 px-4 rounded-md hover:bg-blue-700 transition" >Log in</button></form></div></> ); }; export default LoginScreen;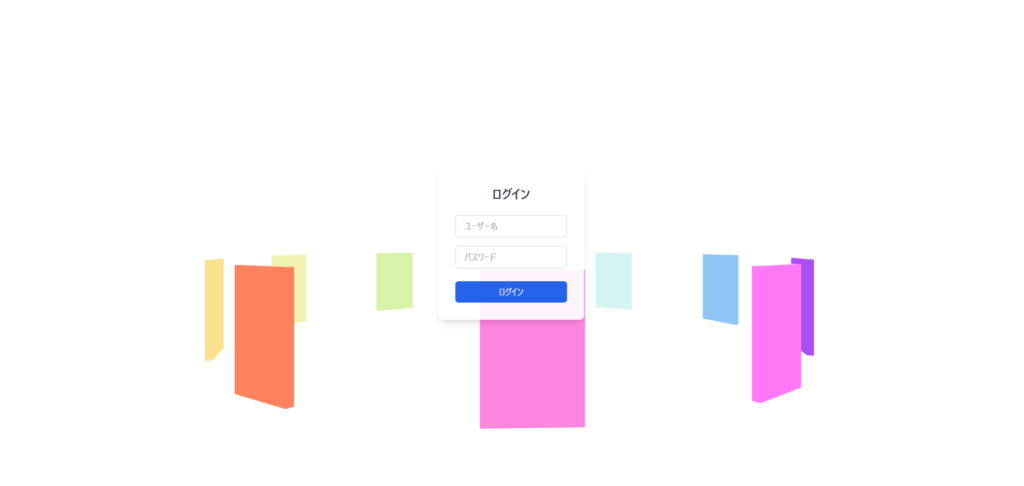
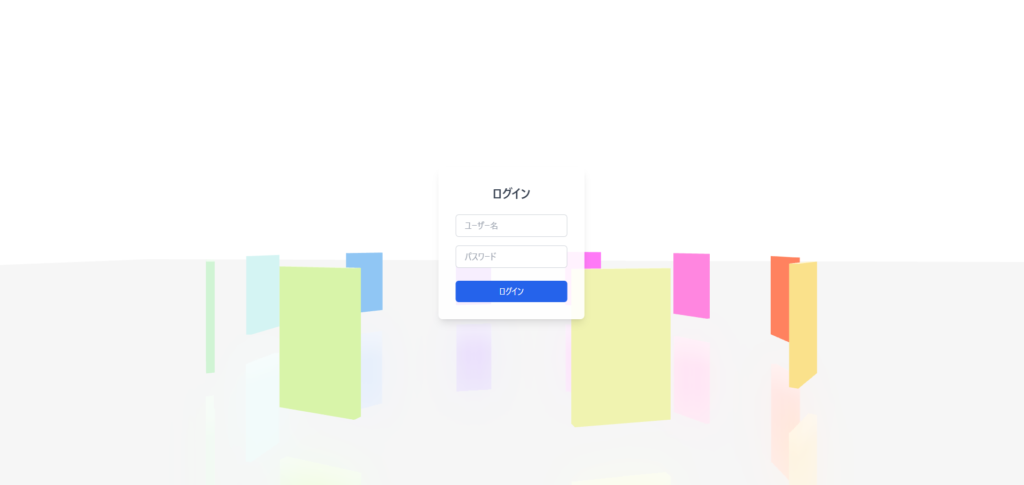
💡A mirror is placed underneath the pack!!
If you look at the PokePoke pack selection area, you'll see that the pack appears reflective, so we'll try adding a mirrored surface underneath the pack in the same way
import { Canvas } from "@react-three/fiber"; import { MeshReflectorMaterial, OrbitControls, } from "@react-three/drei"; // === Specular Plane Component === const ReflectivePlane = () => { return ( <><mesh rotation-x={-Math.PI / 2} position={[0, -2, 0]}><planeGeometry args={[100, 100]} /> {/* Make the mirror bigger to cover the whole background */} <MeshReflectorMaterial blur={[200, 100]} mixBlur={0.7} mixStrength={1} mixContrast={1} resolution={1024} mirror={1} depthScale={0.1} reflectorOffset={0.2} /></mesh></> ); }; // === Place boxes resembling a pack of cards in a circle centered at [0,0,0] === const CircularCardPack = ({ radius = 5, count = 10, cardSize = [1, 1.5, 0.1], // width, height, depth }: { radius?: number; // radius of the circle count?: number; // number of cards to place cardSize?: [number, number, number]; // size of the cards }) => { const cards = Array.from({ length: count }); // Generate an array return (<group> {cards.map((_, i) => { const angle = (i / count) * Math.PI * 2; // Angle on the circumference const x = radius * Math.cos(angle); // X coordinate const z = radius * Math.sin(angle); // Z coordinate const rotationY = -angle + Math.PI / 2; // Rotate the card so that it faces the center return ( <mesh key={i} position={[x, -1, z]} // カードの位置 rotation={[0, rotationY, 0]} // カードの向き ><boxGeometry args={cardSize} /><meshStandardMaterial color={`hsl(${(i / count) * 360}, 70%, 50%)`} /></mesh> ); })}</group> ); }; // === Main app component === const LoginScreen = () => { return ( <> {/* Three.js Canvas */}<Canvas camera={{ position: [0, 0, 10], fov: 50 }}><color attach="background" args={["white"]} /> {/* Lighting */}<ambientLight intensity={10} /><directionalLight position={[0, 5, 0]} intensity={15} /> {/* Camera operation */} <OrbitControls enablePan={false} enableZoom={false} minPolarAngle={Math.PI / 2} maxPolarAngle={Math.PI / 2} /> {/* Card pack object */}<CircularCardPack /> {/* Specular object */}<ReflectivePlane /></Canvas> {/* Login form created with HTML/CSS */} <div className="absolute top-1/2 left-1/2 transform -translate-x-1/2 -translate-y-1/2 bg-white/90 rounded-lg p-8 shadow-lg text-center"><h2 className="text-2xl font-semibold text-gray-700 mb-6"> Log in </h2><form><div className="mb-4"><input type="text" placeholder="ユーザー名" className="w-full px-4 py-2 border border-gray-300 rounded-md focus:outline-none focus:ring-2 focus:ring-blue-500" /></div><div className="mb-6"><input type="password" placeholder="パスワード" className="w-full px-4 py-2 border border-gray-300 rounded-md focus:outline-none focus:ring-2 focus:ring-blue-500" /></div> <button type="submit" className="w-full bg-blue-600 text-white py-2 px-4 rounded-md hover:bg-blue-700 transition" >Log in</button></form></div></> ); }; export default LoginScreen;
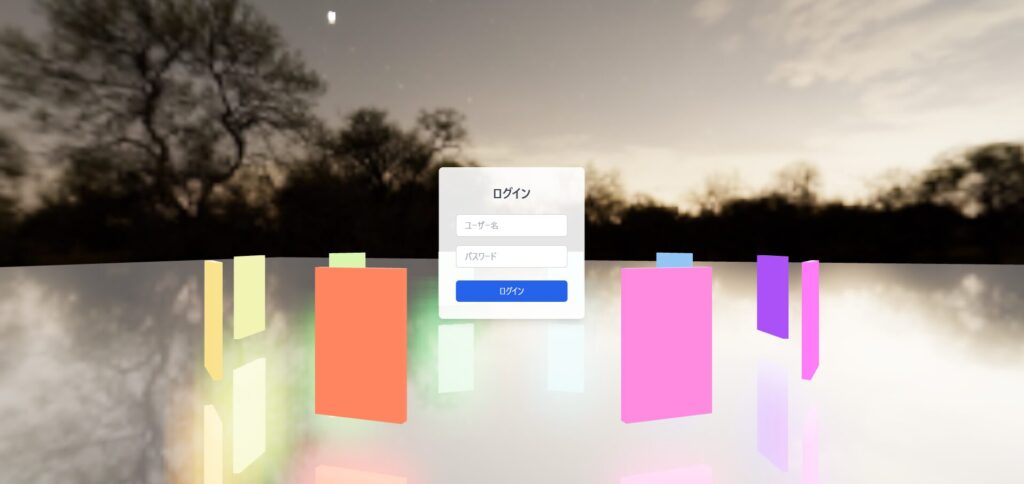
💡Added background!!
This is not necessary, but it looks a bit lonely, so I'll add a background.
I'll also use the standard React Three Drei background.
import { Canvas } from "@react-three/fiber"; import { Environment, MeshReflectorMaterial, OrbitControls, } from "@react-three/drei"; // === Specular Plane Component === const ReflectivePlane = () => { return ( <><mesh rotation-x={-Math.PI / 2} position={[0, -2, 0]}><planeGeometry args={[100, 100]} /> {/* Make the mirror bigger to cover the whole background */} <MeshReflectorMaterial blur={[200, 100]} mixBlur={0.7} mixStrength={1} mixContrast={1} resolution={1024} mirror={1} depthScale={0.1} reflectorOffset={0.2} /></mesh></> ); }; // === Place boxes resembling a pack of cards in a circle centered at [0,0,0] === const CircularCardPack = ({ radius = 5, count = 10, cardSize = [1, 1.5, 0.1], // width, height, depth }: { radius?: number; // radius of the circle count?: number; // number of cards to place cardSize?: [number, number, number]; // size of the cards }) => { const cards = Array.from({ length: count }); // Generate an array return (<group> {cards.map((_, i) => { const angle = (i / count) * Math.PI * 2; // Angle on the circumference const x = radius * Math.cos(angle); // X coordinate const z = radius * Math.sin(angle); // Z coordinate const rotationY = -angle + Math.PI / 2; // Rotate the card so that it faces the center return ( <mesh key={i} position={[x, -1, z]} // カードの位置 rotation={[0, rotationY, 0]} // カードの向き ><boxGeometry args={cardSize} /><meshStandardMaterial color={`hsl(${(i / count) * 360}, 70%, 50%)`} /></mesh> ); })}</group> ); }; // === Main app component === const LoginScreen = () => { return ( <> {/* Three.js Canvas */}<Canvas camera={{ position: [0, 0, 10], fov: 50 }}><color attach="background" args={["white"]} /> {/* Lighting */}<ambientLight intensity={10} /><directionalLight position={[0, 5, 0]} intensity={15} /> {/* Camera operation */} <OrbitControls enablePan={false} enableZoom={false} minPolarAngle={Math.PI / 2} maxPolarAngle={Math.PI / 2} /> {/* Card pack object */}<CircularCardPack /> {/* Specular object */}<ReflectivePlane /> {/* background */}<Environment preset="night" background /></Canvas> {/* Login form created with HTML/CSS */} <div className="absolute top-1/2 left-1/2 transform -translate-x-1/2 -translate-y-1/2 bg-white/90 rounded-lg p-8 shadow-lg text-center"><h2 className="text-2xl font-semibold text-gray-700 mb-6"> Log in </h2><form><div className="mb-4"><input type="text" placeholder="ユーザー名" className="w-full px-4 py-2 border border-gray-300 rounded-md focus:outline-none focus:ring-2 focus:ring-blue-500" /></div><div className="mb-6"><input type="password" placeholder="パスワード" className="w-full px-4 py-2 border border-gray-300 rounded-md focus:outline-none focus:ring-2 focus:ring-blue-500" /></div> <button type="submit" className="w-full bg-blue-600 text-white py-2 px-4 rounded-md hover:bg-blue-700 transition" >Log in</button></form></div></> ); }; export default LoginScreen;
lastly
This time, we'll be creating a PokePoke-style 3D background using standard objects! We've recreated the PokePoke pack selection screen using only standard objects from React Three Fiber and React Three Drei!
📌You can get a detailed understanding of the actual movements by watching the YouTube below!
📺 Watch the demo on YouTube : You can watch it from this link
📌The code I created this time is posted on GitHub, so please check it out too!
💾 GitHub Repository : Check the source code at this link
📌If you use Mesh and replace it with a 3D object, you can even get closer to your ideal!!
Meshy is a service that allows you to easily generate 3D objects using AI.
By using this, you can easily create your ideal 3D object, so I think you can get even closer to your ideal!
📺 Check Mesh : You can check it on the official page from this link
If you found this helpful, please subscribe to our channel!
We will continue to create lessons and works from TypeScript x React Three Fiber in the future!
We will be making an announcement on YouTube, so please subscribe to our YouTube channel and wait for notifications!
📺 Watch YouTube : You can watch it from this link
If you'd like to know what React Three Fiber can do, please refer to the following!
We have easy-to-use works available!
- I tried making bears walk with React x Three.js!
- I tried making an old man dance on React x Three.js!
- I tried to display a 3D model with React x Three.js!
- I made a 3D button that explodes in React x Three.js!
- React Three Fiber x Drei x Introduction to TypeScript! Poke Poke style 3D background made with standard objects!
![How to build a web app that automatically generates LPs in ChatGPT + Next.js [OpenAI API + Next.js + Tailwind CSS]](https://hack-lab-256.com/wp-content/uploads/2025/07/hack-lab-256-samnail-27-300x169.jpg)

![I tried creating a chatbot using the OpenAI API [Next.js + Tailwind CSS]](https://hack-lab-256.com/wp-content/uploads/2025/07/hack-lab-256-samnail-25-300x169.jpg)

![[For beginners] Introduction to React Three Fiber x Drei x TypeScript! Create pixel art and dynamic animations from images](https://hack-lab-256.com/wp-content/uploads/2025/02/hack-lab-256-samnail-16-300x169.jpg)
![[Complete explanation] Learn with React Three Fiber × TypeScript! Practical guide to Transform (Position, Rotation, Scale) for 3D Objects](https://hack-lab-256.com/wp-content/uploads/2025/02/hack-lab-256-samnail-15-300x169.png)