
![[For beginners] Introduction to React Three Fiber x Drei x TypeScript! Create pixel art and dynamic animations from images](https://hack-lab-256.com/wp-content/uploads/2025/02/hack-lab-256-samnail-16.jpg)
Recently, web application development has seen an increasing number of efforts to improve the user experience using graphics. With React Three Fiber (R3F), you can easily utilize Three.js features as a React component, making it easy for anyone to achieve attractive expressions.
we will explain in detail how to combine the wrapper library Drei and TypeScript, and implement pixel art automatically generated from images
📌 What's more, this implementation will not use any special 3D models, and will only use the basic geometry (Box, Plane, etc.) provided by Three.js as standard, to create retro yet sophisticated expressions unique to pixel art.
The step-by-step explanations are easy to understand even for beginners, and the content is so you can learn while actually working on your hands, so be sure to give it a try!
💡 Completed image
📺 Watch the demo on YouTube : You can watch it from this link
We will continue to create lessons and works from TypeScript x React Three Fiber in the future!
We will be making an announcement on YouTube, so please subscribe to our YouTube channel and wait for notifications!
📺 Watch YouTube : You can watch it from this link

If you'd like to know what React Three Fiber can do, please refer to the following!
We have easy-to-use works available!
- I tried making bears walk with React x Three.js!
- I tried making an old man dance on React x Three.js!
- I tried to display a 3D model with React x Three.js!
- I made a 3D button that explodes in React x Three.js!
- React Three Fiber x Drei x Introduction to TypeScript! Poke Poke style 3D background made with standard objects!
- The crisp typing feel that is unique to the capacitive non-contact system!
- REALFORCE's first wireless compatible device! Wired connection also available!
- Unlike the HHKB, the Japanese keyboard layout has no quirks and is easy for anyone to use!
- Equipped with a thumb wheel, horizontal scrolling is very easy!
- It also has excellent noise reduction performance, making it quiet and comfortable!
- Scrolling can be switched between high speed mode and ratchet mode!
🚀Introduction to technical elements: Tools and libraries to use in this project
You can change the tools and libraries you use to one that is easy to use for yourself, but this project will explain this assumption.
- VSCode
-
- A free code editor provided by Microsoft.
- It doesn't need to be VSCode, but there are many extensions, so I recommend it.
- It is also recommended to include ESLint or Prettier.
- Node.js
-
- A JavaScript built on Chrome's V8 JavaScript engine .
- You can run JavaScript code outside of your browser.
- This is explained based on the assumption that it is already installed, so please download it from
https://nodejs.org/ja *We recommend downloading the long-term stable version of LTS.
- Vite
-
- A build tool for modern web projects. It is characterized by its fast and lightweight
- The previously used "CRA (create-react-app)" is not listed on the official website, and has become an old technology.
- From now on, Vite should be the best option when creating apps with React.
- React
-
- This is a JavaScript library for building a UI (user interface). It was developed by Facebook and is still used in many web apps today.
- Three.js
-
- A JavaScript library for easily creating 3D graphics. It abstracts the complex operations of WebGL and enables intuitive 3D development.
- It's easy to create 3D graphics and is easier to use than direct WebGL operations.
- React Three Fiber
-
- This is a library that allows Three.js to be used with React. It combines React's component structure with Three.js' 3D engine.
- Three.js can be used in the React development style, allowing for intuitive and efficient development.
- React Three Drei
-
- A collection of useful utility components for React Three Fiber. It's easy to add the commonly used Three.js features.
- Complex Three.js features can be achieved with short code, reducing learning costs.
🚀 Make "pixel art" with React Three Fiber × Drei × TypeScript!
📌The environment construction is explained in this article
📌This time, we will not use any special 3D models, but only use standard objects that are available in React Three Fiber and React Three Drei.
If you would like to learn more about standard objects, please also refer to this article
Please check GitHub for the complete source code you created this time.
💾 GitHub Repository : Check the source code at this link

💡Create the UI for the Control Panel!!
First, the Control Panel creates a UI for users to upload images, set pixel sizes, and operate various animations.
// Import React and Three.js related libraries import { useState } from "react"; // Constant setting: const DEFAULT_PIXEL_SIZE = 64; // - DEFAULT_PIXEL_SIZE: Default size (pixel count) when shrinking an image // ==== // App components: // - Central management of UI (image loading, pixel size setting, animation operations) // - Place two Canvas (pixel scenes and background scenes) // ==== const App = () => { // State Management: const [tempPixelSize, setTempPixelSize] = useState<number> (DEFAULT_PIXEL_SIZE); // - tempPixelSize: Temporary pixel size on input form return (<div style={{ width: "100vw", height: "100vh" }}> {/* ------------------------------------------------------------------------------------------------------------------------------------------------------------------------------------------------------------------------------------------------------------<div className="absolute top-4 left-4 bg-white shadow-lg p-4 rounded-lg z-10 w-64 space-y-4"> {/* Select image file */} <input type="file" accept="image/*" className="w-full border border-gray-300 rounded-md px-3 py-2 text-sm focus:ring-2 focus:ring-blue-500 focus:outline-none" /> {/* Pixel Size Input Field */}<div className="flex items-center space-x-2"> <label className="text-sm text-gray-700">Pixel Size:</label><input type="number" value={tempPixelSize} onChange={(e) => setTempPixelSize(Number(e.target.value))} min="1" max="128" className="w-16 border border-gray-300 rounded-md px-2 py-1 text-sm focus:ring-2 focus:ring-blue-500 focus:outline-none" /></div> {/* Redisplay button */} <button className="w-full bg-green-600 text-white py-2 px-4 rounded-md hover:bg-green-700 transition">Redisplay</button> {/* Animation control button */}<div className="flex flex-wrap gap-2"><button className="flex-1 bg-blue-600 text-white py-2 px-4 rounded-md hover:bg-blue-700 transition">Explosion</button><button className="flex-1 bg-blue-600 text-white py-2 px-4 rounded-md hover:bg-blue-700 transition">Wave</button></div></div></div> ); }; export default App;
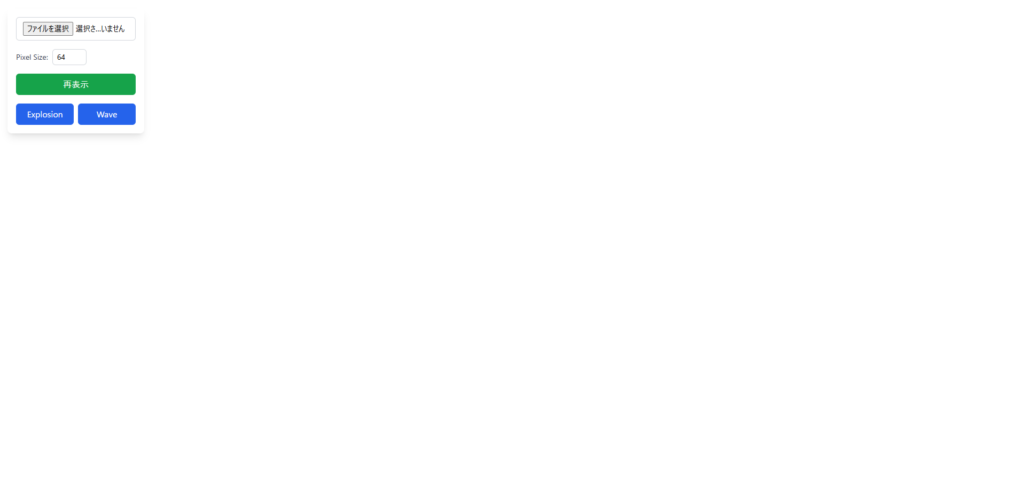
This time, I want to create something simple, so I'll leave it like this as a UI.
Explosion and Wave are used to animate pixel art.
I think the advantage of creating pixel art with React Three Fiber is that you can add animation to pixel art.
💡Create a control panel event!!
I'll put the event into the UI I just created.
handleFileChange
handleFileChange is the process when an image is selected.
Selecting an image will update the pixel size and then update the image source.
// Import React and Three.js related libraries import { useState } from "react"; // Constant setting: const DEFAULT_PIXEL_SIZE = 64; // - DEFAULT_PIXEL_SIZE: Default size (pixel count) when shrinking an image // ==== // App components: // - Central management of UI (image loading, pixel size setting, animation operations) // - Place two Canvas (pixel scenes and background scenes) // ==== const App = () => { // State Management: const [tempPixelSize, setTempPixelSize] = useState<number> (DEFAULT_PIXEL_SIZE); // - tempPixelSize: Temporary pixel size on input form const [pixelSize, setPixelSize] = useState<number> (tempPixelSize); // - tempPixelSize: Temporary pixel size on input form const [imageSrc, setImageSrc] = useState<string | null> (null); // - imageSrc: Data URL of imported image // ---- // What to do when an image file is selected: // - Load the file, convert it to a Data URL and set it in imageSrc // -----------------------------------------------------------------------------------------------------------------------------------------------------------------------------------------------------------------------------------------------------------------------------------------------------------------------------------------------------------------------------------------------------------------------------------------------------------------------<HTMLInputElement> ) => { const file = e.target.files?.[0]; if (!file) return; const reader = new FileReader(); reader.onload = (ev) => { const url = ev.target?.result; if (typeof url !== "string") return; // Update the pixel size and then set the image source setPixelSize(tempPixelSize); setImageSrc(url); }; reader.readAsDataURL(file); }; return (<div style={{ width: "100vw", height: "100vh" }}> {/* ------------------------------------------------------------------------------------------------------------------------------------------------------------------------------------------------------------------------------------------------------------<div className="absolute top-4 left-4 bg-white shadow-lg p-4 rounded-lg z-10 w-64 space-y-4"> {/* Select image file */} <input type="file" accept="image/*" onChange={handleFileChange} className="w-full border border-gray-300 rounded-md px-3 py-2 text-sm focus:ring-2 focus:ring-blue-500 focus:outline-none" /> {/* Pixel Size Input Field */} ...</div></div> ); }; export default App;
reloadImage
Next is the redisplay button event.
This is used when updating the pixel size and re-rendering to the pixel size.
This is a form that reflects tempPixelSize in pixelSize.
// Import React and Three.js related libraries import { useState } from "react"; // Constant setting: const DEFAULT_PIXEL_SIZE = 64; // - DEFAULT_PIXEL_SIZE: Default size (pixel count) when shrinking an image // ==== // App components: // - Central management of UI (image loading, pixel size setting, animation operations) // - Place two Canvas (pixel scenes and background scenes) // ==== const App = () => { // State Management: const [tempPixelSize, setTempPixelSize] = useState<number> (DEFAULT_PIXEL_SIZE); // - tempPixelSize: Temporary pixel size on input form const [pixelSize, setPixelSize] = useState<number> (tempPixelSize); // - tempPixelSize: Temporary pixel size on input form const [imageSrc, setImageSrc] = useState<string | null> (null); // - imageSrc: Data URL of imported image // ---- // What to do when an image file is selected: // - Load the file, convert it to a Data URL and set it in imageSrc // -----------------------------------------------------------------------------------------------------------------------------------------------------------------------------------------------------------------------------------------------------------------------------------------------------------------------------------------------------------------------------------------------------------------------------------------------------------------------<HTMLInputElement> ) => { ... }; // ----- // Processing when pressing the "Review" button: // - Redraw the image by reflecting the value of tempPixelSize in pixelSize // -----------------------------------------------------------------------------------------------------------------------------------------------------------------------------------------------------------------------------------------------------------------------------------------------------------------------------------------------------------------------------------------------------------------------------------------------------------------------<div style={{ width: "100vw", height: "100vh" }}> {/* ------------------------------------------------------------------------------------------------------------------------------------------------------------------------------------------------------------------------------------------------------------<div className="absolute top-4 left-4 bg-white shadow-lg p-4 rounded-lg z-10 w-64 space-y-4"> ... {/* Redisplay button */} <button className="w-full bg-green-600 text-white py-2 px-4 rounded-md hover:bg-green-700 transition" onClick={reloadImage} >Redisplay</button> {/* Animation control button */}<div className="flex flex-wrap gap-2"><button className="flex-1 bg-blue-600 text-white py-2 px-4 rounded-md hover:bg-blue-700 transition">Explosion</button><button className="flex-1 bg-blue-600 text-white py-2 px-4 rounded-md hover:bg-blue-700 transition">Wave</button></div></div></div> ); }; export default App;
controlExplosionAnimation and controlWaveAnimation
The animation control button event will look like this:
Since I have set ANIMATION_TIME as a constant, I will animate in that number of seconds, undo in the same number of seconds, and return to default mode.
// Import React and Three.js-related libraries import { useState } from "react"; // Constant setting: const DEFAULT_PIXEL_SIZE = 64; // - DEFAULT_PIXEL_SIZE: Default size (in pixels) when shrinking the image const ANIMATION_TIME = 3; // - ANIMATION_TIME: Time (in seconds) to animation // ==== // App Components: // - Central UI Management (Image Loading, Pixel Sizing, Animation Operations) // - Arrange 2 Canvas (pixel Scene and Background Scene) // ===== const App = () => { // State Management: const [tempPixelSize, setTempPixelSize] = useState<number> (DEFAULT_PIXEL_SIZE); // - tempPixelSize: Temporary pixel size on input form const [pixelSize, setPixelSize] = useState<number> (tempPixelSize); // - tempPixelSize: Temporary pixel size on input form const [imageSrc, setImageSrc] = useState<string | null> (null); // - imageSrc: Data URL of imported image const [animation, setAnimation] = useState("default"); // - animation: Current animation mode // ---- // What to do when an image file is selected: // - Load the file, convert it to a Data URL and set it in imageSrc // ------------------------------------------------------------------------------------------------------------------------------------------------------------------------------------------------------------------------------------------------------------------------------------------------------------------------------------------------------------------------------------------------------------------------------------ React.ChangeEvent<HTMLInputElement> ) => { ... }; // ----- // Processing when pressing the "Review" button: // - Repaints the image by reflecting the value of tempPixelSize in pixelSize // --------------------------------------------------------------------------------------------------------------------------------------------------------------------------------------------------------------------------------------------------------------------------------------------------------------------------------------------------------------------------------------------------------------------------------------------------------------------- Explosion animation control: // - Start, end, and undo the explosion sequentially with timeout // ------------------------------------------------------------------------------------------------------------------------------------------------------------------------------------------------------------------------------------------------------------------------------------------------------------------------------------------------------------------------------------------------------------------------------------------------------------------------------------------------ setAnimation("default"); }, ANIMATION_TIME * 2000); }; // ----- // Control Wave animation: // - Start, end, and undo waves sequentially execute timeout // ----------------------------------------------------------------------------------------------------------------------------------------------------------------------------------------------------------------------------------------------------------------------------------------------------------------------------------------------------------------------------------------------------------------------------------------------------------- setAnimation("wave_end"); }, ANIMATION_TIME * 1000); setTimeout(() => { setAnimation("default"); }, ANIMATION_TIME * 2000); }; return (<div style={{ width: "100vw", height: "100vh" }}> {/* ------------------------------------------------------------------------------------------------------------------------------------------------------------------------------------------------------------------------------------------------------------<div className="absolute top-4 left-4 bg-white shadow-lg p-4 rounded-lg z-10 w-64 space-y-4"> ... {/* Animation control button */}<div className="flex flex-wrap gap-2"> <button className="flex-1 bg-blue-600 text-white py-2 px-4 rounded-md hover:bg-blue-700 transition" onClick={controlExplosionAnimation} >Explosion</button> <button className="flex-1 bg-blue-600 text-white py-2 px-4 rounded-md hover:bg-blue-700 transition" onClick={controlWaveAnimation} >Wave</button></div></div></div> ); }; export default App;
💡The current overall source is here
// Import React and Three.js-related libraries import { useState } from "react"; // Constant setting: const DEFAULT_PIXEL_SIZE = 64; // - DEFAULT_PIXEL_SIZE: Default size (in pixels) when shrinking the image const ANIMATION_TIME = 3; // - ANIMATION_TIME: Time (in seconds) to animation // ==== // App Components: // - Central UI Management (Image Loading, Pixel Sizing, Animation Operations) // - Arrange 2 Canvas (pixel Scene and Background Scene) // ===== const App = () => { // State Management: const [tempPixelSize, setTempPixelSize] = useState<number> (DEFAULT_PIXEL_SIZE); // - tempPixelSize: Temporary pixel size on input form const [pixelSize, setPixelSize] = useState<number> (tempPixelSize); // - tempPixelSize: Temporary pixel size on input form const [imageSrc, setImageSrc] = useState<string | null> (null); // - imageSrc: Data URL of imported image const [animation, setAnimation] = useState("default"); // - animation: Current animation mode // ---- // What to do when an image file is selected: // - Load the file, convert it to a Data URL and set it in imageSrc // ------------------------------------------------------------------------------------------------------------------------------------------------------------------------------------------------------------------------------------------------------------------------------------------------------------------------------------------------------------------------------------------------------------------------------------ React.ChangeEvent<HTMLInputElement> ) => { const file = e.target.files?.[0]; if (!file) return; const reader = new FileReader(); reader.onload = (ev) => { const url = ev.target?.result; if (typeof url !== "string") return; // Update the pixel size once and then set the image source setPixelSize(tempPixelSize); setImageSrc(url); }; reader.readAsDataURL(file); }; // ----- // Action when pressing the "Review" button: // - Redraw the image by reflecting the value of tempPixelSize in pixelSize // ------------------------------------------------------------------------------------------------------------------------------------------------------------------------------------------------------------------------------------------------------------------------------------------------------------------------------------------------------------------------------------------------------------------------------------------------------------------------------------------ -------------------------------------------------------------------------------------------------------------------------------------------------------------------------------------------------------------------------------------------------------------------------------------------------------------------------------------------------------------------------------------------------------------------------------------------------------------------------------------------------------------------------------- ---- // Wave animation control: // - Start, end, and undo waves sequentially with timeout // ------------------------------------------------------------------------------------------------------------------------------------------------------------------------------------------------------------------------------------------------------------------------------------------------------------------------------------------------------------------------------------------------------------------------------------------------------------------------------------------------ => { setAnimation("default"); }, ANIMATION_TIME * 2000); }; return (<div style={{ width: "100vw", height: "100vh" }}> {/* ------------------------------------------------------------------------------------------------------------------------------------------------------------------------------------------------------------------------------------------------------------<div className="absolute top-4 left-4 bg-white shadow-lg p-4 rounded-lg z-10 w-64 space-y-4"> {/* Select image file */} <input type="file" accept="image/*" onChange={handleFileChange} className="w-full border border-gray-300 rounded-md px-3 py-2 text-sm focus:ring-2 focus:ring-blue-500 focus:outline-none" /> {/* Pixel Size Input Field */}<div className="flex items-center space-x-2"> <label className="text-sm text-gray-700">Pixel Size:</label><input type="number" value={tempPixelSize} onChange={(e) => setTempPixelSize(Number(e.target.value))} min="1" max="128" className="w-16 border border-gray-300 rounded-md px-2 py-1 text-sm focus:ring-2 focus:ring-blue-500 focus:outline-none" /></div> {/* Redisplay button */} <button className="w-full bg-green-600 text-white py-2 px-4 rounded-md hover:bg-green-700 transition" onClick={reloadImage} >Redisplay</button> {/* Animation control button */}<div className="flex flex-wrap gap-2"> <button className="flex-1 bg-blue-600 text-white py-2 px-4 rounded-md hover:bg-blue-700 transition" onClick={controlExplosionAnimation} >Explosion</button> <button className="flex-1 bg-blue-600 text-white py-2 px-4 rounded-md hover:bg-blue-700 transition" onClick={controlWaveAnimation} >Wave</button></div></div></div> ); }; export default App;
💡 Create pixel data from images!!
This time, we will load the image, generate the pixel data, and display the screen.
So let's create a process that generates pixel data from an image.
*For the purposes of explanation, files etc. are not separate. I think it would be better to separate files at the component level to be more readable.
Creating a createPixelData function
// Import React and Three.js-related libraries import { useState } from "react"; import * as THREE from "three"; // ----- // PixelInfo type: Manage position (x, y, z) and color (THREE.Color) of each pixel // -------------------------------------------------------------------------------------------------------------------------------------------------------------------------------------------------------------------------------------------------------------------------------------------------------------------------------------------------------------------------------------------------------------------------------------------- PixelInfo = { x: number; y: number; z: number; color: THREE.Color; }; // Constant setting: const DEFAULT_PIXEL_SIZE = 64; // - DEFAULT_PIXEL_SIZE: Default size (in pixels) when shrinking the image const ANIMATION_TIME = 3; // - ANIMATION_TIME: Time taken to animation (seconds) // ===== // App Components: // - Central UI Management (Image Loading, Pixel Sizing, Animation Operations) // - Arrange two Canvas (pixel scene and background scene) // ===== const App = () => { ... }; export default App; // ===== // / createPixelData function: // - Get pixel data from the specified image using Canvas and convert it to an array of type PixelInfo // ===== const createPixelData = ( img: HTMLImageElement, targetWidth: number, targetHeight: number ): PixelInfo[] => { // Create a Canvas element and set it to the specified size const canvas = document.createElement("canvas"); canvas.width = targetWidth; canvas.height = targetHeight; const ctx = canvas.getContext("2d"); if (!ctx) throw new Error("No 2D context available"); // Draw an image on Canvas and get pixel information ctx.drawImage(img, 0, 0, targetWidth, targetHeight); const imgData = ctx.getImageData(0, 0, targetWidth, targetHeight); const data = imgData.data; const result: PixelInfo[] = []; let idx = 0; // For each pixel in the image, get the RGBA value and convert it to PixelInfo for (let y = 0; y < targetHeight; y++) { for (let x = 0; x < targetWidth; x++) { const r = data[idx], g = data[idx + 1], b = data[idx + 2], a = data[idx + 3]; idx += 4; // Ignore low transparency pixels (if a < 30) if (a < 30) continue; result.push({ // Adjust x,y coordinates so that the center of the image is the origin x: x - targetWidth / 2, y: -y + targetHeight / 2, z: 0, // Create THREE.Color by converting the RGB value to the range 0 to 1 color: new THREE.Color(r / 255, g / 255, b / 255), }); } } return result; };
The process is as follows: The process is a bit complicated, but I think what I'm doing is simple.
- Get the image and pixel size
- Draw the image on Canvas to get pixel information
- Gets RGBA information for pixels and stores it in PixelInfo
Create a call part (useEffect)
Since pixel data is updated when the image or pixel size changes, useEffect() to monitor [pixelSize, imageSrc].
// Import React and Three.js-related libraries import { useState, useEffect } from "react"; import * as THREE from "three"; // ----- // PixelInfo type: Manage the position (x, y, z) and color (THREE.Color) of each pixel // -------------------------------------------------------------------------------------------------------------------------------------------------------------------------------------------------------------------------------------------------------------------------------------------------------------------------------------------------------------------------------------------------------------------------------------- type PixelInfo = { x: number; y: number; z: number; color: THREE.Color; }; // Constant setting: const DEFAULT_PIXEL_SIZE = 64; // - DEFAULT_PIXEL_SIZE: Default size (in pixels) when shrinking the image const ANIMATION_TIME = 3; // - ANIMATION_TIME: Time taken to animation (seconds) // ===== // App Components: // - Central UI Management (Image Loading, Pixel Sizing, Animation Operations) // - Place two Canvas (pixel scene and background scene) // ===== const App = () => { // State Management: const [pixels, setPixels] = useState<PixelInfo[] | null> (null); // - pixels: Array of pixel information generated from the image const [fileChangeCount, setFileChangeCount] = useState<number> (0); // - fileChangeCount: Number of changes to the image (used to trigger a reload) const [tempPixelSize, setTempPixelSize] = useState<number> (DEFAULT_PIXEL_SIZE); // - tempPixelSize: Temporary pixel size on input form const [pixelSize, setPixelSize] = useState<number> (tempPixelSize); // - tempPixelSize: Temporary pixel size on input form const [imageSrc, setImageSrc] = useState<string | null> (null); // - imageSrc: Data URL of imported image const [animation, setAnimation] = useState("default"); // - animation: Current animation mode ... // ---- // Generate pixel data from the image when the image or pixelSize changes // -------------------------------------------------------------------------------------------------------------------------------------------------------------------------------------------------------------------------------------------------------------------------------------------------------------------------------------------------------------------------------------------------------------------------------------------------- Update fileChangeCount as a trigger when the image changes setFileChangeCount((prev) => prev + 1); // Load new image and generate pixel data with onload event const img = new Image(); img.onload = () => { const pixel = createPixelData(img, pixelSize, pixelSize); setPixels(pix); }; img.src = imageSrc; }, [pixelSize, imageSrc]); return (<div style={{ width: "100vw", height: "100vh" }}> {/* ------------------------------------------------------------------------------------------------------------------------------------------------------------------------------------------------------------------------------------------------------------</div> ); }; export default App; // ==== // createPixelData function: // - Get pixel data from the specified image using Canvas and convert it to an array of type PixelInfo // ===== const createPixelData = ( img: HTMLImageElement, targetWidth: number, targetHeight: number ): PixelInfo[] => { // Create a Canvas element and set it to the specified size const canvas = document.createElement("canvas"); canvas.width = targetWidth; canvas.height = targetHeight; const ctx = canvas.getContext("2d"); if (!ctx) throw new Error("No 2D context available"); // Draw the image on Canvas and get pixel information ctx.drawImage(img, 0, 0, targetWidth, targetHeight); const imgData = ctx.getImageData(0, 0, targetWidth, targetHeight); const data = imgData.data; const result: PixelInfo[] = []; let idx = 0; // For each pixel in the image, get the RGBA value and convert it to PixelInfo for (let y = 0; y < targetHeight; y++) { for (let x = 0; x < targetWidth; x++) { const r = data[idx], g = data[idx + 1], b = data[idx + 2], a = data[idx + 3]; idx += 4; // Ignore pixels with low transparency (a < 30) if (a < 30) continues; result.push({ // Adjust x,y coordinates, so the center of the image is the origin x: x - targetWidth / 2, y: -y + targetHeight / 2, z: 0, // Create THREE.Color by converting the RGB value to the range 0 to 1 color: new THREE.Color(r / 255, g / 255, b / 255), }); } } return result; };
💡A Canvas is available for pixel display!!
First place the Canvas and prepare your camera, lighting, etc.
// Import React and Three.js-related libraries import { OrbitControls } from "@react-three/drei"; import { Canvas } from "@react-three/fiber"; import { useState, useEffect, useRef } from "react"; import * as THREE from "three"; // ----- // PixelInfo Type: Manage the position (x, y, z) and color (THREE.Color) of each pixel // ------------------------------------------------------------------------------------------------------------------------------------------------------------------------------------------------------------------------------------------------------------------------------------------------------------------------------------------------------------------------------------------------------------------------------------------------------------------------------------------------------------------------------ Time taken in seconds to animation // ==== // App components: // - Central UI management (image loading, pixel sizing, animation operations) // - Arrange two Canvas (pixel scene and background scene) // ===== const App = () => { ... return (<div style={{ width: "100vw", height: "100vh" }}> {/* ------------------------------------------------------------------------------------------------------------------------------------------------------------------------------------------------------------------------------------------------------------ <div className="absolute top-0 left-0 w-full h-full z-[1]"><Canvas camera={{ far: 5000, position: [0, 0, 100] }}> {/* Basic lighting settings */}<ambientLight intensity={1} /><directionalLight position={[100, 200, 100]} intensity={1} /> {/* OrbitControls that allow you to rotate the scene with mouse operation */}<OrbitControls /> {/* Render PixelGrid only if pixel data is present */} )}</Canvas></div></div> ); }; export default App; // ==== // createPixelData function: // - Get pixel data from the specified image using Canvas and convert it to an array of type PixelInfo // ===== const createPixelData = ( img: HTMLImageElement, targetWidth: number, targetHeight: number ): PixelInfo[] => { ... return result; };
💡 Display pixels!!
// Import React and Three.js-related libraries import { OrbitControls } from "@react-three/drei"; import { Canvas } from "@react-three/fiber"; import { useState, useEffect, useRef } from "react"; import * as THREE from "three"; // ----- // PixelInfo Type: Manage the position (x, y, z) and color (THREE.Color) of each pixel // ------------------------------------------------------------------------------------------------------------------------------------------------------------------------------------------------------------------------------------------------------------------------------------------------------------------------------------------------------------------------------------------------------------------------------------------------------------------------------------------------------------------------------ Time taken in seconds to animation // ==== // PixelGrid Component: // - Renders groups of pixel data, and // - Controls display animation (gradual enlargement) and moving animation (explosion/wave) // ==== type PixelGridProps = { pixelSize: number; pixels: PixelInfo[]; animation: string; fileChangeCount: number; }; const PixelGrid = ({ pixelSize, pixels, animation, fileChangeCount, }: PixelGridProps) => { // A reference to the Group object in Three.js. Used to group all pixels const groupRef = useRef<THREE.Group> (null); // Place each PixelBox component in a group managed by groupRef to render return (<group ref={groupRef}> {pixels.map((pixel, i) => (<PixelBox key={i} pixel={pixel} scale={1} /> ))}</group> ); }; // ==== // PixelBox Component: // - A component for drawing a single pixel (box) // ==== type PixelBoxProps = { pixel: PixelInfo; scale: number; }; const PixelBox = ({ pixel, scale }: PixelBoxProps) => { // mesh: Use box geometry and material with location and scale return ( <mesh position={[pixel.x, pixel.y, pixel.z]} scale={[scale, scale, scale]}><boxGeometry args={[1, 1, 1]} /><meshStandardMaterial color={pixel.color} /></mesh> ); }; // ==== // App Component: // - Central UI Management (Image Loading, Pixel Sizing, Animation Operations) // - Arrange two Canvas (pixel Scene and Background Scene) // ===== const App = () => { ... return (<div style={{ width: "100vw", height: "100vh" }}> {/* ------------------------------------------------------------------------------------------------------------------------------------------------------------------------------------------------------------------------------------------------------------ <div className="absolute top-0 left-0 w-full h-full z-[1]"><Canvas camera={{ far: 5000, position: [0, 0, 100] }}> {/* Basic lighting settings */}<ambientLight intensity={1} /><directionalLight position={[100, 200, 100]} intensity={1} /> {/* OrbitControls that allow you to rotate the scene with mouse operation */}<OrbitControls /> {/* Render PixelGrid only if pixel data is present */} {pixels && ( <PixelGrid pixelSize={pixelSize} pixels={pixels} animation={animation} fileChangeCount={fileChangeCount} /> )}</Canvas></div></div> ); }; export default App; // ==== // createPixelData function: // - Get pixel data from the specified image using Canvas and convert it to an array of type PixelInfo // ===== const createPixelData = ( img: HTMLImageElement, targetWidth: number, targetHeight: number ): PixelInfo[] => { ... };
I think the pixel art is displayed in this way.
This is fine, but since I'm making it with React Three Fiber, I'll be adding animations and more.
💡 Added display animation
I'll try to recreate the display animation as it is gradually drawn.
It's an image of gradually increasing the pixel scale from 0 to 1.
// Import React and Three.js-related libraries import { OrbitControls } from "@react-three/drei"; import { Canvas, useFrame } from "@react-three/fiber"; import { useState, useEffect, useRef } from "react"; import * as THREE from "three"; // ----- // PixelInfo type: Position of each pixel (x, y, z) and color (THREE.Color) // ----------------------------------------------------------------------------------------------------------------------------------------------------------------------------------------------------------------------------------------------------------------------------------------------------------------------------------------------------------------------------------------------------------------------------------------------------------------------------------------------------------------- ANIMATION_TIME: Time (in seconds) to animation // ==== // PixelGrid Component: // - Renders groups of pixel data, and // - Controls display animation (gradual enlargement) and moving animation (explosion/wave) // ==== type PixelGridProps = { pixelSize: number; pixels: PixelInfo[]; animation: string; fileChangeCount: number; }; const PixelGrid = ({ pixelSize, pixels, animation, fileChangeCount, }: PixelGridProps) => { // A reference to the Group object in Three.js. Used to group all pixels const groupRef = useRef<THREE.Group> (null); // ---- // Display animation: Processing of pixels being displayed in stages // ---- // Manage scale state for each pixel (the initial state is all 0 = hidden) const [scales, setScales] = useState<number[]> (Array(pixels.length).fill(0)); // scaleProgressRef: Keeps display progress (accumulated time) for each batch const scaleProgressRef = useRef(0); // batchIndexRef: Manages the currently displayed batch number const batchIndexRef = useRef(0); // UseFrame to update each frame and display pixels step by step useFrame((_, delta) => { // If all batches are displayed, no further processing is performed if (batchIndexRef.current > pixels.length / pixelSize) return; // Adds the time since the previous frame scaleProgressRef.current += delta; // Calculates the time threshold to display the current batch const threshold = batchIndexRef.current * (ANIMATION_TIME / (pixels.length / pixelSize)); // When the elapsed time exceeds the threshold, start displaying pixels for the next batch if (scaleProgressRef.current > threshold) { // Create a copy of the current scale state const newScales = [...scales]; // Calculates the index range of pixels belonging to the current batch const startIndex = batchIndexRef.current * pixelSize; const endIndex = Math.min(startIndex + pixelSize, pixels.length); // Display the corresponding pixel scale with 1 for (let i = startIndex; i < endIndex; i++) { newScales[i] = 1; } // Set the updated scale state setScales(newScales); // Proceed to the next batch batchIndexRef.current += 1; } }); // Place each PixelBox component in a group managed by groupRef and render it (<group ref={groupRef}> {pixels.map((pixel, i) => (<PixelBox key={i} pixel={pixel} scale={scales[i]} /> ))}</group> ); }; // ==== // PixelBox Component: // - A component for drawing a single pixel (box) // ==== type PixelBoxProps = { pixel: PixelInfo; scale: number; }; const PixelBox = ({ pixel, scale }: PixelBoxProps) => { // mesh: Use box geometry and material with location and scale return ( <mesh position={[pixel.x, pixel.y, pixel.z]} scale={[scale, scale, scale]}><boxGeometry args={[1, 1, 1]} /><meshStandardMaterial color={pixel.color} /></mesh> ); }; // ==== // App Component: // - Central UI Management (Image Loading, Pixel Sizing, Animation Operations) // - Arrange two Canvas (pixel Scene and Background Scene) // ===== const App = () => { ... return (<div style={{ width: "100vw", height: "100vh" }}> {/* ------------------------------------------------------------------------------------------------------------------------------------------------------------------------------------------------------------------------------------------------------------ <div className="absolute top-0 left-0 w-full h-full z-[1]"><Canvas camera={{ far: 5000, position: [0, 0, 100] }}> {/* Basic lighting settings */}<ambientLight intensity={1} /><directionalLight position={[100, 200, 100]} intensity={1} /> {/* OrbitControls that allow you to rotate the scene with mouse operation */}<OrbitControls /> {/* Render PixelGrid only if pixel data is present */} {pixels && ( <PixelGrid pixelSize={pixelSize} pixels={pixels} animation={animation} fileChangeCount={fileChangeCount} /> )}</Canvas></div></div> ); }; export default App; // ==== // createPixelData function: // - Get pixel data from the specified image using Canvas and convert it to an array of type PixelInfo // ===== const createPixelData = ( img: HTMLImageElement, targetWidth: number, targetHeight: number ): PixelInfo[] => { ... };
💡 Supports image reloading!!
If this continues, the display animation will not work when the image is reloaded and will be displayed immediately.
Add useEffect to reset the state when reloading an image or changing the pixel size.
// Import React and Three.js-related libraries import { OrbitControls } from "@react-three/drei"; import { Canvas, useFrame } from "@react-three/fiber"; import { useState, useEffect, useRef } from "react"; import * as THREE from "three"; // ----- // PixelInfo type: Position of each pixel (x, y, z) and color (THREE.Color) // ----------------------------------------------------------------------------------------------------------------------------------------------------------------------------------------------------------------------------------------------------------------------------------------------------------------------------------------------------------------------------------------------------------------------------------------------------------------------------------------------------------------- ANIMATION_TIME: Time (in seconds) to animation // ==== // PixelGrid Component: // - Renders groups of pixel data, and // - Controls display animation (gradual enlargement) and moving animation (explosion/wave) // ==== type PixelGridProps = { pixelSize: number; pixels: PixelInfo[]; animation: string; fileChangeCount: number; }; const PixelGrid = ({ pixelSize, pixels, animation, fileChangeCount, }: PixelGridProps) => { // A reference to the Group object in Three.js. Used to group all pixels const groupRef = useRef<THREE.Group> (null); // ---- // Display animation: Processing of pixels being displayed in stages // ---- // Manage scale state for each pixel (the initial state is all 0 = hidden) const [scales, setScales] = useState<number[]> (Array(pixels.length).fill(0)); // scaleProgressRef: Keeps display progress (accumulated time) for each batch const scaleProgressRef = useRef(0); // batchIndexRef: manages the currently displayed batch number const batchIndexRef = useRef(0); // A reference to determine if an image file has been changed const prevFileChangeCountRef = useRef(fileChangeCount); // Resets the display state (scale) of all pixels when reloading an image useEffect(() => { if (fileChangeCount !== prevFileChangeCountRef.current) { // Reset the scale to 0 to hide all pixels setScales(Array(pixels.length).fill(0)); // Initialize accumulated time and batch index for batch display scaleProgressRef.current = 0; batchIndexRef.current = 0; // Update the number of changes prevFileChangeCountRef.current = fileChangeCount; } }, [fileChangeCount, pixels.length, pixelSize]); // UseFrame to update each frame, and display pixels step by step useFrame delta) => { // No further processing is performed if all batches are visible if (batchIndexRef.current > pixels.length / pixelSize) return; // Add time since the previous frame scaleProgressRef.current += delta; // Calculate the time threshold to display the current batch const threshold = batchIndexRef.current * (ANIMATION_TIME / (pixels.length / pixelSize)); // When the elapsed time exceeds the threshold, start displaying pixels for the next batch if (scaleProgressRef.current > threshold) { // Create a copy of the current scale state const newScales = [...scales]; // Calculate the index range of pixels belonging to the current batch const startIndex = batchIndexRef.current * pixelSize; const endIndex = Math.min(startIndex + pixelSize, pixels.length); // Display the corresponding pixel scale to 1 for (let i = startIndex; i < endIndex; i++) { newScales[i] = 1; } // Set the updated scale state setScales(newScales); // Proceed to the next batchIndexRef.current += 1; } }); // Each PixelBox component is placed in a group managed by groupRef to render return (<group ref={groupRef}> {pixels.map((pixel, i) => (<PixelBox key={i} pixel={pixel} scale={scales[i]} /> ))}</group> ); }; // ==== // PixelBox Component: // - A component for drawing a single pixel (box) // ==== type PixelBoxProps = { pixel: PixelInfo; scale: number; }; const PixelBox = ({ pixel, scale }: PixelBoxProps) => { // mesh: Use box geometry and material with location and scale return ( <mesh position={[pixel.x, pixel.y, pixel.z]} scale={[scale, scale, scale]}><boxGeometry args={[1, 1, 1]} /><meshStandardMaterial color={pixel.color} /></mesh> ); }; // ==== // App Component: // - Central UI Management (Image Loading, Pixel Sizing, Animation Operations) // - Arrange two Canvas (pixel Scene and Background Scene) // ===== const App = () => { ... return (<div style={{ width: "100vw", height: "100vh" }}> {/* ------------------------------------------------------------------------------------------------------------------------------------------------------------------------------------------------------------------------------------------------------------ <div className="absolute top-0 left-0 w-full h-full z-[1]"><Canvas camera={{ far: 5000, position: [0, 0, 100] }}> {/* Basic lighting settings */}<ambientLight intensity={1} /><directionalLight position={[100, 200, 100]} intensity={1} /> {/* OrbitControls that allow you to rotate the scene with mouse operation */}<OrbitControls /> {/* Render PixelGrid only if pixel data is present */} {pixels && ( <PixelGrid pixelSize={pixelSize} pixels={pixels} animation={animation} fileChangeCount={fileChangeCount} /> )}</Canvas></div></div> ); }; export default App; // ==== // createPixelData function: // - Get pixel data from the specified image using Canvas and convert it to an array of type PixelInfo // ===== const createPixelData = ( img: HTMLImageElement, targetWidth: number, targetHeight: number ): PixelInfo[] => { ... };
Now you can see that it works correctly even if you reload the image.
pixelSize is also monitored, so even if you update the Pixel Size, it will be displayed again.
💡Added explosion animation!!
Next, add an explosion animation.
What we're doing is pretty simple: first calculate random coordinates and then use useFrame to move them to that position. When you go back to normal, you can do the opposite.
// Import React and Three.js-related libraries import { OrbitControls } from "@react-three/drei"; import { Canvas, useFrame } from "@react-three/fiber"; import { useState, useEffect, useRef } from "react"; import * as THREE from "three"; // ----- // PixelInfo type: Position of each pixel (x, y, z) and color (THREE.Color) // ----------------------------------------------------------------------------------------------------------------------------------------------------------------------------------------------------------------------------------------------------------------------------------------------------------------------------------------------------------------------------------------------------------------------------------------------------------------------------------------------------------------- ANIMATION_TIME: Time (in seconds) to animation // ==== // PixelGrid Component: // - Renders groups of pixel data, and // - Controls display animation (gradual enlargement) and moving animation (explosion/wave) // ==== type PixelGridProps = { pixelSize: number; pixels: PixelInfo[]; animation: string; fileChangeCount: number; }; const PixelGrid = ({ pixelSize, pixels, animation, fileChangeCount, }: PixelGridProps) => { // A reference to the Group object in Three.js. Used to group all pixels const groupRef = useRef<THREE.Group> (null); // ---- // Display animation: Processing of pixels displayed in stages // ----- ... // ----- // Moving animation: Change pixel position with explosion or wave effects // ---- // A reference to compare with the previous animation state and reset progress if there is a change const lastAnimationRef = useRef(animation); // Manage animation progress (0 to 1) const animationProgressRef = useRef(0); // Generate random scatter destination coordinates for each pixel (for explosion effects) const scatterPositionsRef = useRef( pixels.map(() => ({ x: (Math.random() - 0.5) * 100, y: (Math.random() - 0.5) * 100, z: (Math.random() - 0.5) * 100, }))); // Regenerate random scatter coordinates when image or pixel data is updated useEffect(() => { scatterPositionsRef.current = pixels.map(() => ({ x: (Math.random() - 0.5) * 100, y: (Math.random() - 0.5) * 100, z: (Math.random() - 0.5) * 100, })); }, [pixels]); // Update the position of each pixel every frame with useFrame to match the animation progress useFrame((_, delta) => { // Reset progress if the animation state changes if (animation !== lastAnimationRef.current) { lastAnimationRef.current = animation; animationProgressRef.current = 0; } // No position updates occur in the "default" state if (animation === "default") return; // Update animation progress (normalized with ANIMATION_TIME) if (animationProgressRef.current < 1) { animationProgressRef.current += delta / ANIMATION_TIME; if (animationProgressRef.current > 1) animationProgressRef.current = 1; } // To smooth the interpolation, use the sin function to convert progress const smoothProgress = Math.sin( (animationProgressRef.current * Math.PI) / 2 ); // Calculate and update the new position of each pixel pixels.forEach((pixel, i) => { // The base target coordinates are the original coordinates let targetX = pixel.x; let targetY = pixel.y; let targetZ = pixel.z; // Start of explosion: Move from original position to random scattering position if (animation === "explosion_start") { targetX = scatterPositionsRef.current[i].x * smoothProgress + pixel.x * (1 - smoothProgress); targetY = scatterPositionsRef.current[i].y * smoothProgress + pixel.y * (1 - smoothProgress); targetZ = scatterPositionsRef.current[i].z * smoothProgress + pixel.z * (1 - smoothProgress); } // End of explosion: Return from scattering position to original position else if (animation === "explosion_end") { targetX = scatterPositionsRef.current[i].x * (1 - smoothProgress) + pixel.x * smoothProgress; targetY = scatterPositionsRef.current[i].y * (1 - smoothProgress) + pixel.y * smoothProgress; targetZ = scatterPositionsRef.current[i].z * (1 - smoothProgress) + pixel.z * smoothProgress; } // Update mesh position for the corresponding pixel groupRef.current?.children[i]?.position.set(targetX, targetY, targetZ); }); }); // Place each PixelBox component in a group managed by groupRef to render return (<group ref={groupRef}> {pixels.map((pixel, i) => (<PixelBox key={i} pixel={pixel} scale={scales[i]} /> ))}</group> ); }; // ==== // PixelBox Component: // - A component for drawing a single pixel (box) // ==== type PixelBoxProps = { pixel: PixelInfo; scale: number; }; const PixelBox = ({ pixel, scale }: PixelBoxProps) => { // mesh: Use box geometry and material with location and scale return ( <mesh position={[pixel.x, pixel.y, pixel.z]} scale={[scale, scale, scale]}><boxGeometry args={[1, 1, 1]} /><meshStandardMaterial color={pixel.color} /></mesh> ); }; // ==== // App Component: // - Central UI Management (Image Loading, Pixel Sizing, Animation Operations) // - Arrange two Canvas (pixel Scene and Background Scene) // ===== const App = () => { ... return (<div style={{ width: "100vw", height: "100vh" }}> {/* ------------------------------------------------------------------------------------------------------------------------------------------------------------------------------------------------------------------------------------------------------------ <div className="absolute top-0 left-0 w-full h-full z-[1]"><Canvas camera={{ far: 5000, position: [0, 0, 100] }}> {/* Basic lighting settings */}<ambientLight intensity={1} /><directionalLight position={[100, 200, 100]} intensity={1} /> {/* OrbitControls that allow you to rotate the scene with mouse operation */}<OrbitControls /> {/* Render PixelGrid only if pixel data is present */} {pixels && ( <PixelGrid pixelSize={pixelSize} pixels={pixels} animation={animation} fileChangeCount={fileChangeCount} /> )}</Canvas></div></div> ); }; export default App; // ==== // createPixelData function: // - Get pixel data from the specified image using Canvas and convert it to an array of type PixelInfo // ===== const createPixelData = ( img: HTMLImageElement, targetWidth: number, targetHeight: number ): PixelInfo[] => { ... };
Although it's simple, I think it seems to have a sense of splitting up by pixel!!
💡 Added wave animation!!
Let's add wave animations as well.
I think I can basically add this in the same way as an explosion animation.
// Import React and Three.js-related libraries import { OrbitControls } from "@react-three/drei"; import { Canvas, useFrame } from "@react-three/fiber"; import { useState, useEffect, useRef } from "react"; import * as THREE from "three"; // ----- // PixelInfo type: Position of each pixel (x, y, z) and color (THREE.Color) // ----------------------------------------------------------------------------------------------------------------------------------------------------------------------------------------------------------------------------------------------------------------------------------------------------------------------------------------------------------------------------------------------------------------------------------------------------------------------------------------------------------------- ANIMATION_TIME: Time (in seconds) to animation // ==== // PixelGrid Component: // - Renders groups of pixel data, and // - Controls display animation (gradual enlargement) and moving animation (explosion/wave) // ==== type PixelGridProps = { pixelSize: number; pixels: PixelInfo[]; animation: string; fileChangeCount: number; }; const PixelGrid = ({ pixelSize, pixels, animation, fileChangeCount, }: PixelGridProps) => { // A reference to the Group object in Three.js. Used to group all pixels const groupRef = useRef<THREE.Group> (null); // ---- // Display animation: Processing of pixels displayed in stages // ----- ... // ----- // Moving animation: Change pixel position with explosion or wave effects // ---- // A reference to compare with the previous animation state and reset progress if there is a change const lastAnimationRef = useRef(animation); // Manage animation progress (0 to 1) const animationProgressRef = useRef(0); // Generate random scatter destination coordinates for each pixel (for explosion effects) const scatterPositionsRef = useRef( pixels.map(() => ({ x: (Math.random() - 0.5) * 100, y: (Math.random() - 0.5) * 100, z: (Math.random() - 0.5) * 100, }))); // Regenerate random scatter coordinates when image or pixel data is updated useEffect(() => { scatterPositionsRef.current = pixels.map(() => ({ x: (Math.random() - 0.5) * 100, y: (Math.random() - 0.5) * 100, z: (Math.random() - 0.5) * 100, })); }, [pixels]); // Update the position of each pixel every frame with useFrame to match the animation progress useFrame((_, delta) => { // Reset progress if the animation state changes if (animation !== lastAnimationRef.current) { lastAnimationRef.current = animation; animationProgressRef.current = 0; } // No position updates occur in the "default" state if (animation === "default") return; // Update animation progress (normalized with ANIMATION_TIME) if (animationProgressRef.current < 1) { animationProgressRef.current += delta / ANIMATION_TIME; if (animationProgressRef.current > 1) animationProgressRef.current = 1; } // To smooth the interpolation, use the sin function to convert progress const smoothProgress = Math.sin( (animationProgressRef.current * Math.PI) / 2 ); // Calculate and update the new position of each pixel pixels.forEach((pixel, i) => { // The base target coordinates are the original coordinates let targetX = pixel.x; let targetY = pixel.y; let targetZ = pixel.z; // Start of explosion: Move from original position to random scattering position if (animation === "explosion_start") { targetX = scatterPositionsRef.current[i].x * smoothProgress + pixel.x * (1 - smoothProgress); targetY = scatterPositionsRef.current[i].y * smoothProgress + pixel.y * (1 - smoothProgress); targetZ = scatterPositionsRef.current[i].z * smoothProgress + pixel.z * (1 - smoothProgress); } // End of explosion: Return from scattering position to original position else if (animation === "explosion_end") { targetX = scatterPositionsRef.current[i].x * (1 - smoothProgress) + pixel.x * smoothProgress; targetY = scatterPositionsRef.current[i].y * (1 - smoothProgress) + pixel.y * smoothProgress; targetZ = scatterPositionsRef.current[i].z * (1 - smoothProgress) + pixel.z * smoothProgress; } // Start of Wave: Gives the wave motion in the Z-axis direction, based on the X and Z coordinates else if (animation === "wave_start") { targetZ = Math.sin( (pixel.x + pixel.z + animationProgressRef.current * 10) * 0.3 ) * 5 * smoothProgress; } // End of wave: gradually cancel the wave effect and return it to its original state else if (animation === "wave_end") { targetZ = Math.sin( (pixel.x + pixel.z + (1 - animationProgressRef.current) * 10) * 0.3 ) * 5 * (1 - smoothProgress); } // Update the mesh position of the corresponding pixel groupRef.current?.children[i]?.position.set(targetX, targetY, targetZ); }); }); // Place each PixelBox component in a group managed by groupRef to render return (<group ref={groupRef}> {pixels.map((pixel, i) => (<PixelBox key={i} pixel={pixel} scale={scales[i]} /> ))}</group> ); }; // ==== // PixelBox Component: // - A component for drawing a single pixel (box) // ==== type PixelBoxProps = { pixel: PixelInfo; scale: number; }; const PixelBox = ({ pixel, scale }: PixelBoxProps) => { // mesh: Use box geometry and material with location and scale return ( <mesh position={[pixel.x, pixel.y, pixel.z]} scale={[scale, scale, scale]}><boxGeometry args={[1, 1, 1]} /><meshStandardMaterial color={pixel.color} /></mesh> ); }; // ==== // App Component: // - Central UI Management (Image Loading, Pixel Sizing, Animation Operations) // - Arrange two Canvas (pixel Scene and Background Scene) // ===== const App = () => { ... return (<div style={{ width: "100vw", height: "100vh" }}> {/* ------------------------------------------------------------------------------------------------------------------------------------------------------------------------------------------------------------------------------------------------------------ <div className="absolute top-0 left-0 w-full h-full z-[1]"><Canvas camera={{ far: 5000, position: [0, 0, 100] }}> {/* Basic lighting settings */}<ambientLight intensity={1} /><directionalLight position={[100, 200, 100]} intensity={1} /> {/* OrbitControls that allow you to rotate the scene with mouse operation */}<OrbitControls /> {/* Render PixelGrid only if pixel data is present */} {pixels && ( <PixelGrid pixelSize={pixelSize} pixels={pixels} animation={animation} fileChangeCount={fileChangeCount} /> )}</Canvas></div></div> ); }; export default App; // ==== // createPixelData function: // - Get pixel data from the specified image using Canvas and convert it to an array of type PixelInfo // ===== const createPixelData = ( img: HTMLImageElement, targetWidth: number, targetHeight: number ): PixelInfo[] => { ... };
I think this can express the rippling feeling.
💡Added background!!
This doesn't need it, but I was a little lonely so I'll add a background too.
React Three Drei has Star and Cloud, so I'll combine them in a nice way.
// Import React and Three.js-related libraries import React, { useState, useRef, memo, useEffect } from "react"; import { Canvas, useFrame } from "@react-three/fiber"; import { Cloud, OrbitControls, Stars } from "@react-three/drei"; import * as THREE from "three"; // ----- // PixelInfo type: Manage each pixel's position (x, y, z) and color (THREE.Color) // ---------------------------------------------------------------------------------------------------------------------------------------------------------------------------------------------------------------------------------------------------------------------------------------------------------------------------------------------------------------------------------------------------------------------------------------------------------------------------------------------------- DEFAULT_PIXEL_SIZE = 64; const ANIMATION_TIME = 3; // ==== // PixelGrid Component: // - Renders groups of pixel data, and // - controls display animation (gradual enlargement) and moving animation (explosion/wave) // ==== type PixelGridProps = { pixelSize: number; pixels: PixelInfo[]; animation: string; fileChangeCount: number; }; const PixelGrid = ({ pixelSize, pixels, animation, fileChangeCount, }: PixelGridProps) => { ... // / Place each PixelBox component in a group managed by groupRef to render return (<group ref={groupRef}> {pixels.map((pixel, i) => (<PixelBox key={i} pixel={pixel} scale={scales[i]} /> ))}</group> ); }; // ==== // PixelBox Component: // - A component for drawing a single pixel (box) // ==== type PixelBoxProps = { pixel: PixelInfo; scale: number; }; const PixelBox = ({ pixel, scale }: PixelBoxProps) => { // mesh: Use box geometry and material with location and scale return ( <mesh position={[pixel.x, pixel.y, pixel.z]} scale={[scale, scale, scale]}><boxGeometry args={[1, 1, 1]} /><meshStandardMaterial color={pixel.color} /></mesh> ); }; // ==== // App Component: // - Central UI Management (Image Loading, Pixel Sizing, Animation Operations) // - Arrange two Canvas (pixel Scene and Background Scene) // ===== const App = () => { ... return (<div style={{ width: "100vw", height: "100vh" }}> {/* ---------------------------------------------------------------------------------------------------------------------------------------------------------------------------------------------------------------------------------------------------------------------------------------------------------------------------------------------------------------------------------------------------------------------------------------------------------------------------------------------------------------------------- <div className="absolute top-0 left-0 w-full h-full z-[-1]"><Canvas camera={{ position: [0, 5, 15], fov: 50 }} style={{ background: "black" }} ><ambientLight intensity={0.5} /><pointLight position={[10, 10, 10]} intensity={0.5} color="white" /><BackgroundScene /></Canvas></div></div> ); }; // ==== // createPixelData function: // - Get pixel data from the specified image using Canvas and convert it to an array of type PixelInfo // ===== const createPixelData = ( img: HTMLImageElement, targetWidth: number, targetHeight: number ): PixelInfo[] => { ... return result; }; // ==== // BackgroundScene component: // - A component for displaying starry sky and clouds in the background // - Wrapping with memo to prevent unnecessary redrawing // ===== const BackgroundScene = memo(() => { return ( <> {/* Represents the starry sky with Stars components */} <Stars radius={100} // 星が存在する空間の半径 depth={50} // 星の配置される深さの範囲 count={5000} // 表示する星の総数 factor={6} // 星の大きさ調整用の係数 saturation={1} // 色の鮮やかさ fade // 遠くの星がフェードアウトする効果 /> {/* Express clouds with Cloud components */} <Cloud position={[0, 0, 0]} // 雲の中心位置 opacity={0.1} // 雲の不透明度(低いほど透明) speed={0.2} // 雲の動く速度 scale={[10, 10, 10]} // 雲全体のサイズ segments={20} // 雲を構成するパーティクルの数 /></> ); }); export default App;
It may be hard to tell from the video, but it feels like the smoke is rising and it feels good.
💡Final source code!!
💾 GitHub Repository : Check the source code at this link
// Import React and Three.js-related libraries import React, { useState, useRef, memo, useEffect } from "react"; import { Canvas, useFrame } from "@react-three/fiber"; import { Cloud, OrbitControls, Stars } from "@react-three/drei"; import * as THREE from "three"; // ----- // PixelInfo type: Manage each pixel's position (x, y, z) and color (THREE.Color) // ---------------------------------------------------------------------------------------------------------------------------------------------------------------------------------------------------------------------------------------------------------------------------------------------------------------------------------------------------------------------------------------------------------------------------------------------------------------------------------------------------- DEFAULT_PIXEL_SIZE = 64; const ANIMATION_TIME = 3; // ==== // PixelGrid Component: // - Renders groups of pixel data, and // - controls display animation (gradual enlargement) and moving animation (explosion/wave) // ==== type PixelGridProps = { pixelSize: number; pixels: PixelInfo[]; animation: string; fileChangeCount: number; }; const PixelGrid = ({ pixelSize, pixels, animation, fileChangeCount, }: PixelGridProps) => { // A reference to the Group object in Three.js. Used to group all pixels const groupRef = useRef<THREE.Group> (null); // ---- // Display animation: Processing of pixels being displayed in stages // ---- // Manage scale state for each pixel (the initial state is all 0 = hidden) const [scales, setScales] = useState<number[]> (Array(pixels.length).fill(0)); // scaleProgressRef: Keeps display progress (accumulated time) for each batch const scaleProgressRef = useRef(0); // batchIndexRef: manages the currently displayed batch number const batchIndexRef = useRef(0); // A reference to determine if an image file has been changed const prevFileChangeCountRef = useRef(fileChangeCount); // Resets the display state (scale) of all pixels when reloading an image useEffect(() => { if (fileChangeCount !== prevFileChangeCountRef.current) { // Reset the scale to 0 to hide all pixels setScales(Array(pixels.length).fill(0)); // Initialize accumulated time and batch index for batch display scaleProgressRef.current = 0; batchIndexRef.current = 0; // Update the number of changes prevFileChangeCountRef.current = fileChangeCount; } }, [fileChangeCount, pixels.length, pixelSize]); // UseFrame to update each frame, and display pixels step by step useFrame delta) => { // No further processing is performed if all batches are visible if (batchIndexRef.current > pixels.length / pixelSize) return; // Add time since the previous frame scaleProgressRef.current += delta; // Calculate the time threshold to display the current batch const threshold = batchIndexRef.current * (ANIMATION_TIME / (pixels.length / pixelSize)); // When the elapsed time exceeds the threshold, start displaying pixels for the next batch if (scaleProgressRef.current > threshold) { // Create a copy of the current scale state const newScales = [...scales]; // Calculate the index range of pixels belonging to the current batch const startIndex = batchIndexRef.current * pixelSize; const endIndex = Math.min(startIndex + pixelSize, pixels.length); // Display the corresponding pixel scale to 1 for (let i = startIndex; i < endIndex; i++) { newScales[i] = 1; } // Set the updated scale state setScales(newScales); // Proceed to the next batchIndexRef.current += 1; } }); // ---- // Moving animation: Change pixel position with explosion or wave effects // ---- // Reference to compare with the previous animation state and reset progress if there is a change const lastAnimationRef = useRef(animation); // Manage animation progress (0-1) const animationProgressRef = useRef(0); // Generate random scattering coordinates for each pixel (for explosion effects) const scatterPositionsRef = useRef( pixels.map(() => ({ x: (Math.random() - 0.5) * 100, y: (Math.random() - 0.5) * 100, z: (Math.random() - 0.5) * 100, })) ); // Regenerate random scattering coordinates when image or pixel data is updated useEffect(() => { scatterPositionsRef.current = pixels.map(() => ({ x: (Math.random() - 0.5) * 100, y: (Math.random() - 0.5) * 100, z: (Math.random() - 0.5) * 100, })); }, [pixels]); // Update the position of each pixel every frame with useFrame to match the animation progress useFrame((_, delta) => { // Reset the progress if the animation state changes if (animation !== lastAnimationRef.current) { lastAnimationRef.current = animation; animationProgressRef.current = 0; } // No position updates occur in the "default" state if (animation === "default") return; // Update animation progress (normalized with ANIMATION_TIME) if (animationProgressRef.current < 1) { animationProgressRef.current += delta / ANIMATION_TIME; if (animationProgressRef.current > 1) animationProgressRef.current = 1; } // To smooth the interpolation, use the sin function to convert progress const smoothProgress = Math.sin( (animationProgressRef.current * Math.PI) / 2 ); // Calculate and update the new position of each pixel pixels.forEach((pixel, i) => { // The base target coordinates are the original coordinates let targetX = pixel.x; let targetY = pixel.y; let targetZ = pixel.z; // Start of explosion: Move from original position to random scattering position if (animation === "explosion_start") { targetX = scatterPositionsRef.current[i].x * smoothProgress + pixel.x * (1 - smoothProgress); targetY = scatterPositionsRef.current[i].y * smoothProgress + pixel.y * (1 - smoothProgress); targetZ = scatterPositionsRef.current[i].z * smoothProgress + pixel.z * (1 - smoothProgress); } // End of explosion: Return from scatter position to original position else if (animation === "explosion_end") { targetX = scatterPositionsRef.current[i].x * (1 - smoothProgress) + pixel.x * smoothProgress; targetY = scatterPositionsRef.current[i].y * (1 - smoothProgress) + pixel.y * smoothProgress; targetZ = scatterPositionsRef.current[i].z * (1 - smoothProgress) + pixel.z * smoothProgress; } // Start of wave: Gives the wave motion in the Z-axis direction based on the X and Z coordinates else if (animation === "wave_start") { targetZ = Math.sin( (pixel.x + pixel.z + animationProgressRef.current * 10) * 0.3 ) * 5 * smoothProgress; } // End of wave: gradually cancel the wave effect and return it to its original state else if (animation === "wave_end") { targetZ = Math.sin( (pixel.x + pixel.z + (1 - animationProgressRef.current) * 10) * 0.3 ) * 5 * (1 - smoothProgress); } // Update the mesh position of the corresponding pixel groupRef.current?.children[i]?.position.set(targetX, targetY, targetZ); }); }); // Place each PixelBox component in a group managed by groupRef to render return (<group ref={groupRef}> {pixels.map((pixel, i) => (<PixelBox key={i} pixel={pixel} scale={scales[i]} /> ))}</group> ); }; // ==== // PixelBox Component: // - A component for drawing a single pixel (box) // ==== type PixelBoxProps = { pixel: PixelInfo; scale: number; }; const PixelBox = ({ pixel, scale }: PixelBoxProps) => { // mesh: Use box geometry and material with location and scale return ( <mesh position={[pixel.x, pixel.y, pixel.z]} scale={[scale, scale, scale]}><boxGeometry args={[1, 1, 1]} /><meshStandardMaterial color={pixel.color} /></mesh> ); }; // ==== // App Component: // - Central UI Management (Image Loading, Pixel Sizing, Animation Operations) // - Arrange two Canvas (pixel Scene and Background Scene) // ===== const App = () => { // State Management: // - pixels: Array of pixel information generated from images // - tempPixelSize: Temporary pixel size on the input form // - pixelSize: Actual pixel size applied // - fileChangeCount: Number of changes to the image (used to trigger a reload) // - imageSrc: Data URL of the imported image // - animation: Current animation mode const [pixels, setPixels] = useState<PixelInfo[] | null> (null); const [tempPixelSize, setTempPixelSize] = useState<number> (DEFAULT_PIXEL_SIZE); const [pixelSize, setPixelSize] = useState<number> (tempPixelSize); const [fileChangeCount, setFileChangeCount] = useState<number> (0); const [imageSrc, setImageSrc] = useState<string | null> (null); const [animation, setAnimation] = useState("default"); // ----- // What to do when an image file is selected: // - Load the file, convert it to a Data URL and set it in imageSrc // ---------------------------------------------------------------------------------------------------------------------------------------------------------------------------------------------------------------------------------------------------------------------------------------------------------------------------------------------------------------------------------------------------------------------------------------------------------<HTMLInputElement> ) => { const file = e.target.files?.[0]; if (!file) return; const reader = new FileReader(); reader.onload = (ev) => { const url = ev.target?.result; if (typeof url !== "string") return; // Update the pixel size once and then set the image source setPixelSize(tempPixelSize); setImageSrc(url); }; reader.readAsDataURL(file); }; // ----- // Processing when pressing the "Review" button: // - Redraw the image by reflecting the value of tempPixelSize in pixelSize // ----------------------------------------------------------------------------------------------------------------------------------------------------------------------------------------------------------------------------------------------------------------------------------------------------------------------------------------------------------------------------------------------------------------------------------------------------------------------------------------- -------------------------------------------------------------------------------------------------------------------------------------------------------------------------------------------------------------------------------------------------------------------------------------------------------------------------------------------------------------------------------------------------------------------------------------------------------------------------------------------------------------------------------- }, [pixelSize, imageSrc]); // ----- // Control Explosion animation: // - Start, end, and undo the explosion sequentially executes timeout // ----------------------------------------------------------------------------------------------------------------------------------------------------------------------------------------------------------------------------------------------------------------------------------------------------------------------------------------------------------------------------------------------------------------------------------------------------------------------- setAnimation("explosion_end"); }, ANIMATION_TIME * 1000); setTimeout(() => { console.log("default"); setAnimation("default"); }, ANIMATION_TIME * 2000); }; // ----- // Wave animation control: // - Start, end, and undo waves sequentially execute timeout // --------------------------------------------------------------------------------------------------------------------------------------------------------------------------------------------------------------------------------------------------------------------------------------------------------------------------------------------------------------------------------------------------------------------------------------------------------------------------------------------------------------------------------<div style={{ width: "100vw", height: "100vh" }}> {/* ------------------------------------------------------------------------------------------------------------------------------------------------------------------------------------------------------------------------------------------------------------<div className="absolute top-4 left-4 bg-white shadow-lg p-4 rounded-lg z-10 w-64 space-y-4"> {/* Select image file */} <input type="file" accept="image/*" onChange={handleFileChange} className="w-full border border-gray-300 rounded-md px-3 py-2 text-sm focus:ring-2 focus:ring-blue-500 focus:outline-none" /> {/* Pixel Size Input Field */}<div className="flex items-center space-x-2"> <label className="text-sm text-gray-700">Pixel Size:</label><input type="number" value={tempPixelSize} onChange={(e) => setTempPixelSize(Number(e.target.value))} min="1" max="128" className="w-16 border border-gray-300 rounded-md px-2 py-1 text-sm focus:ring-2 focus:ring-blue-500 focus:outline-none" /></div> {/* Redisplay button */} <button className="w-full bg-green-600 text-white py-2 px-4 rounded-md hover:bg-green-700 transition" onClick={reloadImage} >Redisplay</button> {/* Animation control button */}<div className="flex flex-wrap gap-2"> <button className="flex-1 bg-blue-600 text-white py-2 px-4 rounded-md hover:bg-blue-700 transition" onClick={controlExplosionAnimation} >Explosion</button> <button className="flex-1 bg-blue-600 text-white py-2 px-4 rounded-md hover:bg-blue-700 transition" onClick={controlWaveAnimation} >Wave</button></div></div> {/* ------------------------------------------------------------------------------------------------------------------------------------------------------------------------------------------------------------------------------------------------------------ <div className="absolute top-0 left-0 w-full h-full z-[1]"><Canvas camera={{ far: 5000, position: [0, 0, 100] }}> {/* Basic lighting settings */}<ambientLight intensity={1} /><directionalLight position={[100, 200, 100]} intensity={1} /> {/* OrbitControls that allow you to rotate the scene with mouse operation */}<OrbitControls /> {/* Render PixelGrid only if pixel data is present */} {pixels && ( <PixelGrid pixelSize={pixelSize} pixels={pixels} animation={animation} fileChangeCount={fileChangeCount} /> )}</Canvas></div> {/* ---------------------------------------------------------------------------------------------------------------------------------------------------------------------------------------------------------------------------------------------------------------------------------------------------------------------------------------------------------------------------------------------------------------------------------------------------------------------------------------------------------------------------- <div className="absolute top-0 left-0 w-full h-full z-[-1]"><Canvas camera={{ position: [0, 5, 15], fov: 50 }} style={{ background: "black" }} ><ambientLight intensity={0.5} /><pointLight position={[10, 10, 10]} intensity={0.5} color="white" /><BackgroundScene /></Canvas></div></div> ); }; // ==== // createPixelData function: // - Get pixel data from the specified image using Canvas and convert it to an array of type PixelInfo // ===== const createPixelData = ( img: HTMLImageElement, targetWidth: number, targetHeight: number ): PixelInfo[] => { // Create a Canvas element and set it to the specified size const canvas = document.createElement("canvas"); canvas.width = targetWidth; canvas.height = targetHeight; const ctx = canvas.getContext("2d"); if (!ctx) throw new Error("No 2D context available"); // Draw the image on Canvas and get pixel information ctx.drawImage(img, 0, 0, targetWidth, targetHeight); const imgData = ctx.getImageData(0, 0, targetWidth, targetHeight); const data = imgData.data; const result: PixelInfo[] = []; let idx = 0; // For each pixel in the image, get the RGBA value and convert it to PixelInfo for (let y = 0; y < targetHeight; y++) { for (let x = 0; x < targetWidth; x++) { const r = data[idx], g = data[idx + 1], b = data[idx + 2], a = data[idx + 3]; idx += 4; // Ignore pixels with low transparency (a < 30) if (a < 30) continues; result.push({ // Adjust x,y coordinates so that the center of the image is the origin x: x - targetWidth / 2, y: -y + targetHeight / 2, z: 0, // Create THREE.Color by converting the RGB value to the range 0 to 1 color: new THREE.Color(r / 255, g / 255, b / 255), }); } } return result; }; // ===== // BackgroundScene Component: // - A component for displaying starry sky and clouds in the background // - A wrapping with memo to prevent unnecessary redrawing // ===== const BackgroundScene = memo(() => { return ( <> {/* Representing starry sky with Stars components */} <Stars radius={100} // 星が存在する空間の半径 depth={50} // 星の配置される深さの範囲 count={5000} // 表示する星の総数 factor={6} // 星の大きさ調整用の係数 saturation={1} // 色の鮮やかさ fade // 遠くの星がフェードアウトする効果 /> {/* Express clouds with Cloud components */} <Cloud position={[0, 0, 0]} // 雲の中心位置 opacity={0.1} // 雲の不透明度(低いほど透明) speed={0.2} // 雲の動く速度 scale={[10, 10, 10]} // 雲全体のサイズ segments={20} // 雲を構成するパーティクルの数 /></> ); }); export default App;
lastly
This time, we used React Three Fiber to create pixel art and dynamic animations from images, and used React Three Fiber and React Three Drei to animate pixel art and pixel art!!
As for animation, I think you can create something even more cool if you freely increase the number of implementations, so be sure to give it a try!
📌You can get a detailed understanding of the actual movements by watching the YouTube below!
📺 Watch the demo on YouTube : You can watch it from this link
📌The code I created this time is posted on GitHub, so please check it out too!
💾 GitHub Repository : Check the source code at this link
📌If you use Mesh and replace it with a 3D object, you can even get closer to your ideal!!
Meshy is a service that allows you to easily generate 3D objects using AI.
By using this, you can easily create your ideal 3D object, so I think you can get even closer to your ideal!
📺 Check Mesh : You can check it on the official page from this link
If you found this helpful, please subscribe to our channel!
We will continue to create lessons and works from TypeScript x React Three Fiber in the future!
We will be making an announcement on YouTube, so please subscribe to our YouTube channel and wait for notifications!
📺 Watch YouTube : You can watch it from this link
If you'd like to know what React Three Fiber can do, please refer to the following!
We have easy-to-use works available!
- I tried making bears walk with React x Three.js!
- I tried making an old man dance on React x Three.js!
- I tried to display a 3D model with React x Three.js!
- I made a 3D button that explodes in React x Three.js!
- React Three Fiber x Drei x Introduction to TypeScript! Poke Poke style 3D background made with standard objects!
![How to build a web app that automatically generates LPs in ChatGPT + Next.js [OpenAI API + Next.js + Tailwind CSS]](https://hack-lab-256.com/wp-content/uploads/2025/07/hack-lab-256-samnail-27-300x169.jpg)

![I tried creating a chatbot using the OpenAI API [Next.js + Tailwind CSS]](https://hack-lab-256.com/wp-content/uploads/2025/07/hack-lab-256-samnail-25-300x169.jpg)

![[Complete explanation] Learn with React Three Fiber × TypeScript! Practical guide to Transform (Position, Rotation, Scale) for 3D Objects](https://hack-lab-256.com/wp-content/uploads/2025/02/hack-lab-256-samnail-15-300x169.png)
![[Super Easy] Introduction to React Three Fiber x Drei x TypeScript! Poke Poke style 3D background made with standard objects!](https://hack-lab-256.com/wp-content/uploads/2025/02/hack-lab-256-samnail-14-300x169.jpg)