
![[XServer VPS] The best solution for building a Kali Linux environment with Ubuntu Desktop x Distrobox](https://hack-lab-256.com/wp-content/uploads/2026/01/hack-lab-256-samnail-1.jpg)
When trying to use Kali Linux on a VPS, it is surprisingly common to find that
Kali is not an option In particular, it is not uncommon for Kali to not be available in the OS template on Japanese VPS.
So the realistic option is
Install Ubuntu and build a Kali environment on it
This is the method
In this article, we will show you how to build an Ubuntu Desktop on an XServer VPS and prepare a Kali Linux environment using Distrobox
allows you to create a practical Kali environment, including both the CLI and GUI, on a VPS without having to install Kali directly .
Why Ubuntu + Distrobox?
There are several ways to set up a Kali Linux environment on a VPS, but
the three most realistic options are:
- Installing Kali directly
- Using a Virtual Machine (VM/VirtualBox)
- Preparing a Kali environment using containers
I think Ubuntu + Distrobox the most compatible with a VPS environment
Reasons for not using a VM (VirtualBox, etc.)
VMs work well on local PCs, but not on VPSs
- Nested virtualization is required
- High CPU and memory overhead
- Virtualization is often restricted on the VPS side
As a result, such as slow operation, troublesome setup, and high incidence of problems are more likely to occur.
What is Distrobox?
Distrobox a tool that allows you to create different Linux distribution environments in containers .
- Does not damage the host OS (Ubuntu in this case)
- Only Kali user space is safe to use
- Share files and GUIs naturally with the host
It's easier to understand if you think of it as a mechanism for "using" Kali in lightweight containers , rather than "virtualization
The benefits of Ubuntu + Distrobox
The benefits of this configuration are clear
- No need to install Kali directly
- Maintaining the stability of Ubuntu
- Kali tools can be used in a GUI environment
- Even if it breaks, you can recover it by simply deleting the Kali container
In the case of VPS in Japan, there are very few services that allow you to install Kali directly, so you have to build something like Ubuntu and then go through a lot of troublesome steps before you can even use it..
However, we recommend using Distrobox, as it allows you to easily use Kali Linux in just a few minutes!
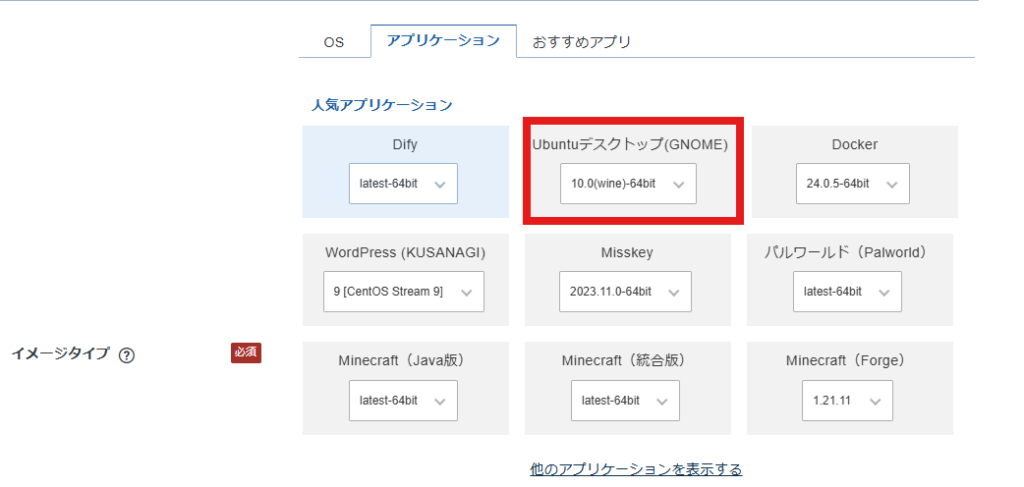
Build Ubuntu Desktop (GNOME) on VPS
First, let's build an Ubuntu desktop on a VPS. There are various VPSs available, but we've put together a simple comparison table below!
| Xserver VPS | Conoha VPS | Sakura VPS | KAGOYA VPS | |
|---|---|---|---|---|
| price | 1,150 yen | 2,033 yen | 1,738 yen | 1,100 yen |
| Memory | 2 GB | 2 GB | 2 GB | 2 GB |
| CPU | 3 cores | 3 cores | 3 cores | 3 cores |
| SSD | 50 GB | 100 GB | 100 GB | 50 GB |
| Recommended POINTS! | Good CPU performance! High specs are also cheap! | There is an hourly fee! | The balance is good! ? | Available on a daily basis! |
| More details here | More details here | More details here | More details here |
I decided to use
Xserver VPS which has reasonable specs but is cheap, and will also be cheap if I want to upgrade the specs in the future Also, if you are building an Ubuntu desktop, Xserver will handle all that automatically , so there is the added benefit of not having to do any troublesome things!

Please refer to the following article for detailed instructions on how to set up a VPS

Installing Distrobox on Ubuntu to build a Kali Linux environment
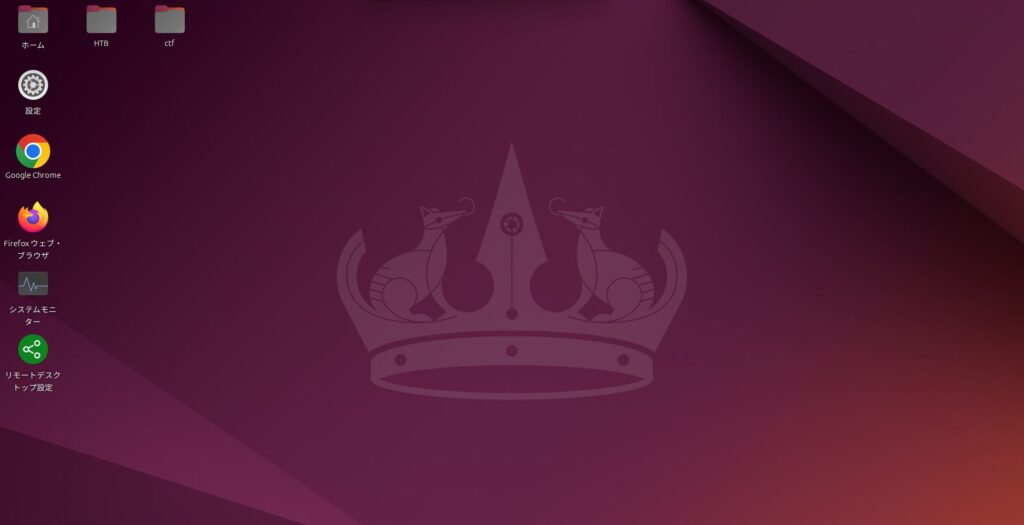
If you have created an Ubuntu desktop environment on an XServer VPS, I think you can display the Ubuntu desktop via remote desktop
Once you've completed the above steps, the next step is to install
Distrobox on Ubuntu Using Distrobox, you can add a Kali Linux working environment without disrupting your Ubuntu environment.
Installing Distrobox and Building Kali Linux
In the Ubuntu Desktop environment of your XServer VPS, open a terminal and run the following:
sudo apt update sudo apt install -y podman distroboxAfter installation, check the version
distrobox --version podman --versionIf the version is displayed without any problems, Distrobox is ready
Next, create a Kali Linux environment using Distrobox.
In my case, I set memory and CPU limits because I use a VPS and often work via VPN.
distrobox create \ --name kali \ --image registry-1.docker.io/kalilinux/kali-rolling \ --home ~/kali-home \ --additional-flags "--memory=10g --cpus=5" \ --pull --yes
Once you've finished creating it, check the list. If it looks like this, there's no problem
$ distrobox list ID | NAME | STATUS | IMAGE 3bbc18672a67 | kali | Created | docker.io/kalilinux/kali-rolling:latest $ podman images REPOSITORY TAG IMAGE ID CREATED SIZE docker.io/kalilinux/kali-rolling latest 3f0b2388a847 6 days ago 252 MB
Logging in and out of Kali Linux
To log in to Kali Linux, use the following command:
$ distrobox enter kali Starting container... [ OK ] Installing basic packages... [ OK ] Setting up devpts mounts... [ OK ] Setting up read-only mounts... [ OK ] Setting up read-write mounts... [ OK ] Setting up host's sockets integration... [ OK ] Integrating host's themes, icons, fonts... [ OK ] Setting up package manager exceptions... [ OK ] Setting up package manager hooks... [ OK ] Setting up dpkg exceptions... [ OK ] Setting up apt hooks... [ OK ] Setting up distrobox profile... [ OK ] Setting up sudo... [ OK ] Setting up user groups... [ OK ] Setting up kerberos integration... [ OK ] Setting up user's group list... [ OK ] Setting up existing user... [ OK ] Setting up user home... [ OK ] Ensuring user's access... [ OK ] Setting up skel... [ OK ] Container Setup Complete! bash: warning: setlocale: LC_CTYPE: cannot change locale (ja_JP.UTF-8): No such file or directory bash: warning: setlocale: LC_CTYPE: cannot change locale (ja_JP.UTF-8): No such file or directory bash: warning: setlocale: LC_COLLATE: cannot change locale (ja_JP.UTF-8): No such file or directory bash: warning: setlocale: LC_CTYPE: cannot change locale (ja_JP.UTF-8): No such file or directory bash: warning: setlocale: LC_CTYPE: cannot change locale (ja_JP.UTF-8): No such file or directory bash: warning: setlocale: LC_COLLATE: cannot change locale (ja_JP.UTF-8): No such file or directory ┏━(Message from Kali developers) ┃ ┃ This is a minimal installation of Kali Linux, you likely ┃ want to install supplementary tools. Learn how: ┃ ⇒ https://www.kali.org/docs/troubleshooting/common-minimum-setup/ ┃ ┗━(Run: “touch ~/.hushlogin” to hide this message) bash: warning: setlocale: LC_CTYPE: cannot change locale (ja_JP.UTF-8): No such file or directory bash: warning: setlocale: LC_CTYPE: cannot change locale (ja_JP.UTF-8): No such file or directory bash: warning: setlocale: LC_COLLATE: cannot change locale (ja_JP.UTF-8): No such file or directory bash: warning: setlocale: LC_CTYPE: cannot change locale (ja_JP.UTF-8): No such file or directory bash: warning: setlocale: LC_CTYPE: cannot change locale (ja_JP.UTF-8): No such file or directory bash: warning: setlocale: LC_COLLATE: cannot change locale (ja_JP.UTF-8): No such file or directory
I got an error when I logged in for the first time. This is because Japanese is not supported, so I will make it Japanese.
Although the error message appears, it says "ubuntu㉿kali", so I am logged in to Kali Linux.
From here on, we will be working on Kali Linux. Execute the following command
┌──(ubuntu㉿kali)-[/home/ubuntu] └─$ sudo apt update Hit:1 http://http.kali.org/kali kali-rolling InRelease 15 packages can be upgraded. Run 'apt list --upgradable' to see them. ┌──(ubuntu㉿kali)-[/home/ubuntu] └─$ sudo apt install -y locales locales is already the newest version (2.42-5). Summary: Upgrading: 0, Installing: 0, Removing: 0, Not Upgrading: 15 ┌──(ubuntu㉿kali)-[/home/ubuntu] └─$ sudo sed -i 's/^# *\(ja_JP.UTF-8 UTF-8\)/\1/' /etc/locale.gen ┌──(ubuntu㉿kali)-[/home/ubuntu] └─$ sudo locale-gen Generating locales (this might take a while)... en_US.UTF-8... done ja_JP.UTF-8... done Generation complete. ┌──(ubuntu㉿kali)-[/home/ubuntu] └─$ sudo update-locale LANG=ja_JP.UTF-8
Once you've done this, log out with "exit" and log back in.
The error should now be gone.
┌──(ubuntu㉿kali)-[/home/ubuntu] └─$ exit logout $ distrobox enter kali ┏━(Message from Kali developers) ┃ ┃ This is a minimal installation of Kali Linux, you likely ┃ want to install supplementary tools. Learn how: ┃ ⇒ https://www.kali.org/docs/troubleshooting/common-minimum-setup/ ┃ ┗━(Run: “touch ~/.hushlogin” to hide this message)
If you are still bothered by the remaining messages, you can stop them by running the command below
┌──(ubuntu㉿kali)-[/home/ubuntu] └─$ touch ~/.hushlogin
Installing required tools
Now that Kali Linux is ready to use, let's install the necessary tools
apt update && apt -y install kali-linux-headless apt update && apt -y install kali-linux-largeTrying out Kali Linux tools
Essentially, the configuration should look something like this:
- Ubuntu Desktop (GNOME) is in charge of the screen
- Kali (Distrobox) is in charge of tools
- X11 / Wayland works on Ubuntu
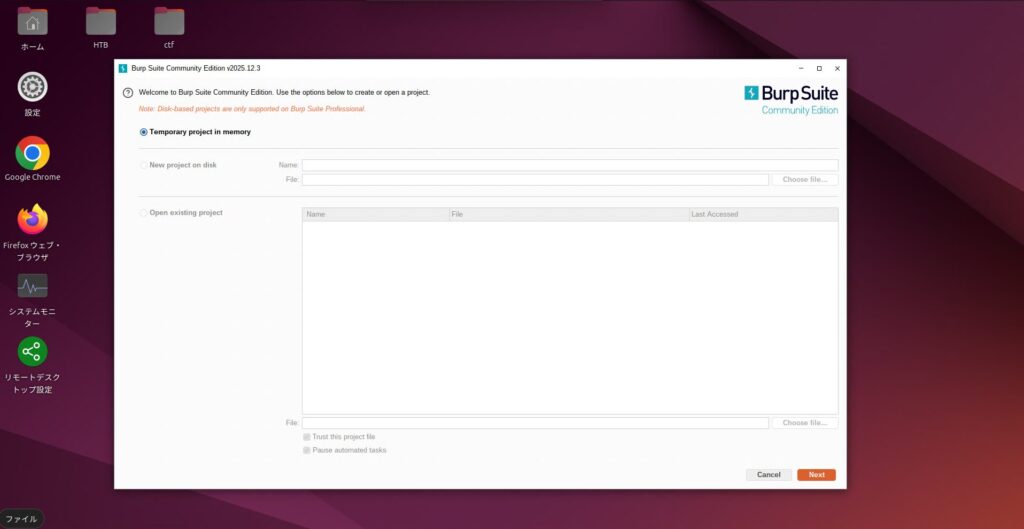
So, for example, when you launch a GUI tool on Kali Linux as shown below:
$ distrobox enter kali ┌──(ubuntu㉿kali)-[/home/ubuntu] └─$ burpsuite
This will display the GUI on the Ubuntu desktop
summary
This time, we introduced how to build Ubuntu Desktop (GNOME) on an XServer VPS and prepare a Kali Linux environment using Distrobox
In Japan, Kali Linux is often not an option, but with this configuration,
- It can be based on the stable environment of Ubuntu
- Kali Linux can be safely added
- Both CLI and GUI tools are available on your VPS
- Even if the environment is broken, you can recover it by simply recreating the Kali container
There are benefits such as:
I feel that the option of "using Kali on Ubuntu" rather than "installing Kali"
I hope this will be helpful for those who are planning to learn about security or create a testing environment on a VPS
![[XServer VPS] Build an LXDE GUI environment on Ubuntu and migrate to LXQt](https://hack-lab-256.com/wp-content/uploads/2026/01/hack-lab-256-samnail-2-300x169.jpg)


![[Hacking] Install KALI LINUX into VirtualBox! Start an OS specializing in penetration testing!](https://hack-lab-256.com/wp-content/uploads/2022/03/hack-lab-256-samnail-2-300x169.jpg)