最近のWebアプリ開発では、3Dグラフィックス を活用するケースが増えてきました。特に、React Three Fiber(R3F) を使えば、React のコンポーネントとして手軽に Three.js を扱うことができます。
今回は、Three.js のラッパーライブラリ Drei も活用しながら、「ポケポケ風」のカラフルな3D背景 を React + TypeScript で実装していきます!
📌 しかも今回は、特別な3Dモデルは一切使いません!
Three.js に標準で用意されている基本オブジェクト(Box, Plane など)だけ で、ここまで表現できる!というのを体験してもらいます。
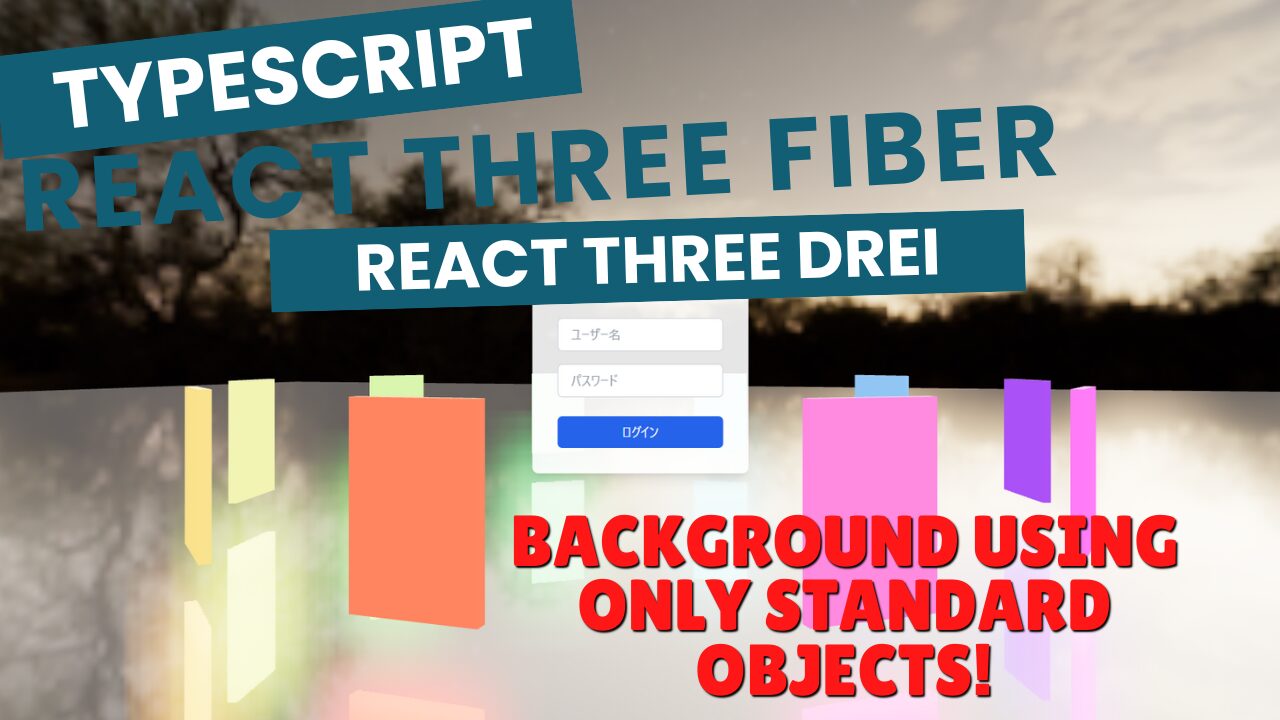
💡 完成イメージ
👇作成するのは、こんな感じの 3D 背景 です👇
📺 YouTubeでデモを見る:こちらのリンクから視聴できます。

✅ カラフルなカードが円形に配置された 3D ワールド
✅ 鏡面反射を活用したおしゃれな背景
✅ HTML/CSS を組み合わせた UI
🚀 「特別な3Dモデルは不要!標準オブジェクトだけでここまでできる!」 という点に注目して進めていきましょう!
それでは、実際にコードを書いてみましょう!
TypeScript x React Three Fiberのレッスンや作品は、今後もどんどん作成していきます!
YouTubeで告知致しますので、ぜひYouTubeのチャンネル登録をして通知をお待ちください!
📺 YouTubeを見る:こちらのリンクから視聴できます。

React Three Fiberで何ができるのか知りたい方は、下記を参考にしてみてください!
簡単にできる作品を用意しております!
- 静電容量無接点方式ならではのスコスコとした打鍵感!
- REALFORCE初のワイヤレス対応!有線接続も可能!
- HHKBと違って、日本語配列に癖がなく誰でも使いやすい!
- サムホイールが搭載、横スクロールがかなり楽に!
- 静音性能も高く、静かで快適!
- スクロールは、高速モードとラチェットモードを使い分け可能!
🚀技術要素の紹介:このプロジェクトで使うツールとライブラリ
利用するツールやライブラリは、ご自身の使いやすいものに変更しても良いですが、このプロジェクトではこちらを前提に説明をしていきます。
- VSCode
-
- Microsoftが提供する無料のコードエディタです。
- VSCodeでなくても良いですが、多くの拡張機能がありますので、おすすめです。
- ESLintやPrettierを入れるのもおすすめです。
- Node.js
-
- ChromeのV8 JavaScriptエンジン上に構築されたJavaScriptランタイムです。
- ブラウザの外でJavaScriptコードを実行することができます。
- こちらは既にインストールされている前提で説明しますので、「https://nodejs.org/ja」からダウンロードしておいてください。
※長期安定版であるLTSバージョンをダウンロードすることをお勧めします。
- Vite
-
- モダンなウェブプロジェクトのためのビルドツールです。 速く、軽量という特徴があります。
- 以前まで使われていた「CRA(create-react-app)」は、公式HPでも記載がなく、古い技術になってしまいました。
- これからは、Reactでアプリを作る際は、Viteが最良の選択肢となるはずです。
- React
-
- UI(ユーザーインターフェース)を構築するためのJavaScriptライブラリです。Facebookが開発し、現在も多くのウェブアプリで使われています。
- Three.js
-
- 3Dグラフィックスを簡単に作成するためのJavaScriptライブラリです。WebGLの複雑な操作を抽象化し、直感的な3D開発を可能にします。
- 3Dグラフィックスを簡単に作成でき、WebGLの直接操作よりも扱いやすいです。
- React Three Fiber
-
- Three.jsをReactで扱えるようにするためのライブラリです。Reactのコンポーネント構造とThree.jsの3Dエンジンを融合します。
- Reactの開発スタイルでThree.jsを扱えるため、直感的かつ効率的な開発が可能になります。
- React Three Drei
-
- React Three Fiberのための便利なユーティリティコンポーネント集です。よく使われるThree.jsの機能を簡単に追加できます。
- 複雑なThree.jsの機能を短いコードで実現できるため、学習コストを削減できます。
🚀 React Three Fiber × Drei × TypeScript で「ポケポケ風3D背景」を作ろう!
📌環境構築は、こちらの記事で紹介してますので、まだの方は確認してみてください。
📌今回は、特殊な3Dモデルは利用せずに、React Three FiberやReact Three Dreiで利用可能な標準オブジェクトのみを利用します。
標準オブジェクトを詳しく知りたい方は、こちらの記事も参考にしてみてください。
今回、作成したソースコード全量は、GitHubで確認してください。
💾 GitHubリポジトリ:こちらのリンクでソースコードをチェック!

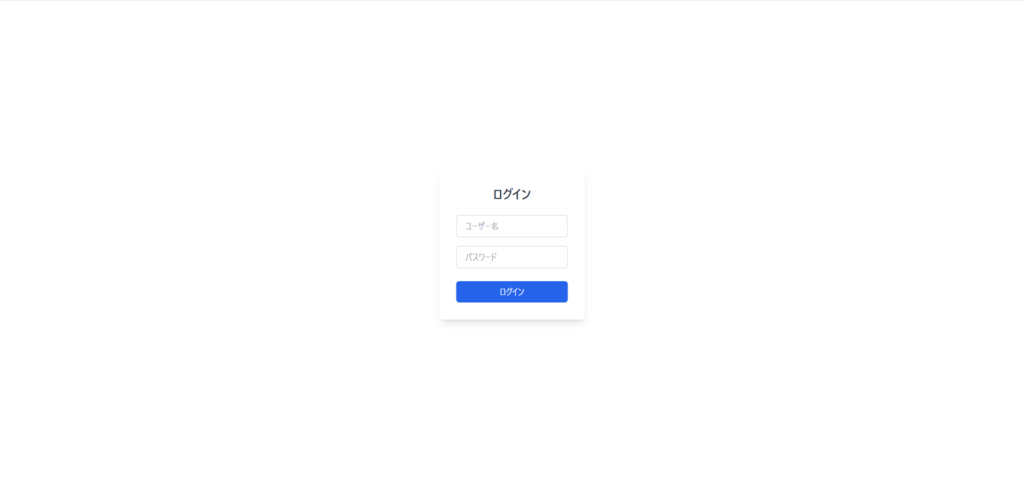
💡ログインフォームを作る!!
まずは、シンプルにReactでログインフォームを作りましょう。
CSSライブラリとして、tailwind-cssを利用しています。
// === メインアプリコンポーネント ===
const LoginScreen = () => {
  return (
    <>
      {/* ログインフォーム */}
      <div className="absolute top-1/2 left-1/2 transform -translate-x-1/2 -translate-y-1/2 bg-white/90 rounded-lg p-8 shadow-lg text-center">
        <h2 className="text-2xl font-semibold text-gray-700 mb-6">ログイン</h2>
        <form>
          <div className="mb-4">
            <input
              type="text"
              placeholder="ユーザー名"
              className="w-full px-4 py-2 border border-gray-300 rounded-md focus:outline-none focus:ring-2 focus:ring-blue-500"
            />
          </div>
          <div className="mb-6">
            <input
              type="password"
              placeholder="パスワード"
              className="w-full px-4 py-2 border border-gray-300 rounded-md focus:outline-none focus:ring-2 focus:ring-blue-500"
            />
          </div>
          <button
            type="submit"
            className="w-full bg-blue-600 text-white py-2 px-4 rounded-md hover:bg-blue-700 transition"
          >
            ログイン
          </button>
        </form>
      </div>
    </>
  );
};

export default LoginScreen;
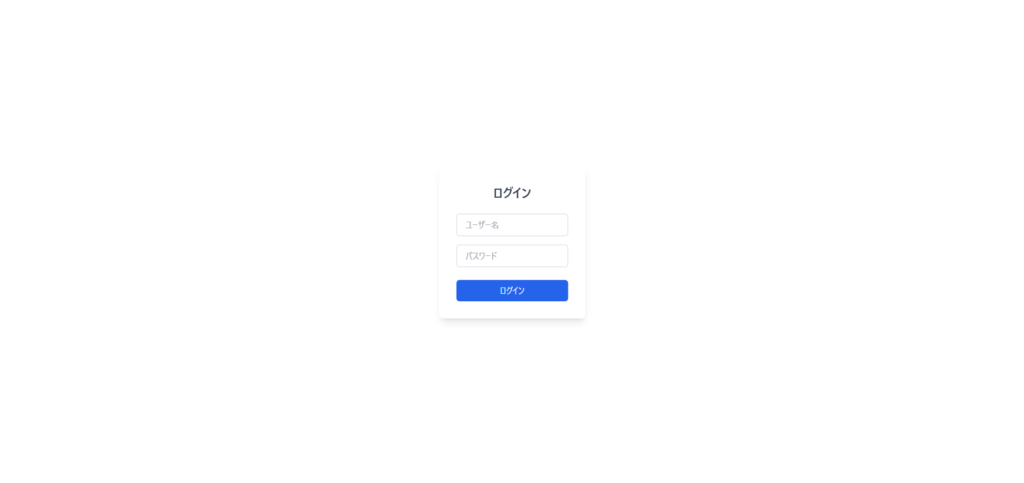
💡Canvasを背景に表示!!
最初にCanvasを配置して、カメラやライティングを用意しておきましょう。
import { Canvas } from "@react-three/fiber";
import {
  OrbitControls,
} from "@react-three/drei";

// === メインアプリコンポーネント ===
const LoginScreen = () => {
  return (
    <>
      {/* Three.jsのCanvas */}
      <Canvas camera={{ position: [0, 0, 10], fov: 50 }}>
        <color attach="background" args={["white"]} />
        {/* ライティング */}
        <ambientLight intensity={10} />
        <directionalLight position={[0, 5, 0]} intensity={15} />

        {/* カメラ操作 */}
        <OrbitControls
          enablePan={false}
          enableZoom={false}
          minPolarAngle={Math.PI / 2}
          maxPolarAngle={Math.PI / 2}
        />
      </Canvas>

      {/* HTML/CSSで作成したログインフォーム */}
      <div className="absolute top-1/2 left-1/2 transform -translate-x-1/2 -translate-y-1/2 bg-white/90 rounded-lg p-8 shadow-lg text-center">
        <h2 className="text-2xl font-semibold text-gray-700 mb-6">ログイン</h2>
        <form>
          <div className="mb-4">
            <input
              type="text"
              placeholder="ユーザー名"
              className="w-full px-4 py-2 border border-gray-300 rounded-md focus:outline-none focus:ring-2 focus:ring-blue-500"
            />
          </div>
          <div className="mb-6">
            <input
              type="password"
              placeholder="パスワード"
              className="w-full px-4 py-2 border border-gray-300 rounded-md focus:outline-none focus:ring-2 focus:ring-blue-500"
            />
          </div>
          <button
            type="submit"
            className="w-full bg-blue-600 text-white py-2 px-4 rounded-md hover:bg-blue-700 transition"
          >
            ログイン
          </button>
        </form>
      </div>
    </>
  );
};

export default LoginScreen;
💡カードパックオブジェクトの配置!!
次に背景にポケポケのカードパック風のオブジェクトを配置します。
これだけでも、何となくポケポケのパックを選ぶ画面に見えませんか?(笑)
import { Canvas } from "@react-three/fiber";
import {
  MeshReflectorMaterial,
  OrbitControls,
} from "@react-three/drei";


// === [0,0,0]を中心にカードのパックをイメージしたboxを円形に配置する ===
const CircularCardPack = ({
  radius = 5,
  count = 10,
  cardSize = [1, 1.5, 0.1], // 幅, 高さ, 奥行き
}: {
  radius?: number; // 円の半径
  count?: number; // 配置するカードの数
  cardSize?: [number, number, number]; // カードのサイズ
}) => {
  const cards = Array.from({ length: count }); // 配列を生成
  return (
    <group>
      {cards.map((_, i) => {
        const angle = (i / count) * Math.PI * 2; // 円周上の角度
        const x = radius * Math.cos(angle); // X座標
        const z = radius * Math.sin(angle); // Z座標
        const rotationY = -angle + Math.PI / 2; // カードが中心を向くように回転

        return (
          <mesh
            key={i}
            position={[x, -1, z]} // カードの位置
            rotation={[0, rotationY, 0]} // カードの向き
          >
            <boxGeometry args={cardSize} />
            <meshStandardMaterial
              color={`hsl(${(i / count) * 360}, 70%, 50%)`}
            />
          </mesh>
        );
      })}
    </group>
  );
};

// === メインアプリコンポーネント ===
const LoginScreen = () => {
  return (
    <>
      {/* Three.jsのCanvas */}
      <Canvas camera={{ position: [0, 0, 10], fov: 50 }}>
        <color attach="background" args={["white"]} />
        {/* ライティング */}
        <ambientLight intensity={10} />
        <directionalLight position={[0, 5, 0]} intensity={15} />

        {/* カメラ操作 */}
        <OrbitControls
          enablePan={false}
          enableZoom={false}
          minPolarAngle={Math.PI / 2}
          maxPolarAngle={Math.PI / 2}
        />

        {/* カードオブジェクト */}
        <CircularCardPack />
      </Canvas>

      {/* HTML/CSSで作成したログインフォーム */}
      <div className="absolute top-1/2 left-1/2 transform -translate-x-1/2 -translate-y-1/2 bg-white/90 rounded-lg p-8 shadow-lg text-center">
        <h2 className="text-2xl font-semibold text-gray-700 mb-6">ログイン</h2>
        <form>
          <div className="mb-4">
            <input
              type="text"
              placeholder="ユーザー名"
              className="w-full px-4 py-2 border border-gray-300 rounded-md focus:outline-none focus:ring-2 focus:ring-blue-500"
            />
          </div>
          <div className="mb-6">
            <input
              type="password"
              placeholder="パスワード"
              className="w-full px-4 py-2 border border-gray-300 rounded-md focus:outline-none focus:ring-2 focus:ring-blue-500"
            />
          </div>
          <button
            type="submit"
            className="w-full bg-blue-600 text-white py-2 px-4 rounded-md hover:bg-blue-700 transition"
          >
            ログイン
          </button>
        </form>
      </div>
    </>
  );
};

export default LoginScreen;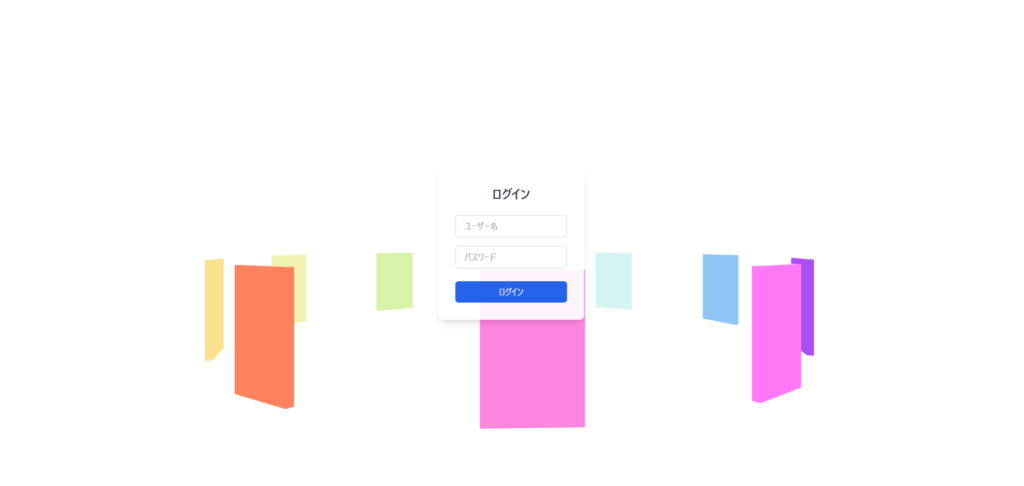
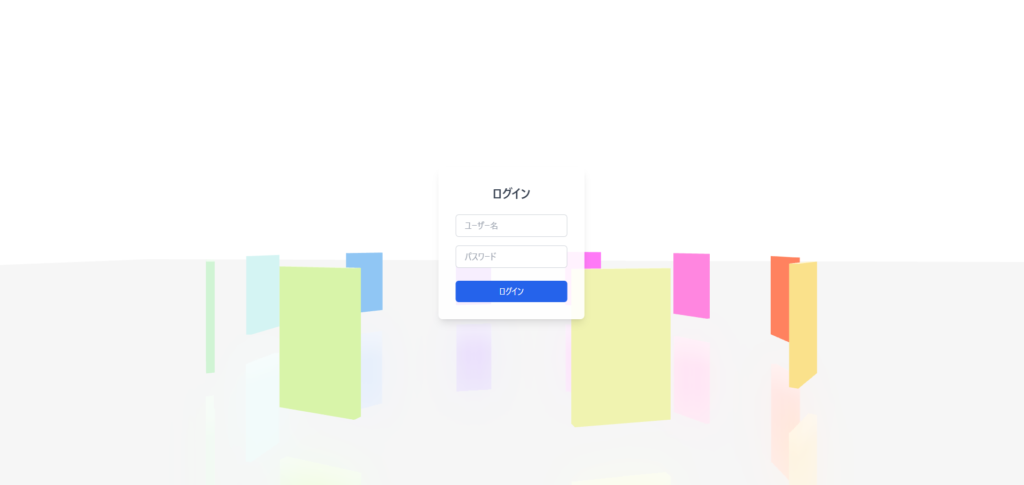
💡パックの下に鏡面を配置!!
ポケポケのパックを選ぶところを確認してみると、パックが反射して見えるので、同じようにパックの下に鏡面を追加してみます。
import { Canvas } from "@react-three/fiber";
import {
  MeshReflectorMaterial,
  OrbitControls,
} from "@react-three/drei";

// === 鏡面コンポーネント ===
const ReflectivePlane = () => {
  return (
    <>
      <mesh rotation-x={-Math.PI / 2} position={[0, -2, 0]}>
        <planeGeometry args={[100, 100]} /> {/* 鏡を大きくして背景全体を覆う */}
        <MeshReflectorMaterial
          blur={[200, 100]}
          mixBlur={0.7}
          mixStrength={1}
          mixContrast={1}
          resolution={1024}
          mirror={1}
          depthScale={0.1}
          reflectorOffset={0.2}
        />
      </mesh>
    </>
  );
};

// === [0,0,0]を中心にカードのパックをイメージしたboxを円形に配置する ===
const CircularCardPack = ({
  radius = 5,
  count = 10,
  cardSize = [1, 1.5, 0.1], // 幅, 高さ, 奥行き
}: {
  radius?: number; // 円の半径
  count?: number; // 配置するカードの数
  cardSize?: [number, number, number]; // カードのサイズ
}) => {
  const cards = Array.from({ length: count }); // 配列を生成
  return (
    <group>
      {cards.map((_, i) => {
        const angle = (i / count) * Math.PI * 2; // 円周上の角度
        const x = radius * Math.cos(angle); // X座標
        const z = radius * Math.sin(angle); // Z座標
        const rotationY = -angle + Math.PI / 2; // カードが中心を向くように回転

        return (
          <mesh
            key={i}
            position={[x, -1, z]} // カードの位置
            rotation={[0, rotationY, 0]} // カードの向き
          >
            <boxGeometry args={cardSize} />
            <meshStandardMaterial
              color={`hsl(${(i / count) * 360}, 70%, 50%)`}
            />
          </mesh>
        );
      })}
    </group>
  );
};

// === メインアプリコンポーネント ===
const LoginScreen = () => {
  return (
    <>
      {/* Three.jsのCanvas */}
      <Canvas camera={{ position: [0, 0, 10], fov: 50 }}>
        <color attach="background" args={["white"]} />
        {/* ライティング */}
        <ambientLight intensity={10} />
        <directionalLight position={[0, 5, 0]} intensity={15} />

        {/* カメラ操作 */}
        <OrbitControls
          enablePan={false}
          enableZoom={false}
          minPolarAngle={Math.PI / 2}
          maxPolarAngle={Math.PI / 2}
        />

        {/* カードパックオブジェクト */}
        <CircularCardPack />

        {/* 鏡面オブジェクト */}
        <ReflectivePlane />
      </Canvas>

      {/* HTML/CSSで作成したログインフォーム */}
      <div className="absolute top-1/2 left-1/2 transform -translate-x-1/2 -translate-y-1/2 bg-white/90 rounded-lg p-8 shadow-lg text-center">
        <h2 className="text-2xl font-semibold text-gray-700 mb-6">ログイン</h2>
        <form>
          <div className="mb-4">
            <input
              type="text"
              placeholder="ユーザー名"
              className="w-full px-4 py-2 border border-gray-300 rounded-md focus:outline-none focus:ring-2 focus:ring-blue-500"
            />
          </div>
          <div className="mb-6">
            <input
              type="password"
              placeholder="パスワード"
              className="w-full px-4 py-2 border border-gray-300 rounded-md focus:outline-none focus:ring-2 focus:ring-blue-500"
            />
          </div>
          <button
            type="submit"
            className="w-full bg-blue-600 text-white py-2 px-4 rounded-md hover:bg-blue-700 transition"
          >
            ログイン
          </button>
        </form>
      </div>
    </>
  );
};

export default LoginScreen;
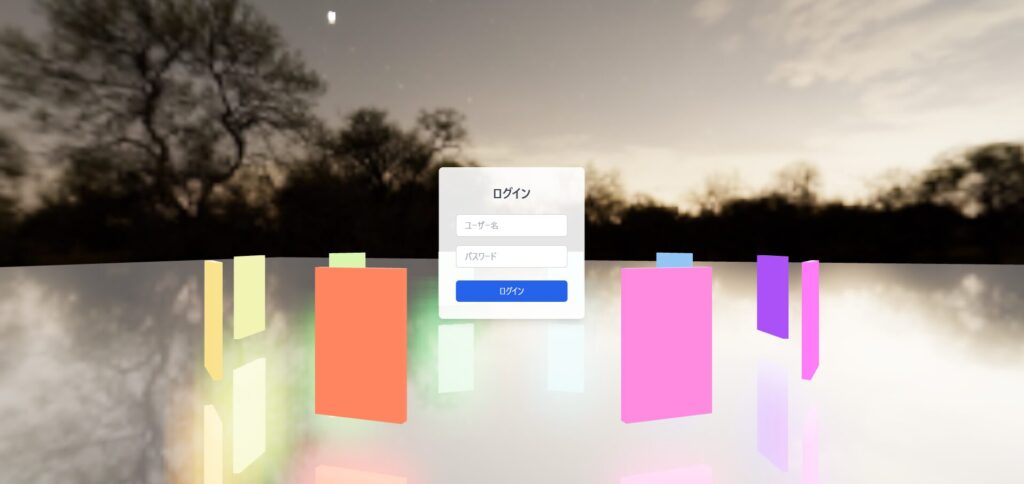
💡背景を追加!!
これは無くても良いのですが、ちょっと寂しかったので、背景も追加してみます。
背景もReact Three Dreiの標準のものを利用します。
import { Canvas } from "@react-three/fiber";
import {
  Environment,
  MeshReflectorMaterial,
  OrbitControls,
} from "@react-three/drei";

// === 鏡面コンポーネント ===
const ReflectivePlane = () => {
  return (
    <>
      <mesh rotation-x={-Math.PI / 2} position={[0, -2, 0]}>
        <planeGeometry args={[100, 100]} /> {/* 鏡を大きくして背景全体を覆う */}
        <MeshReflectorMaterial
          blur={[200, 100]}
          mixBlur={0.7}
          mixStrength={1}
          mixContrast={1}
          resolution={1024}
          mirror={1}
          depthScale={0.1}
          reflectorOffset={0.2}
        />
      </mesh>
    </>
  );
};

// === [0,0,0]を中心にカードのパックをイメージしたboxを円形に配置する ===
const CircularCardPack = ({
  radius = 5,
  count = 10,
  cardSize = [1, 1.5, 0.1], // 幅, 高さ, 奥行き
}: {
  radius?: number; // 円の半径
  count?: number; // 配置するカードの数
  cardSize?: [number, number, number]; // カードのサイズ
}) => {
  const cards = Array.from({ length: count }); // 配列を生成
  return (
    <group>
      {cards.map((_, i) => {
        const angle = (i / count) * Math.PI * 2; // 円周上の角度
        const x = radius * Math.cos(angle); // X座標
        const z = radius * Math.sin(angle); // Z座標
        const rotationY = -angle + Math.PI / 2; // カードが中心を向くように回転

        return (
          <mesh
            key={i}
            position={[x, -1, z]} // カードの位置
            rotation={[0, rotationY, 0]} // カードの向き
          >
            <boxGeometry args={cardSize} />
            <meshStandardMaterial
              color={`hsl(${(i / count) * 360}, 70%, 50%)`}
            />
          </mesh>
        );
      })}
    </group>
  );
};

// === メインアプリコンポーネント ===
const LoginScreen = () => {
  return (
    <>
      {/* Three.jsのCanvas */}
      <Canvas camera={{ position: [0, 0, 10], fov: 50 }}>
        <color attach="background" args={["white"]} />
        {/* ライティング */}
        <ambientLight intensity={10} />
        <directionalLight position={[0, 5, 0]} intensity={15} />

        {/* カメラ操作 */}
        <OrbitControls
          enablePan={false}
          enableZoom={false}
          minPolarAngle={Math.PI / 2}
          maxPolarAngle={Math.PI / 2}
        />

        {/* カードパックオブジェクト */}
        <CircularCardPack />

        {/* 鏡面オブジェクト */}
        <ReflectivePlane />

        {/* 背景 */}
        <Environment preset="night" background />
      </Canvas>

      {/* HTML/CSSで作成したログインフォーム */}
      <div className="absolute top-1/2 left-1/2 transform -translate-x-1/2 -translate-y-1/2 bg-white/90 rounded-lg p-8 shadow-lg text-center">
        <h2 className="text-2xl font-semibold text-gray-700 mb-6">ログイン</h2>
        <form>
          <div className="mb-4">
            <input
              type="text"
              placeholder="ユーザー名"
              className="w-full px-4 py-2 border border-gray-300 rounded-md focus:outline-none focus:ring-2 focus:ring-blue-500"
            />
          </div>
          <div className="mb-6">
            <input
              type="password"
              placeholder="パスワード"
              className="w-full px-4 py-2 border border-gray-300 rounded-md focus:outline-none focus:ring-2 focus:ring-blue-500"
            />
          </div>
          <button
            type="submit"
            className="w-full bg-blue-600 text-white py-2 px-4 rounded-md hover:bg-blue-700 transition"
          >
            ログイン
          </button>
        </form>
      </div>
    </>
  );
};

export default LoginScreen;
最後に
今回は、「標準オブジェクトで作るポケポケ風3D背景!」ということで、React Three FiberとReact Three Dreiの標準オブジェクトのみで、ポケポケのパック選択の画面を再現してみました!!
📌実際の動きに関しては、下記のYouTubeを見てもらえると詳細に理解できると思います!
📺 YouTubeでデモを見る:こちらのリンクから視聴できます。
📌今回作成したコードは、GitHubに載せていますので、こちらも確認してみてください!
💾 GitHubリポジトリ:こちらのリンクでソースコードをチェック!
📌Meshyを利用して、3Dオブジェクトに置き換えれば、さらに理想に近づけることも可能!!
Meshyは、AIで簡単に3Dオブジェクトを生成できるサービスです。
これを利用することで、簡単に理想の3Dオブジェクトを生成することが可能なので、さらに理想に近づけることができると思います!
📺 Meshyを確認する:こちらのリンクから公式ページで確認できます。
参考になった方は、是非チャンネル登録をお願いします!
TypeScript x React Three Fiberのレッスンや作品は、今後もどんどん作成していきます!
YouTubeで告知致しますので、ぜひYouTubeのチャンネル登録をして通知をお待ちください!
📺 YouTubeを見る:こちらのリンクから視聴できます。
React Three Fiberで何ができるのか知りたい方は、下記を参考にしてみてください!
簡単にできる作品を用意しております!