
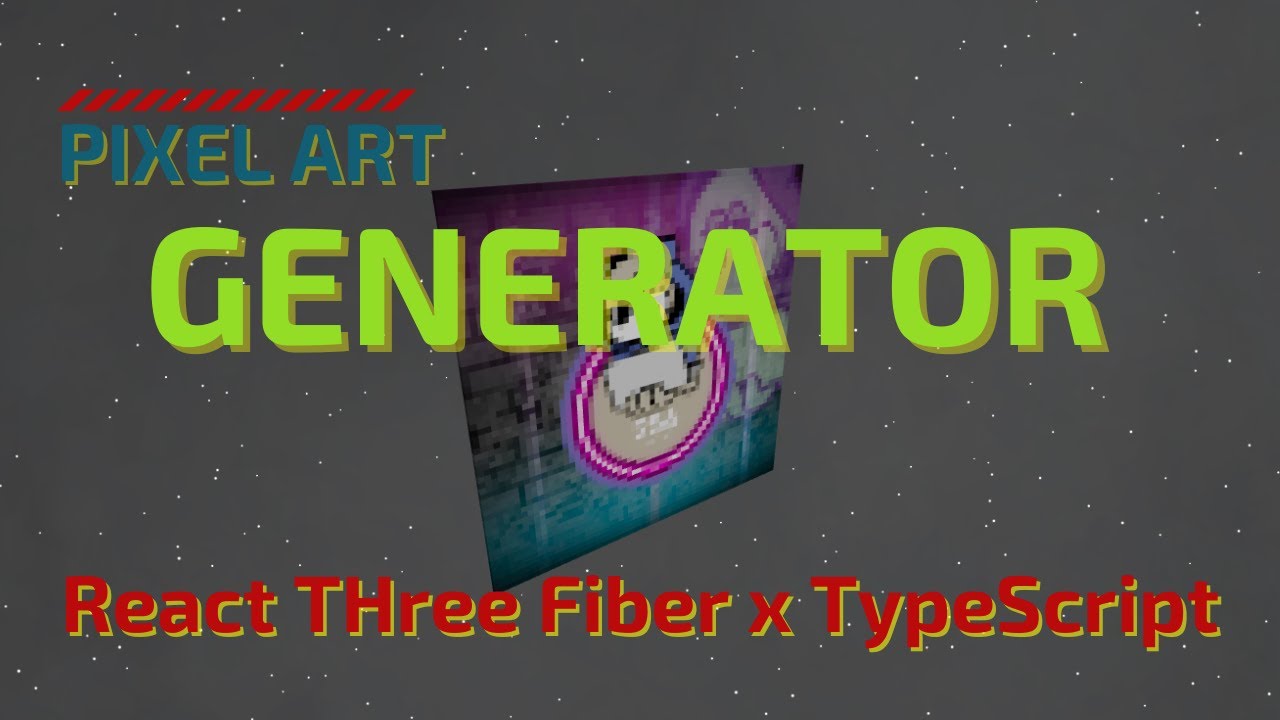
![[对于初学者]介绍三个光纤X DREI X打字稿!从图像创建像素艺术和动态动画](https://hack-lab-256.com/wp-content/uploads/2025/02/hack-lab-256-samnail-16.jpg)
最近,Web应用程序开发越来越多地使用图形来改善用户体验。使用React三个光纤(R3F),您可以轻松地将三个功能作为一个反应组件,从而使任何人都可以轻松获得有吸引力的表达式。
我们将详细说明如何将包装库DREI和打字稿组合在一起,并实现从图像自动生成的像素艺术
📌此外,此实现将不使用任何特殊的3D模型,并且只会使用由三js标准提供的基本几何(框,平面等)来创建Pixel Art独特的复古而又复杂的表达式。
即使对于初学者来说,分步解释也很容易理解,因此您可以在实际工作时学习,因此请务必尝试一下!
💡完成图像
📺在YouTube上观看演示:链接中观看
将来,我们将继续创建课程,并从打字稿x进行三个反应三个光纤!
我们将在YouTube上发布公告,因此请订阅我们的YouTube频道并等待通知!
📺观看YouTube :您可以从此链接

如果您想知道三个纤维可以做什么反应,请参考以下内容!
我们有易于使用的作品!
- 电容式非接触式系统独有的清脆打字感觉!
- REALFORCE首款无线兼容设备!有线连接也可用!
- 与 HHKB 不同,日语键盘布局没有任何怪癖,任何人都可以轻松使用!
- 配有拇指轮,水平滚动非常容易!
- 还拥有出色的降噪性能,安静舒适!
- 滚动可以在高速模式和棘轮模式之间切换!
🚀对技术元素的介绍:在此项目中使用的工具和库
您可以将使用的工具和库更改为易于使用的工具和库,但是该项目将解释这一假设。
- VSCODE
-
- Microsoft提供的免费代码编辑器。
- 它不需要Vscode,但是有很多扩展名,因此我建议它。
- 还建议包括Eslint或更漂亮的。
- node.js
-
- JavaScript建立在Chrome的V8 JavaScript引擎上。
- 您可以在浏览器之外运行JavaScript代码。
- 这是基于已经安装的假设来解释的,因此 https://nodejs.org/ja 下载它
*我们建议下载长期稳定版本的LTS。
- Vite
-
- 现代网络项目的构建工具。它的特征是它的快速和轻巧的
- 先前使用的“ CRA(CREATE-REACT-APP)”未在官方网站上列出,并且已成为旧技术。
- 从现在开始,VITE应该是使用React创建应用程序时的最佳选择。
- 反应
-
- 这是用于构建UI(用户界面)的JavaScript库。它是由Facebook开发的,目前仍在许多Web应用程序中使用。
- 三
-
- JavaScript库,可轻松创建3D图形。它抽象了WebGL的复杂操作,并启用了直观的3D开发。
- 与Direct WebGL操作相比,创建3D图形很容易使用,并且更易于使用。
- 反应三个纤维
-
- 这是一个允许将三个.js用于React的库。它将React的组件结构与三个JS的3D发动机相结合。
- 三个JS可以在反应开发方式中使用,从而可以进行直观有效的发展。
- 反应三个drei
-
- 用于三个纤维的有用实用程序组件的集合。添加常用的三个JS功能很容易。
- 可以通过简短的代码来实现复杂的3.JS功能,从而降低学习成本。
🚀用反应三个光纤×DREI×打字稿制作“像素艺术”!
本文中解释了环境构建
📌这段时间,我们不会使用任何特殊的3D模型,而只使用React三纤维中可用的标准对象并进行了三个DREI。
如果您想了解有关标准对象的更多信息,请参考本文
请检查GitHub以获取您这次创建的完整源代码。
💾github存储库:此链接中检查源代码

💡为控制面板创建UI!
首先,控制面板为用户创建了一个UI,以上传图像,设置像素大小并操作各种动画。
//导入React和与“ React”中导入{USESTATE}的Trix.js相关库; //常数设置:const default_pixel_size = 64; // - DEFAULT_PIXEL_SIZE: Default size (pixel count) when shrinking an image // ==== // App components: // - Central management of UI (image loading, pixel size setting, animation operations) // - Place two Canvas (pixel scenes and background scenes) // ==== const App = () => { // State Management: const [tempPixelSize, SetTemppixelsize] = Usestate<number> (default_pixel_size); //- temppixelsize:输入表单上的临时像素大小返回(<div style={{ width: "100vw", height: "100vh" }}> {/* ------------------------------------------------------------------------------------------------------------------------------------------------------------------------------------------------------------------------------------------------------------<div className="absolute top-4 left-4 bg-white shadow-lg p-4 rounded-lg z-10 w-64 space-y-4"> {/ *选择图像文件 */} <input type="file" accept="image/*" className="w-full border border-gray-300 rounded-md px-3 py-2 text-sm focus:ring-2 focus:ring-blue-500 focus:outline-none" /> {/ *像素大小输入字段 */}<div className="flex items-center space-x-2"><label className="text-sm text-gray-700">像素大小:</label><input type="number" value={tempPixelSize} onChange={(e) => setteMppixelSize(number(e.target.value))} min =“ 1” max =“ 128” className =“ W-16边界边界边界灰色-300圆形MD PX-PX-2 PY-1 PY-1 TEXT-SM焦点:RING-2焦点:Ring-Blue-500 focus:Ring-blue-500 focus:outline ofline ofline ofline nline none” /> none“ />></div> {/ * RedisPlay按钮 */} <button className="w-full bg-green-600 text-white py-2 px-4 rounded-md hover:bg-green-700 transition">redisplay</button> {/ *动画控制按钮 */}<div className="flex flex-wrap gap-2"><button className="flex-1 bg-blue-600 text-white py-2 px-4 rounded-md hover:bg-blue-700 transition">爆炸</button><button className="flex-1 bg-blue-600 text-white py-2 px-4 rounded-md hover:bg-blue-700 transition">波</button></div></div></div>); };导出默认应用;
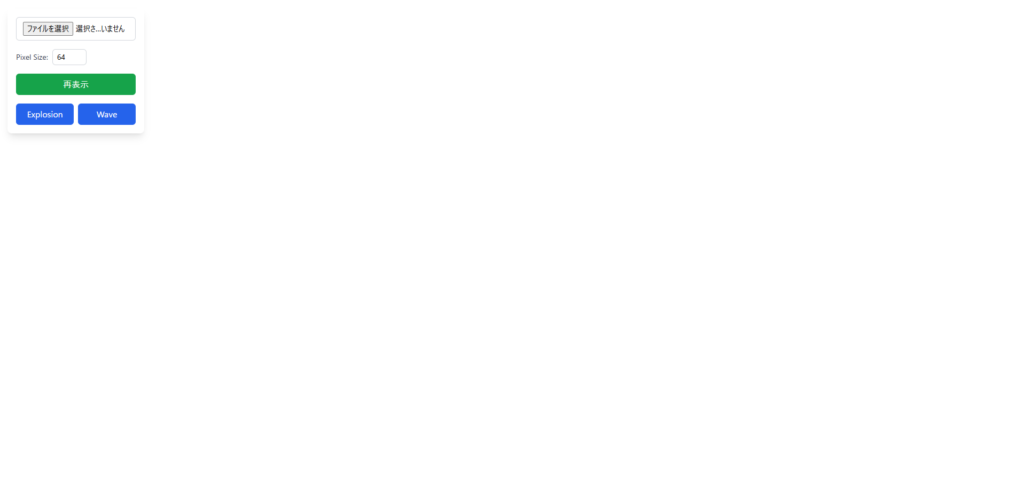
这次,我想创建一些简单的东西,所以我将其作为UI保留。
爆炸和波浪用于动画像素艺术。
我认为使用React三个光纤创建像素艺术的优点是您可以为Pixel Art添加动画。
💡创建控制面板事件!!
我将把活动放入我刚创建的UI中。
handerfilechange
handlefilechange是选择图像时的过程。
选择图像将更新像素大小,然后更新图像源。
//导入React和与“ React”中导入{USESTATE}的Trix.js相关库; //常数设置:const default_pixel_size = 64; // - DEFAULT_PIXEL_SIZE: Default size (pixel count) when shrinking an image // ==== // App components: // - Central management of UI (image loading, pixel size setting, animation operations) // - Place two Canvas (pixel scenes and background scenes) // ==== const App = () => { // State Management: const [tempPixelSize, SetTemppixelsize] = Usestate<number> (default_pixel_size); //- temppixelsize:输入表单上的临时像素大小const [pixelsize,setpixelsize] = usestate<number> (temppixelsize); //- temppixelsize:输入表单上的临时像素大小const [imagesrc,setImagesrc] = usestate<string | null> (无效的); //- imagesRC:导入图像的数据URL // ---- //选择图像文件时该怎么做://-加载文件,将其转换为数据URL并将其设置在Imagesrc //中 -----------------------------------------------------------------------------------------------------------------------------------------------------------------------------------------------------------------------------------------------------------------------------------------------------------------------------------------------------------------------------------------------------------------------------------------------------------------------<HTMLInputElement> )=> {const file = e.target.files?。[0];如果(!文件)返回; const Reader = new FileReader(); reader.onload =(ev)=> {const url = ev.target?.result; if(type url!==“字符串”)返回; //更新像素大小,然后设置image sear setPixelsize(temppixelsize); setImagesRC(url); }; Reader.ReadAsdataurl(file); };返回 (<div style={{ width: "100vw", height: "100vh" }}> {/* ------------------------------------------------------------------------------------------------------------------------------------------------------------------------------------------------------------------------------------------------------------<div className="absolute top-4 left-4 bg-white shadow-lg p-4 rounded-lg z-10 w-64 space-y-4"> {/ *选择图像文件 */} <input type="file" accept="image/*" onChange={handleFileChange} className="w-full border border-gray-300 rounded-md px-3 py-2 text-sm focus:ring-2 focus:ring-blue-500 focus:outline-none" /> {/ *像素大小输入字段 */} ...</div></div> ); };导出默认应用;
重新图像
接下来是重新播放按钮事件。
更新像素大小并重新渲染到像素大小时使用的。
这是一种反映在像素化中的temppixelize的形式。
//导入React和与“ React”中导入{USESTATE}的Trix.js相关库; //常数设置:const default_pixel_size = 64; // - DEFAULT_PIXEL_SIZE: Default size (pixel count) when shrinking an image // ==== // App components: // - Central management of UI (image loading, pixel size setting, animation operations) // - Place two Canvas (pixel scenes and background scenes) // ==== const App = () => { // State Management: const [tempPixelSize, SetTemppixelsize] = Usestate<number> (default_pixel_size); //- temppixelsize:输入表单上的临时像素大小const [pixelsize,setpixelsize] = usestate<number> (temppixelsize); //- temppixelsize:输入表单上的临时像素大小const [imagesrc,setImagesrc] = usestate<string | null> (无效的); //- imagesRC:导入图像的数据URL // ---- //选择图像文件时该怎么做://-加载文件,将其转换为数据URL并将其设置在Imagesrc //中 -----------------------------------------------------------------------------------------------------------------------------------------------------------------------------------------------------------------------------------------------------------------------------------------------------------------------------------------------------------------------------------------------------------------------------------------------------------------------<HTMLInputElement> )=> {...}; // ----- //按下“评论”按钮时处理://-通过反映pixelsize中的temppixels的值来重新绘制图像// -----------------------------------------------------------------------------------------------------------------------------------------------------------------------------------------------------------------------------------------------------------------------------------------------------------------------------------------------------------------------------------------------------------------------------------------------------------------------<div style={{ width: "100vw", height: "100vh" }}> {/* ------------------------------------------------------------------------------------------------------------------------------------------------------------------------------------------------------------------------------------------------------------<div className="absolute top-4 left-4 bg-white shadow-lg p-4 rounded-lg z-10 w-64 space-y-4"> ... {/ * RedisPlay按钮 */} <button className="w-full bg-green-600 text-white py-2 px-4 rounded-md hover:bg-green-700 transition" onClick={reloadImage} >redisplay</button> {/ *动画控制按钮 */}<div className="flex flex-wrap gap-2"><button className="flex-1 bg-blue-600 text-white py-2 px-4 rounded-md hover:bg-blue-700 transition">爆炸</button><button className="flex-1 bg-blue-600 text-white py-2 px-4 rounded-md hover:bg-blue-700 transition">波</button></div></div></div>); };导出默认应用;
plolexplosionimation和ControlweaveAnimation
动画控制按钮事件将看起来像这样:
由于我将Animation_time设置为常数,因此我将在该秒数中进行动画,以相同数量的秒数撤消,然后返回默认模式。
//导入react和三分。与js相关的库导入{usestate}从“ react”; //常数设置:const default_pixel_size = 64; //- default_pixel_size:默认尺寸(以像素为单位)缩小图像const andimation_time = 3; //- animation_time:time(秒)到动画// ============================= //-中央UI管理(图像加载,像素尺寸,动画操作)//-安排2个canvas(像素和背景场景)<number> (default_pixel_size); //- temppixelsize:输入表单上的临时像素大小const [pixelsize,setpixelsize] = usestate<number> (temppixelsize); //- temppixelsize:输入表单上的临时像素大小const [imagesrc,setImagesrc] = usestate<string | null> (无效的); //- imagesRC:导入图像const [animation,setAnimation] = usestate(“ default”)的数据URL; // - 动画:当前动画模式// - - - //选择图像文件时该怎么做://-加载文件,将其转换为数据URL并将其设置在Imagesrc // ------------------------------------------------------------------------------------------------------------------------------------------------------------------------------------------------------------------------------------------------------------------------------------------------------------------------------------------------------------------------------------------------------------------------------------ React.ChangeEvent<HTMLInputElement> )=> {...}; // ----- //按下“评论”按钮时处理://-通过反映pixelsize中的temppixels的值来重新粉刷图像// --------------------------------------------------------------------------------------------------------------------------------------------------------------------------------------------------------------------------------------------------------------------------------------------------------------------------------------------------------------------------------------------------------------------------------------------------------------------- Explosion动画控制://-与超时//依次启动,结束和撤消爆炸// ------------------------------------------------------------------------------------------------------------------------------------------------------------------------------------------------------------------------------------------------ ------------------------------------------------------------------------------------------------------------------------------------------------------------------------------------------------------------------------------------------------ setAnimation(“默认”); },animation_time * 2000); }; // ----- //控制Wave动画:// - 启动,结束和撤消Wave依次执行超时// ----------------------------------------------------------------------------------------------------------------------------------------------------------------------------------------------------------------------------------------------------------------------------------------------------------------------------------------------------------------------------------------------------------------------------------------------------------- setAnimation(“ wave_end”); },animation_time * 1000); setTimeout(()=> {setAnimation(“ default”);},animation_time * 2000); };返回 (<div style={{ width: "100vw", height: "100vh" }}> {/* ------------------------------------------------------------------------------------------------------------------------------------------------------------------------------------------------------------------------------------------------------------<div className="absolute top-4 left-4 bg-white shadow-lg p-4 rounded-lg z-10 w-64 space-y-4"> ... {/ *动画控制按钮 */}<div className="flex flex-wrap gap-2"> <button className="flex-1 bg-blue-600 text-white py-2 px-4 rounded-md hover:bg-blue-700 transition" onClick={controlExplosionAnimation} >爆炸</button><button className="flex-1 bg-blue-600 text-white py-2 px-4 rounded-md hover:bg-blue-700 transition" onClick={controlWaveAnimation} >波</button></div></div></div>); };导出默认应用;
💡当前的总体来源在这里
//导入react和三分。与js相关的库导入{usestate}从“ react”; //常数设置:const default_pixel_size = 64; //- default_pixel_size:默认尺寸(以像素为单位)缩小图像const andimation_time = 3; //- animation_time:time(秒)到动画// ============================= //-中央UI管理(图像加载,像素尺寸,动画操作)//-安排2个canvas(像素和背景场景)<number> (default_pixel_size); //- temppixelsize:输入表单上的临时像素大小const [pixelsize,setpixelsize] = usestate<number> (temppixelsize); //- temppixelsize:输入表单上的临时像素大小const [imagesrc,setImagesrc] = usestate<string | null> (无效的); //- imagesRC:导入图像const [animation,setAnimation] = usestate(“ default”)的数据URL; // - 动画:当前动画模式// - - - //选择图像文件时该怎么做://-加载文件,将其转换为数据URL并将其设置在Imagesrc // ------------------------------------------------------------------------------------------------------------------------------------------------------------------------------------------------------------------------------------------------------------------------------------------------------------------------------------------------------------------------------------------------------------------------------------ React.ChangeEvent<HTMLInputElement> )=> {const file = e.target.files?。[0];如果(!文件)返回; const Reader = new FileReader(); reader.onload =(ev)=> {const url = ev.target?.result; if(type url!==“字符串”)返回; //一次更新像素大小,然后设置image set setPixelsize(temppixelsize); setImagesRC(url); }; Reader.ReadAsdataurl(file); }; // ----- //按下“评论”按钮时的操作://-通过反映pixelsize中的temppixelsize的值//来重新绘制图像。 --------------------------------------------------------------------------------------------------------------------------------------------------------------------------------------------------------------------------------------------- --------------------------------------------------------------------------------------------------------------------------------------------------------------------------------------------------------------------------------------------- ---------------------------------------------------------------------------------------------------------------------------------------------------------------------------------------------------------------------------------------------------------------- ---------------------------------------------------------------------------------------------------------------------------------------------------------------------------------------------------------------------------------------------------------------- ---- // Wave Animation Control://-与超时依次启动,结束和撤消波动// ------------------------------------------------------------------------------------------------------------------------------------------------------------------------------------------------------------------------------------------------ ------------------------------------------------------------------------------------------------------------------------------------------------------------------------------------------------------------------------------------------------ => {setAnimation(“ default”); },animation_time * 2000); };返回 (<div style={{ width: "100vw", height: "100vh" }}> {/* ------------------------------------------------------------------------------------------------------------------------------------------------------------------------------------------------------------------------------------------------------------<div className="absolute top-4 left-4 bg-white shadow-lg p-4 rounded-lg z-10 w-64 space-y-4"> {/ *选择图像文件 */} <input type="file" accept="image/*" onChange={handleFileChange} className="w-full border border-gray-300 rounded-md px-3 py-2 text-sm focus:ring-2 focus:ring-blue-500 focus:outline-none" /> {/ *像素大小输入字段 */}<div className="flex items-center space-x-2"><label className="text-sm text-gray-700">像素大小:</label><input type="number" value={tempPixelSize} onChange={(e) => setteMppixelSize(number(e.target.value))} min =“ 1” max =“ 128” className =“ W-16边界边界边界灰色-300圆形MD PX-PX-2 PY-1 PY-1 TEXT-SM焦点:RING-2焦点:Ring-Blue-500 focus:Ring-blue-500 focus:outline ofline ofline ofline nline none” /> none“ />></div> {/ * RedisPlay按钮 */} <button className="w-full bg-green-600 text-white py-2 px-4 rounded-md hover:bg-green-700 transition" onClick={reloadImage} >redisplay</button> {/ *动画控制按钮 */}<div className="flex flex-wrap gap-2"> <button className="flex-1 bg-blue-600 text-white py-2 px-4 rounded-md hover:bg-blue-700 transition" onClick={controlExplosionAnimation} >爆炸</button><button className="flex-1 bg-blue-600 text-white py-2 px-4 rounded-md hover:bg-blue-700 transition" onClick={controlWaveAnimation} >波</button></div></div></div>); };导出默认应用;
💡从图像创建像素数据!!
这次,我们将加载图像,生成像素数据并显示屏幕。
因此,让我们创建一个从图像生成像素数据的过程。
*出于解释的目的,文件等不是分开的。我认为最好在组件级别分开文件以更可读。
创建一个createpixeldata功能
//导入react和三分。与js相关的库导入{usestate}从“ react”;从“三”中导入 *为三个; // ----- // PIXELINFO类型:管理每个像素的位置(X,Y,Z)和颜色(三。彩色)// -------------------------------------------------------------------------------------------------------------------------------------------------------------------------------------------------------------------------------------------------------------------------------------------------------------------------------------------------------------------------------------------------------------------------------------------- PixelInfo = { X:数字; Y:数字; Z:数字;颜色:三。彩色; }; //常数设置:const default_pixel_size = 64; //- default_pixel_size:默认尺寸(以像素为单位)缩小图像const andimation_time = 3; //- animation_time:花费到动画(秒)// ========= //应用程序组件://-中央UI管理(图像加载,像素尺寸,动画操作)//-安排两个Canvas(Pixel Scene和croppppent Scenes)// ===================== const App =()导出默认应用; // ===== // / createPixelData function: // - Get pixel data from the specified image using Canvas and convert it to an array of type PixelInfo // ===== const createPixelData = ( img: HTMLImageElement, targetWidth: number, targetHeight: number ): PixelInfo[] => { // Create a Canvas element and set it to the指定的尺寸const canvas = document.createelement(“ canvas”); canvas.width = targetWidth; canvas.height = targetheight; const ctx = canvas.getContext(“ 2d”);如果(!ctx)抛出新错误(“无2D上下文可用”); //在画布上绘制图像并获取像素信息ctx.drawimage(img,0,0,targetWidth,targetheight); const imgdata = ctx.getimagedata(0,0,targetWidth,targetheiight); const data = imgdata.data; const结果:pixelinfo [] = [];令IDX = 0; //对于图像中的每个像素,获取RGBA值并将其转换为PixelInfo(令y = 0; y <targetheight; y ++){for(让x = 0; x = 0; x <targetWidth; x ++){const r = data [idx],g = data [idx],g = data [idx+1],b = data [idx+1],b = data [id data [id data [id data [idx+2] IDX += 4; //如果(a <30)继续; //忽略低透明像素(如果<30); result.push({//调整x,y坐标,以使图像中心是原点x:x- targetwidth / y:-y + targetheight / 2,z:0,//创建三个color,通过将rgb值转换为范围0到1 color:new three three.color:r / 255,r / 255,g / g / g / 255,b / 255); }}返回结果; };
该过程如下:该过程有点复杂,但是我认为我正在做的事情很简单。
- 获取图像和像素大小
- 在画布上绘制图像以获取像素信息
- 获取用于像素的RGBA信息,并将其存储在Pixelinfo中
创建一个呼叫部分(使用效果)
由于图像或像素尺寸更改时更新像素数据,因此使用fepedeffect()监视[PixelSize,imagesRC]。
//导入react和与“ react”的trip.js相关库导入{usestate,usefeft};从“三”中导入 *为三个; // ----- // PIXELINFO类型:管理每个像素的位置(X,Y,Z)和颜色(三。彩色)// -------------------------------------------------------------------------------------------------------------------------------------------------------------------------------------------------------------------------------------------------------------------------------------------------------------------------------------------------------------------------------------------------------------------------------------- type PixelInfo = { X:数字; Y:数字; Z:数字;颜色:三。彩色; }; //常数设置:const default_pixel_size = 64; //- default_pixel_size:默认尺寸(以像素为单位)缩小图像const andimation_time = 3; //- animation_time:花费到动画(秒)// ========== //应用程序组件://-中央UI管理(图像加载,像素尺寸,动画操作)//-放置两个canvas(pixel场景和背景场景)<PixelInfo[] | null> (无效的); //-像素:从图像const [FileChangeCount,setFileChangeCount]生成的像素信息数组<number>(0); //- filechangecount:图像的更改数(用于触发重新加载)const [temppixelsize,setteMppixelSize] = usestate<number> (default_pixel_size); //- temppixelsize:输入表单上的临时像素大小const [pixelsize,setpixelsize] = usestate<number> (temppixelsize); //- temppixelsize:输入表单上的临时像素大小const [imagesrc,setImagesrc] = usestate<string | null> (无效的); //- imagesRC:导入图像const [animation,setAnimation] = usestate(“ default”)的数据URL; // - 动画:当前动画模式... // ----- //当图像或像素化更改时,从图像生成像素数据// -------------------------------------------------------------------------------------------------------------------------------------------------------------------------------------------------------------------------------------------------------------------------------------------------------------------------------------------------------------------------------------------------------------------------------------------------- Update fileChangeCount as a当图像更改setFileChangeCount(((prev)=> prev + 1)时,触发器; //加载新图像并使用Onload事件const img = new Image()生成像素数据; img.onload =()=> {const pixel = createpixeldata(img,pixelsize,pixelsize); setPixels(pix); }; img.src = imagesrc; },[pixelsize,imagesrc]);返回 (<div style={{ width: "100vw", height: "100vh" }}> {/* ------------------------------------------------------------------------------------------------------------------------------------------------------------------------------------------------------------------------------------------------------------</div> ); };导出默认应用; // ==== // createpixeldata函数://-使用画布从指定图像中获取像素数据,然后将其转换为一系列PixelInfo // ================================(img:img:htmlimageelement,htmlimageElement,htmlimageElement,targetWidth,targetWidth,norume norume,number,targetheight:targetheight and a cixeliatify and cixelinfo and cixelinfo/ cixelinfo/ cixelinfo = pixelinfo = /////////]大小const canvas = document.createelement(“ canvas”); canvas.width = targetWidth; canvas.height = targetheight; const ctx = canvas.getContext(“ 2d”);如果(!ctx)抛出新错误(“无2D上下文可用”); //在画布上绘制图像并获取像素信息ctx.drawimage(img,0,0,targetWidth,targetheight); const imgdata = ctx.getimagedata(0,0,targetWidth,targetheiight); const data = imgdata.data; const结果:pixelinfo [] = [];令IDX = 0; //对于图像中的每个像素,获取RGBA值并将其转换为PixelInfo(令y = 0; y <targetheight; y ++){for(让x = 0; x = 0; x <targetWidth; x ++){const r = data [idx],g = data [idx],g = data [idx+1],b = data [idx+1],b = data [id data [id data [id data [idx+2] IDX += 4; //如果(a <30)继续,请忽略透明度较低的像素(a <30); result.push({//调整x,y坐标,因此图像中心是原点x:x- targetWidth / y:-y + targetheight / 2,z:0,//创建三个color,通过将RGB值转换为范围0到1 color:new three three.color:r / 255,r / 255,g / g / 255,b / b /}), }}返回结果; };
💡帆布可用于像素显示!!
首先放置画布并准备相机,照明等。
//导入React和与“@react-three/drei”的triph.js相关库导入{orbitControls};从“@react-three/fiber”导入{canvas};导入{usestate,usefeft,useref}来自“ react”;从“三”中导入 *为三个; // ----- // PIXELINFO类型:管理每个像素的位置(X,Y,Z)和颜色(三。彩色)// --------------------------------------------------------------------------------------------------------------------------------------------------------------------------------------------------------------------------------------------------------------- ---------------------------------------------------------------------------------------------------------------------------------------------------------------------------------------------------------------------------------------------------------------以秒为单位花费的时间// ================ //- central UI管理(图像加载,像素大小,动画操作)//-安排两个Canvas(Pixel场景和背景场景)// ====================()=()=> {...<div style={{ width: "100vw", height: "100vh" }}> {/* ------------------------------------------------------------------------------------------------------------------------------------------------------------------------------------------------------------------------------------------------------------ <div className="absolute top-0 left-0 w-full h-full z-[1]"><Canvas camera={{ far: 5000, position: [0, 0, 100] }}> {/ *基本照明设置 */}<ambientLight intensity={1} /><directionalLight position={[100, 200, 100]} intensity={1} /> {/ * OrbitControls允许您使用鼠标操作旋转场景 */}<OrbitControls /> {/ *仅当存在像素数据时 */}}}}}}}}}}}</Canvas></div></div> ); };导出默认应用; // ==== // createPixelData function: // - Get pixel data from the specified image using Canvas and convert it to an array of type PixelInfo // ===== const createPixelData = ( img: HTMLImageElement, targetWidth: number, targetHeight: number ): PixelInfo[] => { ... return result; };
💡显示像素!!
//导入React和与“@react-three/drei”的triph.js相关库导入{orbitControls};从“@react-three/fiber”导入{canvas};导入{usestate,usefeft,useref}来自“ react”;从“三”中导入 *为三个; // ----- // PIXELINFO类型:管理每个像素的位置(X,Y,Z)和颜色(三。彩色)// --------------------------------------------------------------------------------------------------------------------------------------------------------------------------------------------------------------------------------------------------------------- ---------------------------------------------------------------------------------------------------------------------------------------------------------------------------------------------------------------------------------------------------------------秒为动画的时间// ==== // pixelgrid组件://-呈现像素数据的组组,和//-控制示例显示动画(逐渐放大)和移动动画(爆炸/wave)// =====像素:Pixelinfo [];动画:字符串; Filechangecount:数字; }; const pixelgrid =({{pixelsize,pixels,animation,filechangecount,}:pixelgridprops)=> {// triph.js中对组对象的引用。用于对所有像素进行分组<THREE.Group>(无效的); //将每个Pixelbox组件放入由GroupRef管理的组中以渲染返回(<group ref={groupRef}> {pixels.map((Pixel,i)=>((<PixelBox key={i} pixel={pixel} scale={1} /> )}}</group> ); }; // ==== // Pixelbox组件://-用于绘制单个Pixel(box)// ==============================比例:数字; }; const pixelbox =({{pixel,scale}:pixelboxprops)=> {//网格:使用框的几何和材料与位置和比例返回( <mesh position={[pixel.x, pixel.y, pixel.z]} scale={[scale, scale, scale]}><boxGeometry args={[1, 1, 1]} /><meshStandardMaterial color={pixel.color} /></mesh> ); }; // ==== //应用程序组件://-中央UI管理(图像加载,像素大小,动画操作)//-安排两个画布(像素场景和背景场景)// =============== const app =()=> {...<div style={{ width: "100vw", height: "100vh" }}> {/* ------------------------------------------------------------------------------------------------------------------------------------------------------------------------------------------------------------------------------------------------------------ <div className="absolute top-0 left-0 w-full h-full z-[1]"><Canvas camera={{ far: 5000, position: [0, 0, 100] }}> {/ *基本照明设置 */}<ambientLight intensity={1} /><directionalLight position={[100, 200, 100]} intensity={1} /> {/ * OrbitControls允许您使用鼠标操作旋转场景 */}<OrbitControls /> {/ *仅当存在像素数据时 */} {pixels &&( <PixelGrid pixelSize={pixelSize} pixels={pixels} animation={animation} fileChangeCount={fileChangeCount} /> )</Canvas></div></div> ); };导出默认应用; // ==== // createpixeldata函数://-使用帆布从指定图像获取像素数据,然后将其转换为一系列PixelInfo // =======================================(img:htmlimageelement,htmlimageelement,htmlimageelement,targetWidth,targetWidth,targetWidth:number,targetheight:targetheight:number):
我认为像素艺术以这种方式显示。
这很好,但是由于我使用React三个光纤制作它,所以我会添加动画等。
💡添加了显示动画
我将尝试重新创建显示动画,因为它逐渐绘制。
这是将像素量表从0逐渐增加到1的图像。
//导入React和与“@react-three/drei”的triph.js相关库导入{orbitControls};从“@react-three/fiber”中导入{canvas,useframe};导入{usestate,usefeft,useref}来自“ react”;从“三”中导入 *为三个; // ----- // PIXELINFO类型:每个像素的位置(X,Y,Z)和颜色(三。彩色)// -------------------------------------------------------------------------------------------------------------------------------------------------------------------------------------------------------------------------------------------------------- --------------------------------------------------------------------------------------------------------------------------------------------------------------------------------------------------------------------------------------------------------- Animation_Time:时间(以秒为单位)到动画// ====================================== //-呈现像素数据的组,和//-控制显示动画(逐渐放大)和移动动画(爆炸/wave/wave)// =================== type pixelgridprops = pixelgridprops = {pixelsize:{pixelsize:编号:编号:编号;像素:Pixelinfo [];动画:字符串; Filechangecount:数字; }; const pixelgrid =({{pixelsize,pixels,animation,filechangecount,}:pixelgridprops)=> {// triph.js中对组对象的引用。用于对所有像素进行分组<THREE.Group>(无效的); // ----- //显示动画:以阶段显示的像素的处理// ---- //管理每个像素的比例尺状态(初始状态全部为0 =隐藏)const [scales,setScales] = usestate<number[]> (array(pixels.length).fill(0)); // ScaleProgressRef:保持每个批次const scar scaleprogressref = useref(0)的显示进度(累积时间); // BatchIndexRef:管理当前显示的批处理const batchindexref = useref(0); // UseFrame to update each frame and display pixels step by step useFrame((_, delta) => { // If all batches are displayed, no further processing is performed if (batchIndexRef.current > pixels.length / pixelSize) return; // Adds the time since the previous frame scaleProgressRef.current += delta; // Calculates the time threshold to display the当前const阈值= batchindexref.current *(animation_time /(pixels.length / pixelsize));属于当前批处理startindex = batchindexref.current * pixelsize; setScales(新闻范围); //将每个Pixelbox组件放入由GroupRef管理的组中并渲染(<group ref={groupRef}> {pixels.map((Pixel,i)=>((<PixelBox key={i} pixel={pixel} scale={scales[i]} /> )}}</group> ); }; // ==== // Pixelbox组件://-用于绘制单个Pixel(box)// ==============================比例:数字; }; const pixelbox =({{pixel,scale}:pixelboxprops)=> {//网格:使用框的几何和材料与位置和比例返回( <mesh position={[pixel.x, pixel.y, pixel.z]} scale={[scale, scale, scale]}><boxGeometry args={[1, 1, 1]} /><meshStandardMaterial color={pixel.color} /></mesh> ); }; // ==== //应用程序组件://-中央UI管理(图像加载,像素大小,动画操作)//-安排两个画布(像素场景和背景场景)// =============== const app =()=> {...<div style={{ width: "100vw", height: "100vh" }}> {/* ------------------------------------------------------------------------------------------------------------------------------------------------------------------------------------------------------------------------------------------------------------ <div className="absolute top-0 left-0 w-full h-full z-[1]"><Canvas camera={{ far: 5000, position: [0, 0, 100] }}> {/ *基本照明设置 */}<ambientLight intensity={1} /><directionalLight position={[100, 200, 100]} intensity={1} /> {/ * OrbitControls允许您使用鼠标操作旋转场景 */}<OrbitControls /> {/ *仅当存在像素数据时 */} {pixels &&( <PixelGrid pixelSize={pixelSize} pixels={pixels} animation={animation} fileChangeCount={fileChangeCount} /> )</Canvas></div></div> ); };导出默认应用; // ==== // createpixeldata函数://-使用帆布从指定图像获取像素数据,然后将其转换为一系列PixelInfo // =======================================(img:htmlimageelement,htmlimageelement,htmlimageelement,targetWidth,targetWidth,targetWidth:number,targetheight:targetheight:number):
💡支持图像重新加载!!
如果继续这样做,则在重新加载图像并将立即显示时显示动画将不起作用。
在重新加载图像或更改像素大小时,添加使用效果以重置状态。
//导入React和与“@react-three/drei”的triph.js相关库导入{orbitControls};从“@react-three/fiber”中导入{canvas,useframe};导入{usestate,usefeft,useref}来自“ react”;从“三”中导入 *为三个; // ----- // PIXELINFO类型:每个像素的位置(X,Y,Z)和颜色(三。彩色)// -------------------------------------------------------------------------------------------------------------------------------------------------------------------------------------------------------------------------------------------------------- --------------------------------------------------------------------------------------------------------------------------------------------------------------------------------------------------------------------------------------------------------- Animation_Time:时间(以秒为单位)到动画// ====================================== //-呈现像素数据的组,和//-控制显示动画(逐渐放大)和移动动画(爆炸/wave/wave)// =================== type pixelgridprops = pixelgridprops = {pixelsize:{pixelsize:编号:编号:编号;像素:Pixelinfo [];动画:字符串; Filechangecount:数字; }; const pixelgrid =({{pixelsize,pixels,animation,filechangecount,}:pixelgridprops)=> {// triph.js中对组对象的引用。用于对所有像素进行分组<THREE.Group>(无效的); // ----- //显示动画:以阶段显示的像素的处理// ---- //管理每个像素的比例尺状态(初始状态全部为0 =隐藏)const [scales,setScales] = usestate<number[]> (array(pixels.length).fill(0)); // ScaleProgressRef:保持每个批次const scar scaleprogressref = useref(0)的显示进度(累积时间); // BatchIndexRef:管理当前显示的批处理const batchindexref = useref(0); //参考以确定图像文件是否已更改,const prevfilechangecountref = useref(filechangecount); //重新加载图像useseffect(()=> {if(filechangecount!== prevfilechangecountref.current)时,请重置所有像素的显示状态(比例) scaleprogressref.current = 0; //使用Frame更新每个帧,并逐步显示Pixels Useframe delta)=> {//如果可见所有批处理,则在(batchindexexref.current> pixels.length / pixelsize)return; //添加时间以来,自上一个帧scaleprogressref.current += delta; //计算显示当前批处理const阈值的时间阈值= batchindexref.current *(animation_time /(pixels.length / pixelsize))); //当经过的时间超过阈值时,请开始显示下一个批次的像素,如果(ScaleProgressRef.Current> threshold){//创建当前比例尺状态const newscales = [... scales]的副本; //计算属于当前批处理const startIndex = batchindexref.current * pixelsize的像素的索引范围; const endIndex = math.min(startIndex + pixelsize,pixels.length); //将相应的像素刻度显示为1(让i = startIndex; i <endIndex; i ++){newscales [i] = 1; } //设置更新的比例尺状态setScales(newscales); //继续进行下一个Batchindexref.current += 1; }}); //每个像素框组件都放在由GroupRef管理的组中以渲染返回(<group ref={groupRef}> {pixels.map((Pixel,i)=>((<PixelBox key={i} pixel={pixel} scale={scales[i]} /> )}}</group> ); }; // ==== // Pixelbox组件://-用于绘制单个Pixel(box)// ==============================比例:数字; }; const pixelbox =({{pixel,scale}:pixelboxprops)=> {//网格:使用框的几何和材料与位置和比例返回( <mesh position={[pixel.x, pixel.y, pixel.z]} scale={[scale, scale, scale]}><boxGeometry args={[1, 1, 1]} /><meshStandardMaterial color={pixel.color} /></mesh> ); }; // ==== //应用程序组件://-中央UI管理(图像加载,像素大小,动画操作)//-安排两个画布(像素场景和背景场景)// =============== const app =()=> {...<div style={{ width: "100vw", height: "100vh" }}> {/* ------------------------------------------------------------------------------------------------------------------------------------------------------------------------------------------------------------------------------------------------------------ <div className="absolute top-0 left-0 w-full h-full z-[1]"><Canvas camera={{ far: 5000, position: [0, 0, 100] }}> {/ *基本照明设置 */}<ambientLight intensity={1} /><directionalLight position={[100, 200, 100]} intensity={1} /> {/ * OrbitControls允许您使用鼠标操作旋转场景 */}<OrbitControls /> {/ *仅当存在像素数据时 */} {pixels &&( <PixelGrid pixelSize={pixelSize} pixels={pixels} animation={animation} fileChangeCount={fileChangeCount} /> )</Canvas></div></div> ); };导出默认应用; // ==== // createpixeldata函数://-使用帆布从指定图像获取像素数据,然后将其转换为一系列PixelInfo // =======================================(img:htmlimageelement,htmlimageelement,htmlimageelement,targetWidth,targetWidth,targetWidth:number,targetheight:targetheight:number):
现在,即使您重新加载图像,您也可以看到它可以正常工作。
还可以监视PixelSize,因此即使更新像素大小,它也会再次显示。
💡增添了爆炸动画!!
接下来,添加爆炸动画。
我们正在做的事情很简单:首先计算随机坐标,然后使用useFrame将其移至该位置。当您恢复正常时,您可以做相反的事情。
//导入React和与“@react-three/drei”的triph.js相关库导入{orbitControls};从“@react-three/fiber”中导入{canvas,useframe};导入{usestate,usefeft,useref}来自“ react”;从“三”中导入 *为三个; // ----- // PIXELINFO类型:每个像素的位置(X,Y,Z)和颜色(三。彩色)// -------------------------------------------------------------------------------------------------------------------------------------------------------------------------------------------------------------------------------------------------------- --------------------------------------------------------------------------------------------------------------------------------------------------------------------------------------------------------------------------------------------------------- Animation_Time:时间(以秒为单位)到动画// ====================================== //-呈现像素数据的组,和//-控制显示动画(逐渐放大)和移动动画(爆炸/wave/wave)// =================== type pixelgridprops = pixelgridprops = {pixelsize:{pixelsize:编号:编号:编号;像素:Pixelinfo [];动画:字符串; Filechangecount:数字; }; const pixelgrid =({{pixelsize,pixels,animation,filechangecount,}:pixelgridprops)=> {// triph.js中对组对象的引用。用于对所有像素进行分组<THREE.Group>(无效的); // ---- //显示动画:以各个阶段显示的像素的处理// ----- ... // ----- // ----- //移动动画:使用爆炸或波效应更改像素位置//-----------------------------------如果有一个更改const lastAnimationRef = useref = useRef = useRef(animation) //管理动画进度(0到1) //为每个像素(爆炸效应)生成随机散射目的地坐标,const const scatspositionsRef = useref(pixels.map.map(()=>({x:{x:(Math.random() - 0.5) - 0.5) * 100,y: //再生随机散射时,当图像或像素数据更新时使用useffect(()=> {sctatepositionsref.current = pixels.map.map(()=>({x:{x:at math.random() - 0.5) * 100,y: [像素]); // Update the position of each pixel every frame with useFrame to match the animation progress useFrame((_, delta) => { // Reset progress if the animation state changes if (animation !== lastAnimationRef.current) { lastAnimationRef.current = animation; animationProgressRef.current = 0; } // No position updates occur in the "default" state if (animation ===“默认”; //更新动画进度(使用Animation_time归一化)(AnimationProgressref.current <1) SmoothProgress = Math.sin(((AnimationProgressRef.Current * Math.pi) / 2);从原始位置到随机散射位置,如果(动画===“爆炸式”){targetx = scatterpositionsref.current [i] .x * smoothprogress + pixel.x *(1-平滑progress); sctationpositionsref.current [i] .z *平滑progress + pixel.z *(1-平滑播放); sctatePositionSref.Current [i] .y *(1-平滑播放) + pixel.y * speame targez = sctatepositionsref.current [i] .z *(1-平滑型) Targetz);}); //将每个Pixelbox组件放入由GroupRef管理的组中以渲染返回(<group ref={groupRef}> {pixels.map((Pixel,i)=>((<PixelBox key={i} pixel={pixel} scale={scales[i]} /> )}}</group> ); }; // ==== // Pixelbox组件://-用于绘制单个Pixel(box)// ==============================比例:数字; }; const pixelbox =({{pixel,scale}:pixelboxprops)=> {//网格:使用框的几何和材料与位置和比例返回( <mesh position={[pixel.x, pixel.y, pixel.z]} scale={[scale, scale, scale]}><boxGeometry args={[1, 1, 1]} /><meshStandardMaterial color={pixel.color} /></mesh> ); }; // ==== //应用程序组件://-中央UI管理(图像加载,像素大小,动画操作)//-安排两个画布(像素场景和背景场景)// =============== const app =()=> {...<div style={{ width: "100vw", height: "100vh" }}> {/* ------------------------------------------------------------------------------------------------------------------------------------------------------------------------------------------------------------------------------------------------------------ <div className="absolute top-0 left-0 w-full h-full z-[1]"><Canvas camera={{ far: 5000, position: [0, 0, 100] }}> {/ *基本照明设置 */}<ambientLight intensity={1} /><directionalLight position={[100, 200, 100]} intensity={1} /> {/ * OrbitControls允许您使用鼠标操作旋转场景 */}<OrbitControls /> {/ *仅当存在像素数据时 */} {pixels &&( <PixelGrid pixelSize={pixelSize} pixels={pixels} animation={animation} fileChangeCount={fileChangeCount} /> )</Canvas></div></div> ); };导出默认应用; // ==== // createpixeldata函数://-使用帆布从指定图像获取像素数据,然后将其转换为一系列PixelInfo // =======================================(img:htmlimageelement,htmlimageelement,htmlimageelement,targetWidth,targetWidth,targetWidth:number,targetheight:targetheight:number):
尽管很简单,但我认为它似乎具有像素分裂的感觉!
💡添加了Wave Animation!
让我们还添加Wave动画。
我认为我基本上可以以与爆炸动画相同的方式添加它。
//导入React和与“@react-three/drei”的triph.js相关库导入{orbitControls};从“@react-three/fiber”中导入{canvas,useframe};导入{usestate,usefeft,useref}来自“ react”;从“三”中导入 *为三个; // ----- // PIXELINFO类型:每个像素的位置(X,Y,Z)和颜色(三。彩色)// -------------------------------------------------------------------------------------------------------------------------------------------------------------------------------------------------------------------------------------------------------- --------------------------------------------------------------------------------------------------------------------------------------------------------------------------------------------------------------------------------------------------------- Animation_Time:时间(以秒为单位)到动画// ====================================== //-呈现像素数据的组,和//-控制显示动画(逐渐放大)和移动动画(爆炸/wave/wave)// =================== type pixelgridprops = pixelgridprops = {pixelsize:{pixelsize:编号:编号:编号;像素:Pixelinfo [];动画:字符串; Filechangecount:数字; }; const pixelgrid =({{pixelsize,pixels,animation,filechangecount,}:pixelgridprops)=> {// triph.js中对组对象的引用。用于对所有像素进行分组<THREE.Group>(无效的); // ---- //显示动画:以各个阶段显示的像素的处理// ----- ... // ----- // ----- //移动动画:使用爆炸或波效应更改像素位置//-----------------------------------如果有一个更改const lastAnimationRef = useref = useRef = useRef(animation) //管理动画进度(0到1) //为每个像素(爆炸效应)生成随机散射目的地坐标,const const scatspositionsRef = useref(pixels.map.map(()=>({x:{x:(Math.random() - 0.5) - 0.5) * 100,y: //再生随机散射时,当图像或像素数据更新时使用useffect(()=> {sctatepositionsref.current = pixels.map.map(()=>({x:{x:at math.random() - 0.5) * 100,y: [像素]); // Update the position of each pixel every frame with useFrame to match the animation progress useFrame((_, delta) => { // Reset progress if the animation state changes if (animation !== lastAnimationRef.current) { lastAnimationRef.current = animation; animationProgressRef.current = 0; } // No position updates occur in the "default" state if (animation ===“默认”; //更新动画进度(使用Animation_time归一化)(AnimationProgressref.current <1) SmoothProgress = Math.sin(((AnimationProgressRef.Current * Math.pi) / 2);从原始位置到随机散射位置,如果(动画===“爆炸式”){targetx = scatterpositionsref.current [i] .x * smoothprogress + pixel.x *(1-平滑progress); sctationpositionsref.current [i] .z *平滑progress + pixel.z *(1-平滑播放); sctatepositionsref.current [i] .y *(1-平滑播放) + pixel.y *平滑progress; “ wave_start”){targetz = math.sin((Pixel.x + pixel.z + andionprogressref.current * 10) * 0.3) * 5 * speame progress; AnimationProgressRef.current) * 10) * 0.3 * 5 *(1-平滑播放)//更新相应的Pixel groupRef.current的网格位置? //将每个Pixelbox组件放入由GroupRef管理的组中以渲染返回(<group ref={groupRef}> {pixels.map((Pixel,i)=>((<PixelBox key={i} pixel={pixel} scale={scales[i]} /> )}}</group> ); }; // ==== // Pixelbox组件://-用于绘制单个Pixel(box)// ==============================比例:数字; }; const pixelbox =({{pixel,scale}:pixelboxprops)=> {//网格:使用框的几何和材料与位置和比例返回( <mesh position={[pixel.x, pixel.y, pixel.z]} scale={[scale, scale, scale]}><boxGeometry args={[1, 1, 1]} /><meshStandardMaterial color={pixel.color} /></mesh> ); }; // ==== //应用程序组件://-中央UI管理(图像加载,像素大小,动画操作)//-安排两个画布(像素场景和背景场景)// =============== const app =()=> {...<div style={{ width: "100vw", height: "100vh" }}> {/* ------------------------------------------------------------------------------------------------------------------------------------------------------------------------------------------------------------------------------------------------------------ <div className="absolute top-0 left-0 w-full h-full z-[1]"><Canvas camera={{ far: 5000, position: [0, 0, 100] }}> {/ *基本照明设置 */}<ambientLight intensity={1} /><directionalLight position={[100, 200, 100]} intensity={1} /> {/ * OrbitControls允许您使用鼠标操作旋转场景 */}<OrbitControls /> {/ *仅当存在像素数据时 */} {pixels &&( <PixelGrid pixelSize={pixelSize} pixels={pixels} animation={animation} fileChangeCount={fileChangeCount} /> )</Canvas></div></div> ); };导出默认应用; // ==== // createpixeldata函数://-使用帆布从指定图像获取像素数据,然后将其转换为一系列PixelInfo // =======================================(img:htmlimageelement,htmlimageelement,htmlimageelement,targetWidth,targetWidth,targetWidth:number,targetheight:targetheight:number):
我认为这可以表达出波动的感觉。
添加了背景!
这不需要它,但是我有点寂寞,所以我也会添加背景。
React Three Drei有星星和云,所以我将它们以一种很好的方式结合在一起。
//导入react和三分。与js相关的库导入react,{usestate,useref,memo,semo,useffect}来自“ react”;从“@react-three/fiber”中导入{canvas,useframe};导入{cloud,orbitControls,stars}来自“@react-three/drei”;从“三”中导入 *为三个; // ----- // PIXELINFO类型:管理每个像素的位置(X,Y,Z)和颜色(三。彩色)// -------------------------------------------------------------------------------------------------------------------------------------------------------------------------------------------------------------------------------------------------- -------------------------------------------------------------------------------------------------------------------------------------------------------------------------------------------------------------------------------------------------- default_pixel_size = 64; const animation_time = 3; // ==== // PixelGrid组件://-渲染像素数据的组和//-控制示例显示动画(逐渐放大)和移动动画(爆炸/wave)// ================= pixelgridprops = {pixelsize = {pixelsize:pixelsize:number;像素:Pixelinfo [];动画:字符串; Filechangecount:数字; }; const pixelgrid =({{pixelsize,pixels,animation,filechangecount,}:pixelgridprops)=> {... // / /将每个pixelbox组件放在由GroupRef管理的组中以呈现返回的组(<group ref={groupRef}> {pixels.map((Pixel,i)=>((<PixelBox key={i} pixel={pixel} scale={scales[i]} /> )}}</group> ); }; // ==== // Pixelbox组件://-用于绘制单个Pixel(box)// ==============================比例:数字; }; const pixelbox =({{pixel,scale}:pixelboxprops)=> {//网格:使用框的几何和材料与位置和比例返回( <mesh position={[pixel.x, pixel.y, pixel.z]} scale={[scale, scale, scale]}><boxGeometry args={[1, 1, 1]} /><meshStandardMaterial color={pixel.color} /></mesh> ); }; // ==== //应用程序组件://-中央UI管理(图像加载,像素大小,动画操作)//-安排两个画布(像素场景和背景场景)// =============== const app =()=> {...<div style={{ width: "100vw", height: "100vh" }}> {/* -------------------------------------------------------------------------------------------------------------------------------------------------------------------------------------------------------------------------------------------------------------- -------------------------------------------------------------------------------------------------------------------------------------------------------------------------------------------------------------------------------------------------------------- <div className="absolute top-0 left-0 w-full h-full z-[-1]"><Canvas camera={{ position: [0, 5, 15], fov: 50 }} style={{ background: "black" }} ><ambientLight intensity={0.5} /><pointLight position={[10, 10, 10]} intensity={0.5} color="white" /><BackgroundScene /></Canvas></div></div> ); }; // ==== // createPixelData function: // - Get pixel data from the specified image using Canvas and convert it to an array of type PixelInfo // ===== const createPixelData = ( img: HTMLImageElement, targetWidth: number, targetHeight: number ): PixelInfo[] => { ... return result; }; // ===== //背景Scene组件://-一个用于在背景中显示星空和云的组件//-与备忘录包裹以防止不必要的重新刷新// ================= <Stars radius={100} // 星が存在する空間の半径 depth={50} // 星の配置される深さの範囲 count={5000} // 表示する星の総数 factor={6} // 星の大きさ調整用の係数 saturation={1} // 色の鮮やかさ fade // 遠くの星がフェードアウトする効果 /> {/ *带有云组件的Express Clouds */} <Cloud position={[0, 0, 0]} // 雲の中心位置 opacity={0.1} // 雲の不透明度(低いほど透明) speed={0.2} // 雲の動く速度 scale={[10, 10, 10]} // 雲全体のサイズ segments={20} // 雲を構成するパーティクルの数 /></> ); });导出默认应用;
从视频中可能很难看出,但是感觉就像烟在上升,感觉很好。
💡最终源代码!
💾github存储库:此链接中检查源代码
//导入react和三分。与js相关的库导入react,{usestate,useref,memo,semo,useffect}来自“ react”;从“@react-three/fiber”中导入{canvas,useframe};导入{cloud,orbitControls,stars}来自“@react-three/drei”;从“三”中导入 *为三个; // ----- // PIXELINFO类型:管理每个像素的位置(X,Y,Z)和颜色(三。彩色)// -------------------------------------------------------------------------------------------------------------------------------------------------------------------------------------------------------------------------------------------------- -------------------------------------------------------------------------------------------------------------------------------------------------------------------------------------------------------------------------------------------------- default_pixel_size = 64; const animation_time = 3; // ==== // PixelGrid组件://-渲染像素数据的组和//-控制示例显示动画(逐渐放大)和移动动画(爆炸/wave)// ================= pixelgridprops = {pixelsize = {pixelsize:pixelsize:number;像素:Pixelinfo [];动画:字符串; Filechangecount:数字; }; const pixelgrid =({{pixelsize,pixels,animation,filechangecount,}:pixelgridprops)=> {// triph.js中对组对象的引用。用于对所有像素进行分组<THREE.Group>(无效的); // ----- //显示动画:以阶段显示的像素的处理// ---- //管理每个像素的比例尺状态(初始状态全部为0 =隐藏)const [scales,setScales] = usestate<number[]> (array(pixels.length).fill(0)); // ScaleProgressRef:保持每个批次const scar scaleprogressref = useref(0)的显示进度(累积时间); // BatchIndexRef:管理当前显示的批处理const batchindexref = useref(0); //参考以确定图像文件是否已更改,const prevfilechangecountref = useref(filechangecount); //重新加载图像useseffect(()=> {if(filechangecount!== prevfilechangecountref.current)时,请重置所有像素的显示状态(比例) scaleprogressref.current = 0; //使用Frame更新每个帧,并逐步显示Pixels Useframe delta)=> {//如果可见所有批处理,则在(batchindexexref.current> pixels.length / pixelsize)return; //添加时间以来,自上一个帧scaleprogressref.current += delta; //计算显示当前批处理const阈值的时间阈值= batchindexref.current *(animation_time /(pixels.length / pixelsize))); //当经过的时间超过阈值时,请开始显示下一个批次的像素,如果(ScaleProgressRef.Current> threshold){//创建当前比例尺状态const newscales = [... scales]的副本; //计算属于当前批处理const startIndex = batchindexref.current * pixelsize的像素的索引范围; const endIndex = math.min(startIndex + pixelsize,pixels.length); //将相应的像素刻度显示为1(让i = startIndex; i <endIndex; i ++){newscales [i] = 1; } //设置更新的比例尺状态setScales(newscales); //继续进行下一个Batchindexref.current += 1; }}); // ---- //移动动画:使用爆炸或波浪效应更改像素位置//--- //参考以与先前的动画状态进行比较,如果存在更改const lastAnimationRef = useref(animation); //管理动画进度(0-1)const AnimationProgressref = useref(0); //为每个像素(爆炸效应)生成随机散射坐标,const const sctationPositionsRef = useref(pixels.map.map(()=>({x:{x:(Math.random() - 0.5) - 0.5) * 100,y: //在图像或像素数据被更新时,再生随机散射坐标坐标((()=> {sctatePositionSref.current = pixels.map.map(()=>({x:{x:atrandom() - 0.5) * 100,y: [像素]); // Update the position of each pixel every frame with useFrame to match the animation progress useFrame((_, delta) => { // Reset the progress if the animation state changes if (animation !== lastAnimationRef.current) { lastAnimationRef.current = animation; animationProgressRef.current = 0; } // No position updates occur in the "default" state if (animation ===“默认”; //更新动画进度(使用Animation_time归一化)(AnimationProgressref.current <1) SmoothProgress = Math.sin(((AnimationProgressRef.Current * Math.pi) / 2);从原始位置到随机散射位置,如果(动画===“爆炸式”){targetx = scatterpositionsref.current [i] .x * smoothprogress + pixel.x *(1-平滑progress); sctatepositionsref.current [i] .z *平滑progress + pixel.z *(1-平滑播放); sctatepositionsref.current [i] .y *(1-平滑播放) + pixel.y *平滑progress; “ wave_start”){targetz = math.sin((Pixel.x + pixel.z + andionprogressref.current * 10) * 0.3) * 5 * speame progress; AnimationProgressRef.current) * 10) * 0.3 * 5 *(1-平滑播放)//更新相应的Pixel groupRef.current的网格位置? //将每个Pixelbox组件放入由GroupRef管理的组中以渲染返回(<group ref={groupRef}> {pixels.map((Pixel,i)=>((<PixelBox key={i} pixel={pixel} scale={scales[i]} /> )}}</group> ); }; // ==== // Pixelbox组件://-用于绘制单个Pixel(box)// ==============================比例:数字; }; const pixelbox =({{pixel,scale}:pixelboxprops)=> {//网格:使用框的几何和材料与位置和比例返回( <mesh position={[pixel.x, pixel.y, pixel.z]} scale={[scale, scale, scale]}><boxGeometry args={[1, 1, 1]} /><meshStandardMaterial color={pixel.color} /></mesh> ); }; // ==== //应用程序组件://-中央UI管理(图像加载,像素大小,动画操作)//-安排两个帆布(像素场景和背景场景)// ==========================()=> {//状态管理://状态管理://-- PixelSize:应用的实际像素大小//- -FileChangeCount:图像更改的数量(用于触发重新加载)//- imagesRC:导入image的数据URL // - 动画:当前动画模式const [Pixels,setPixels = USESTATE] = USESTATE<PixelInfo[] | null> (无效的); const [temppixelsize,setteMppixelSize] = usestate<number> (default_pixel_size); const [pixelsize,setpixelsize] = usestate<number> (temppixelsize); const [filechangecount,setFilechangecount] = Usestate<number> (0); const [imagesrc,setImagesrc] = usestate<string | null> (无效的); const [动画,setAnimation] = usestate(“ default”); // ----- //选择图像文件时该怎么办://-加载文件,将其转换为数据URL并将其设置为Imagesrc // ---------------------------------------------------------------------------------------------------------------------------------------------------------------------------------------------------------------------------------------------------------------------------------------------------------------------------------------------------------------------------------------------------------------------------------------------------------<HTMLInputElement> )=> {const file = e.target.files?。[0];如果(!文件)返回; const Reader = new FileReader(); reader.onload =(ev)=> {const url = ev.target?.result; if(type url!==“字符串”)返回; //一次更新像素大小,然后设置image set setPixelsize(temppixelsize); setImagesRC(url); }; Reader.ReadAsdataurl(file); }; // ----- //按下“评论”按钮时处理://-通过反映pixelsize中的temppixels的值来重新绘制图像// -------------------------------------------------------------------------------------------------------------------------------------------------------------------------------------------------------------------------------------------- --------------------------------------------------------------------------------------------------------------------------------------------------------------------------------------------------------------------------------------------- ---------------------------------------------------------------------------------------------------------------------------------------------------------------------------------------------------------------------------------------------------------------- ---------------------------------------------------------------------------------------------------------------------------------------------------------------------------------------------------------------------------------------------------------------- },[pixelsize,imagesrc]); // ----- //控制爆炸动画:// - 启动,结束和撤消爆炸依次执行超时// ----------------------------------------------------------------------------------------------------------------------------------------------------------------------------------------------------------------------------------------------------------------------------------------------------------------------------------------------------------------------------------------------------------------------------------------------------------------------- setAnimation(“ fresposion_end”); },animation_time * 1000); setTimeout(()=> {console.log(“ default”); setAnimation(“ default”);},animation_time * 2000); }; // ----- // Wave Animation Control:// - 启动,结束和撤消Waves顺序执行超时// ---------------------------------------------------------------------------------------------------------------------------------------------------------------------------------------------------------------------------------------------------------------- ----------------------------------------------------------------------------------------------------------------------------------------------------------------------------------------------------------------------------------------------------------------<div style={{ width: "100vw", height: "100vh" }}> {/* ------------------------------------------------------------------------------------------------------------------------------------------------------------------------------------------------------------------------------------------------------------<div className="absolute top-4 left-4 bg-white shadow-lg p-4 rounded-lg z-10 w-64 space-y-4"> {/ *选择图像文件 */} <input type="file" accept="image/*" onChange={handleFileChange} className="w-full border border-gray-300 rounded-md px-3 py-2 text-sm focus:ring-2 focus:ring-blue-500 focus:outline-none" /> {/ *像素大小输入字段 */}<div className="flex items-center space-x-2"><label className="text-sm text-gray-700">像素大小:</label><input type="number" value={tempPixelSize} onChange={(e) => setteMppixelSize(number(e.target.value))} min =“ 1” max =“ 128” className =“ W-16边界边界边界灰色-300圆形MD PX-PX-2 PY-1 PY-1 TEXT-SM焦点:RING-2焦点:Ring-Blue-500 focus:Ring-blue-500 focus:outline ofline ofline ofline nline none” /> none“ />></div> {/ * RedisPlay按钮 */} <button className="w-full bg-green-600 text-white py-2 px-4 rounded-md hover:bg-green-700 transition" onClick={reloadImage} >redisplay</button> {/ *动画控制按钮 */}<div className="flex flex-wrap gap-2"> <button className="flex-1 bg-blue-600 text-white py-2 px-4 rounded-md hover:bg-blue-700 transition" onClick={controlExplosionAnimation} >爆炸</button><button className="flex-1 bg-blue-600 text-white py-2 px-4 rounded-md hover:bg-blue-700 transition" onClick={controlWaveAnimation} >波</button></div></div>{/* ------------------------------------------------------------------------------------------------------------------------------------------------------------------------------------------------------------------------------------------------------------ <div className="absolute top-0 left-0 w-full h-full z-[1]"><Canvas camera={{ far: 5000, position: [0, 0, 100] }}> {/ *基本照明设置 */}<ambientLight intensity={1} /><directionalLight position={[100, 200, 100]} intensity={1} /> {/ * OrbitControls允许您使用鼠标操作旋转场景 */}<OrbitControls /> {/ *仅当存在像素数据时 */} {pixels &&( <PixelGrid pixelSize={pixelSize} pixels={pixels} animation={animation} fileChangeCount={fileChangeCount} /> )</Canvas></div> {/* -------------------------------------------------------------------------------------------------------------------------------------------------------------------------------------------------------------------------------------------------------------- -------------------------------------------------------------------------------------------------------------------------------------------------------------------------------------------------------------------------------------------------------------- <div className="absolute top-0 left-0 w-full h-full z-[-1]"><Canvas camera={{ position: [0, 5, 15], fov: 50 }} style={{ background: "black" }} ><ambientLight intensity={0.5} /><pointLight position={[10, 10, 10]} intensity={0.5} color="white" /><BackgroundScene /></Canvas></div></div> ); }; // ==== // createpixeldata函数://-使用画布从指定图像中获取像素数据,然后将其转换为一系列PixelInfo // ================================(img:img:htmlimageelement,htmlimageElement,htmlimageElement,targetWidth,targetWidth,norume norume,number,targetheight:targetheight and a cixeliatify and cixelinfo and cixelinfo/ cixelinfo/ cixelinfo = pixelinfo = /////////]大小const canvas = document.createelement(“ canvas”); canvas.width = targetWidth; canvas.height = targetheight; const ctx = canvas.getContext(“ 2d”);如果(!ctx)抛出新错误(“无2D上下文可用”); //在画布上绘制图像并获取像素信息ctx.drawimage(img,0,0,targetWidth,targetheight); const imgdata = ctx.getimagedata(0,0,targetWidth,targetheiight); const data = imgdata.data; const结果:pixelinfo [] = [];令IDX = 0; //对于图像中的每个像素,获取RGBA值并将其转换为PixelInfo(令y = 0; y <targetheight; y ++){for(让x = 0; x = 0; x <targetWidth; x ++){const r = data [idx],g = data [idx],g = data [idx+1],b = data [idx+1],b = data [id data [id data [id data [idx+2] IDX += 4; //如果(a <30)继续,请忽略透明度较低的像素(a <30); result.push({//调整x,y坐标,以使图像中心是原点x:x- targetwidth / y:-y + targetheight / 2,z:0,//创建三个color,通过将rgb值转换为范围0到1 color:new three three.color:r / 255,r / 255,g / g / g / 255,b / 255); }}返回结果; }; // ====== //背景Scene组件://-一个用于在背景中显示星空和云的组件//-与备忘录包装以防止不必要的重新绘制// ================= <Stars radius={100} // 星が存在する空間の半径 depth={50} // 星の配置される深さの範囲 count={5000} // 表示する星の総数 factor={6} // 星の大きさ調整用の係数 saturation={1} // 色の鮮やかさ fade // 遠くの星がフェードアウトする効果 /> {/ *带有云组件的Express Clouds */} <Cloud position={[0, 0, 0]} // 雲の中心位置 opacity={0.1} // 雲の不透明度(低いほど透明) speed={0.2} // 雲の動く速度 scale={[10, 10, 10]} // 雲全体のサイズ segments={20} // 雲を構成するパーティクルの数 /></> ); });导出默认应用;
最后
这次,我们使用了三个纤维来创建图像的像素艺术和动态动画,并使用了三个纤维,并反应三个DREI来动画像素艺术和像素艺术!
至于动画,我认为,如果您自由地增加实现的数量,您可以创建更酷的东西,因此请务必尝试一下!
您可以通过观看下面的YouTube来详细了解实际动作!
📺在YouTube上观看演示:链接中观看
📌我这次创建的代码发布在GitHub上,因此也请查看!
💾github存储库:此链接中检查源代码
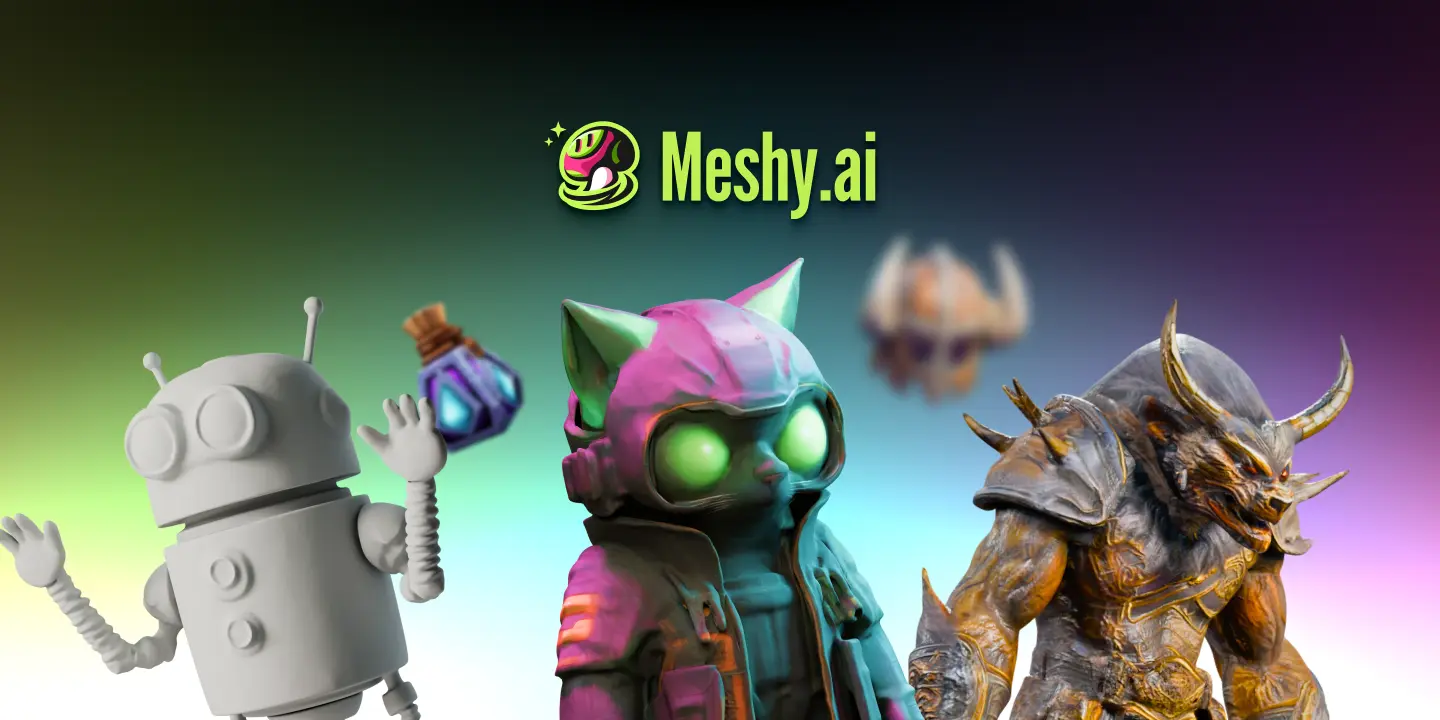
📌如果您使用网格并将其替换为3D对象,那么您甚至可以更接近理想!!
Meshy是一项服务,可让您使用AI轻松生成3D对象。
通过使用此功能,您可以轻松地创建理想的3D对象,因此我认为您可以更接近理想!
📺检查网格:此链接的官方页面上检查它
如果您发现这有用,请订阅我们的频道!
将来,我们将继续创建课程,并从打字稿x进行三个反应三个光纤!
我们将在YouTube上发布公告,因此请订阅我们的YouTube频道并等待通知!
📺观看YouTube :您可以从此链接
如果您想知道三个纤维可以做什么反应,请参考以下内容!
我们有易于使用的作品!
![如何构建一个自动在Chatgpt + Next.js [OpenAI API + NEXT.JS + Tailwind CSS]中自动生成LP的Web应用程序]](https://hack-lab-256.com/wp-content/uploads/2025/07/hack-lab-256-samnail-27-300x169.jpg)

![我尝试使用OpenAI API [Next.js + Tailwind CSS]创建聊天机器人](https://hack-lab-256.com/wp-content/uploads/2025/07/hack-lab-256-samnail-25-300x169.jpg)

![[完整说明]用React三个光纤×打字稿学习! 3D对象转换(位置,旋转,比例)的实用指南](https://hack-lab-256.com/wp-content/uploads/2025/02/hack-lab-256-samnail-15-300x169.png)
![[超级简单]介绍三个光纤X DREI X打字稿!用标准对象制造的oke oke样式3D背景!](https://hack-lab-256.com/wp-content/uploads/2025/02/hack-lab-256-samnail-14-300x169.jpg)